Showing posts with label brass hardware. Show all posts

Wednesday, January 26, 2022

Mahogany Buffet Refinished

Buffet Before

Buffet After
One of my personal favorite refinishing woods is mahogany. Being a darker wood with a natural reddish tone, when refinished the woodgrain is more apparent, making it look fabulous. When furniture comes out of a manufacturing plant, much of it hides the natural grain of the wood. Unlike refinishing, furniture right from the factory woodgrain isn’t as prominent as it is upon stripping.

This buffet was a good, sturdy piece that had seen some wear, but overall was in great shape. There were minor scratches on the top, a few on the front legs and sides, but nothing that stripping and sanding can’t remove. Surface scratches are almost always removed when sanding, however, if the scratch is a gouge, sanding can only do so much. Especially with veneer furniture. If you sand too deeply, you will remove the veneer and go too far into the wood beneath (big problem!) That’s why we love working with antiques; the wood, even if it has veneer, is thicker and much more durable, thus better to work with on the refinishing end. 

That being said, the finishing product looks fabulous. Once it was stained and protected with satin polyurethane, Jim polished the original hardware, a Federal Style, and once again the piece looked like new (if not better!) I love the way hardware makes a piece truly stand out. Over time the brass will oxidize, faded and dull. But polished, it shines and adds beauty and freshness to any piece of furniture.


The beauty of working with a piece such as this mahogany buffet is that you have so many color choices with stain. Our customer chose “Carrington,” by Varithane. It’s a rich, warm color with no overly red tones. Mahogany can accept most stains, but seldom can you go a lot lighter with it because the wood is naturally reddish and darker, like walnut. A good tip to keep in mind when choosing stain is the wood itself. 

Darker woods usually cannot go much lighter than their natural color, but lighter wood, such as maple, birch or pine can accept both light and dark colors of stain. An example is if you were to put the same color stain on five different types of wood, each one would look different. Some wood has more grain than other wood, such as oak compared to birch. There are also different types of the same wood; tiger oak, tiger maple, birds eye maple, and so many more. The choices are endless as are the stain colors, so it’s not difficult to narrow down which stain is the right one for you.

Luckily we have plenty of experience in choosing the right stain for your project (unless you are 100% sure what you want). But no matter, the finished furniture item will always be the one you love the most.

Friday, November 8, 2019

Solid Cedar Chest

Cedar Chest Before
Over the many years I have been restoring cedar chests, this is only the second one that was made of solid cedar. Many cedar chests have a decorative outer layer, which is created by carefully piecing many veneer sections together to create a vast style of designs and patterns.
Cedar Chest After

This cedar chest had no veneer, therefore the natural beauty of the cedar could be seen. As you can see, the cedar itself is such a lovely wood that it needs no embellishments. The hardware was made of copper, dulled by age, hiding the color beneath years of oxidation. Our customer had not wanted this cedar chest stained, just left natural and then protected with polyurethane only.

This chest had been painted at one time and the paint had been mostly removed, except for the left front foot. Why anyone would paint a cedar chest is beyond me, but it happens. Cedar is a natural moth repellant, so it makes for an excellent place for storing linens, quilts and seasonal items.

For this cedar chest, we removed the hardware prior to sanding the exterior to remove any remaining old finish, then filled the holes with a medium-tone wood filler. There had been a few gouges, other than that the exterior was in pretty good condition. All hardware was removed and polished. The oversized tacks were treated with black patina so that they would contrast well with the brass. Since it was being use as a coffee table as well as a storage chest, we replaced the worn interior hinge with a friction lid hinge, which is adjustable, so that it doesn’t fall on tiny fingers when it is being opened and closed. Once it was sanded and gouges filled, it received two coats of satin polyurethane and looked better than new.

Check out other cedar chests we have refinished by clicking on these links:

https://finalefurniture.blogspot.com/2016/08/1948-lane-cedar-chest_22.html
https://finalefurniture.blogspot.com/2015/04/elegant-cedar-chest-revival.html
https://finalefurniture.blogspot.com/2013/12/1945-lane-waterfall-cedar-chest.html
https://finalefurniture.blogspot.com/2012/06/my-waterfall-cedar-chest.html
https://finalefurniture.blogspot.com/2020/01/painted-cedar-chest-revival.html

Cedar Chest Before Open
Cedar Chest After Open


Monday, October 21, 2019

Antique Oak Cabinet

Cabinet Before Refinishing

Cabinet After Refinishing
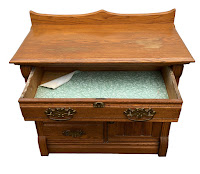
Oak is one of my favorite woods to work with. This antique
cabinet was made from solid oak, which had been previously stained in a medium golden color. While it wasn’t in terrible condition, it needed to be fleshed up, thus refinished. The first step as in most restoration jobs is to strip off the old finishes, including old stain and any lacquer or varnish.

The top of this piece had a bit of water damage as some one had left a planter on top and didn’t place anything beneath it. This is a commonly seen problem with wooden furniture if it is used to keep plants. If you don’t have something to protect the top from water, eventually even the most protected furniture will begin show signs of water damage, including a milky looking top coat to a deeper, darkening of the wood beneath the top layer which is harder to mask as it affects the fibers of the wood and is usually deeper than the surface. Either way, it’s always best to keep your plants on a porous barrier such as a plastic or aluminum pie pan or plate to properly protect your furniture from water damage.

Old Drawer Lining
New Drawer Lining
Once this cabinet was stripped, I chose “gunstock” stain, followed up with two coats of satin polyurethane.

The inside of the cabinet drawers and door area had been lined with outdated 1960’s era contact paper (it had to go!) I opted for wallpaper that had been used for a great replacement of headboard when we added a half bath to our upstairs. It worked well for drawer liner and mimicked the headboard front of the cabinet door. I used this for the three drawers and the shelf inside the cabinet. The final step is polishing the hardware and viola! We have a newly restored, lovely piece of oak furniture which will look great for many years.

Tuesday, September 5, 2017

Art Deco Dresser

Art Deco Dresser Before
Art Deco Dresser After
This lovely art deco dresser was one item of a complete bedroom set with other art deco items. This dresser is a classic example of timeless beauty with clean lines and elegant design. Made of lovely cherry, this dresser had a great, solid structure and plenty of use left, albeit a bit worn around the edges. It needed a good, solid comeback and had been crying for a total restoration. But no restoration is easy. This dresser required a lot of attention to details.

First we removed the hardware (which would later be cleaned and polished by hand) and the drawers, some of which had bottoms that weren't completely attached. A few nails in the exact center of the support board in the back of these drawers reinforced the bottoms, so they were once again strong enough for perfect functionality. Each drawer was then completely stripped, sanded and stained with cherry stain, then put aside while we did the same work on the body of the dresser. The stain brought out the beauty of the wood's grain, always my favorite part of any restoration.

Handles before and after
Measuring at 52" tall, this dresser offered plenty of storage with deep drawers and a solid body. The bottom decorative rail had been loose and fell off during the pick up drive, therefore it wasn't show in the "before" photo, but we glued and nailed it back after refinishing it as well. After applying two coats of semi-gloss polyurethane, this deco beauty was once again the star of the show. The handles had been polished and after they were reinstalled, added the "bling" which was the perfect touch in another great refinishing job.