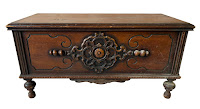
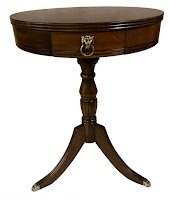
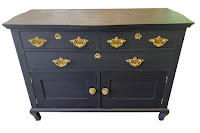
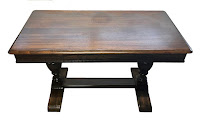
Hutch Before |
Hutch After |
Hutch Before |
Hutch After |
Waterfall Dresser After |
Waterfall Dresser Before |
Jim was able to minimize the damage of the burn mark on the top with careful sanding. With veneer you can't sand too much or you will completely remove the veneer down to the bare wood. In furniture such as this, it's not an easy fix so better to keep the sanding to a minimum. Jim decided to paint the center curved section of the front top drawer and the backing since originally it had some kind of painted feature which had long since worn away. It looked better than leaving it stained with an uneven, unattractive color. It also matched the new hardware very well. The plastic back section of the original knobs were broken, so out customer had decided to replace them with new hardware.
Our photo on the top left is the "before" version, which shows a bit of the top. Since our customer had to order the hardware and it took a few weeks to get it, we were unable to get an "after" photo of this dresser, so the one you see on the right was supplied by the customer. However, they posted the refinished dresser along with the mirror on our Facebook page, so here it is. It looks pretty good!
Dresser with Mirror |
Cedar Chest After |
Cedar Chest Before |
The wood top had been completely unusable. It was covered with the glue that had been holding the foam in place and the fabric was attached with large tacks. Evidently whoever had done this wanted to cover the top and make it an effective seating area, which is not a bad way to go if you don't have the resources to refinish and restore the piece of furniture. After discussion the possibilities with the customers, they decided to replace the veneer with new veneer (good choice) and it looked great. Jim ordered a walnut veneer that had a self-stick feature which is a great way to go since you do not require adhesive to attach it.
Of course the entire cedar chest had to be stripped, sanded and refinished. Once that was done and the new veneer had been installed, he stained the entire cedar chest with English Chestnut stain (this year's most popular stain!) It turned out terrific. The new walnut veneer was the cherry on top of this hope chest which is once again a lovely, usable and beautifully finished piece of furniture.
Old Cedar Chest Top (before new veneer) |
Dresser After |
Dresser Before |
Jim made a brand new top using sassafras wood, which has a similar wood grain as oak, which matched perfectly with this dresser. He opted to paint it using chalk paint and treated with wax, which protects the finish and makes it easy to clean. He chose a lovely brushed brass for the drawer pulls which looks stunning with the new color.
This dresser has four large drawers and two smaller ones at the top. Each drawer bottom has been replaced since many were either missing or not operative any longer. The drawers were constructed with dovetail joints, so it was made well as new, but as the years pass by, it got its fair share of use and likely, neglect over time. What you see in the "before" photo it the way it looked when we got it home. The "after" photo is what it looked like once it was complete.
This dresser is also for sale, asking $375.00. It is solid wood and will make a nice addition to your bedroom.
Dresser After Painting FOR SALE! |
Dresser Before |
First it was stripped, sanded and then painted in a lovely dark shade called "In The Navy." Jim chose to paint this dresser with chalk paint, which requires a finishing treatment of waxing upon completion of painting. The was protects the paint and makes it strong and durable and easy to take care of as it provides a hard finish to the paint, protecting the wood. We've used wax paint on several projects and they always look terrific.
The original hardware was brass, so he cleaned and polished it, making it pop on the newly painted color. The interior drawers were stained and the bottom compartments behind the doors was painted in a light color. Although its primary function was a dresser, this lovely renovated piece of furniture can also be used as a buffet since it has plenty of storage for silverware and plates below and behind the doors. If you wanted a coffee bar, it could be used for that as well. And of course, its original use as a dresser will still suffice.
This piece is currently for sale. Asking price is $425.00, so please get it touch with us if you are interested!
Chair After |
Chair Before |
The original seat and back were black vinyl, with upholstery tacks surrounding the seat area and sides of the top. The seats were torn and the foam was destroyed. Time to renew.
There was a lovely medallion carving in the center of the back, which was almost invisible prior to refinishing. Made of solid (and I mean SOLID) oak, these chairs must have weighed 40 lbs. each. This made the refinishing and reupholstery project tough, because of how many times needed to move the chairs to complete the work.
To save time, Jim removed the black vinyl and got to work. He opted to take them apart so he could access the areas that needed to be re-glued and repaired and that's the best and proper way to do it. Apart, he sanded the pieces down to bare wood then stained them with English Chestnut stain. Once the new stain was applied, the chairs were put together and "brought back to life." The final step was sprayed the polyurethane, and wow! The chairs were beautiful and that beautiful flower medallion just popped!
Once he was done working his magic, it was time for me to work mine. The chairs needed new fabric. My customer and I agreed gray would be a nice color. The old padding was not usable, so each chair got new foam and batting on the seats. As I stated before, these chairs were HEAVY! Since adding material requires a lot of moving the chair around, it was necessary to lift them up to put on my work table then down again on the floor for stapling and then up on the table again to continue other parts. You get the picture.
The curved back portion of the chair was trickier than it first looked, because each chair needed a template which I had to create from the chair's measurements instead of using the old material, since it was so distorted and badly damaged it was unusable. Upholstery has many challenges, one being sometimes you simply do not know what is involved until you get into it. Such was the case with the backs. Once I figured out that part, measuring the material properly was crucial, because if the measurement was incorrect, it wouldn't fit.
I created templates out of card stock, which gave me the precise size of each fabric section. I had to line up the top edges of the curved portion of the top prior to stitching, so that once it was pulled into position, it would fit snugly to the bottom edge before I could attach the underside with staples. This required a lot of lifting, turning, more lifting, more turning, etc. Good body mechanics is essential when doing this heavy lifting.
The last step in the process was adding the double welt cord around the seat to finish it off with a polished, professional look. I used hot glue on the double welt cord, as it is the most effective way to attach welt cord, but I also like to reinforce welt cord with tiny nails to make sure it doesn't move over time. Needless to say I was extremely happy to finish these heavy, but lovely, tavern chairs.
Dining Table After |
Dining Table Before |
At some point wheels had been added, but they were metal and rusting, so Jim replaced them with new rubber wheels. Traditionally, wheels aren't recommended for dining tables, but sometimes they are useful when the person plans on moving the table's location.
The color had been faded, showing its wear. Our customer chose a lovely stain color, English Chestnut, which worked quite well for the table as well as the chairs it came with. He used satin polyurethane to give the surface a durable finish and it looked great once it was done.
The chairs and table were not an original set, but once they were finished, the wood actually matched very well. The chairs will appear in a separate blog post titled, "Tavern Chairs' Revival."
Desk After |
Desk Before |
The top was a bit worn as it had been used for many years. But overall, this desk/table served a great purpose for the owner's business use. In front is a drawer which is difficult to see in the photographs, but it was a nice feature of this lovely piece of furniture.
Jim stripped it down to bare wood and sanded it carefully, maintaining the original details at the bottom edge. It had a sturdy base with two sidebar supports which made this desk a very stable piece of furniture. He chose dark walnut stain and satin polyurethane for protection. This makes a great family heirloom and can be used for many more years to come, serving the future generations well.
Desk After |
Desk Before |
Jim removed the hardware then proceeded to strip, sand and re-stain the desk using walnut stain. He applied three coats of satin polyurethane which finished the surface nicely. The handles got a great polish and the desk was once again beautiful. A perfect size desk for anyone's use.
Rocking Chair After |
Rocking Chair Before |
This was a very old rocking chair that belonged to my customer’s grandfather. It had plenty of use and had seen better days, so it was in need of some TLC. The right arm had broken off the spindle and needed to be glued back into place prior to any refinishing work being done.
She had wanted to keep the same color, so we decided to go with traditional walnut, which brought out the beauty of the solid oak wood, refreshing the overall look and making it once again a beautiful piece of furniture.
Like most old rocking chairs, this one had a very badly worn seat which had the original horsehair stuffing and some very unusable other materials. The dust was enough to make me sneeze! My customer had chosen a fabric similar in color to the original, which was a lovely dark olive velour, to keep the original look and feel of the chair. Jim was kind enough to remove the old fabric, since I was still recovering from my stomach surgery and he took plenty of photos for reference. I have found taking photos to be an essential part of reupholstery disassembly, because you need to know how it was put together, before you take it apart and reassemble it properly, and photos are a great way to accomplish this.
The springs on this seat were installed from the bottom side, downward. I have worked on a few chairs like this and always wondered the reason for this type of installation of springs. For a chair to be comfortable, you have to have a “crown,” which is a curved top so that the springs are underneath you, covered by layers of various materials so you don’t feel the springs. Installed from the underside of the seat seems backward and puts more stress on the springs, since they can’t really support you properly. Since I have been doing reupholstery, I have learned the proper way to attach webbing to the underside of the chair and hand-stitch each spring to the webbing using a curved needle, then using the 8-way tie to keep the springs tight, creating the “crown” chairs should have for support.
After the springs are tied up and in securely in place, they get covered with upholstery burlap. This is the first layer to cover the springs. Since this chair had only five springs, I built-up the in-between spring area with a bit of raw cotton to keep everything level and soft. Next I covered the springs with a one inch layer of foam, which gets stapled to the chair’s seat edges, covering the springs. On top of the foam, I covered everything with a 1” layer of Dacron. This is a more dense material and really does a great job of covering the springs so you don’t feel them at all. My last covering was a high-quality layer of muslin. This keeps everything neat and makes it easier to attach the fabric, the last step in the process.
This chair originally had tacks along the bottom edge, but they weren’t the correct upholstery tacks. Someone used regular tacks that you’d use on a bulletin board, which are not adequate for chair use. I used brass upholstery tacks on the folded underside edge of the material so it will not fray. My final step for the fabric was to finish it with a double-cording on the chair’s arms and back spindles. This adds a nice finishing touch and secures the edges of the material.
The last step of the process is to cover the underside of the chair with chambray to cover the webbing and keep the dust out. It is also referred to as the dust cover on chairs and couches. This finishes off the chair and looks great.
Below I have a few photos of the springs’ underside tying and correct 8-way tying so you can see how much better it looks. I’m not really sure what the reason is to do it the underside way, but the way I’ve been self-taught is to use the 8-way tie on the topside of the chair.
Underseat tying, incorrect way |
8-way tie correct way |
Dining Chair After |
Dining Chair Before |
The four chairs all had rollers, which had to be removed prior to stripping. Once Jim had stripped everything, chairs and table alike, he began carefully sanding all surfaces and applied the new stain, golden pecan. This gave it a perfectly suitable color for the customer, lighter and updated.
Originally she had not wanted to replace the fabric (based on budget) but once the staining and finishing was done, I thought I’d suggest she splurge and get the fabric updated as well and because I had given her a great price she agreed. I provided her with resources for the fabric and she chose a gorgeous Hillary Farr Design with an aqua chevron nap. It was the perfect accompaniment for the newly stained lighter wood. Had she not chosen new fabric, the old fabric would have been okay, but without the feel and touch of fresh new fabric. I probably would have chosen the same fabric since I am a fan of that color!
Dining Set After |
Dining Set Before |
China Cabinet Before |
China Cabinet After |
Armchair Before |
Armchair After |
The far right support board was cracked and had come apart from the arm. This board needed to be reattached with glue and a single screw. The top curved board was cracked in the center; the inner right board had broken off at the top. Repairs included making a new dowel and reattaching the inner support board and gluing, then screwing the outer side board back in place to make it structurally sound. *(See photo below to see where the chair was broken and repaired).
Once the repairs were made and the structure strong again, the legs were stripped, sanded and restrained then protected with polyurethane. After Jim had worked his magic, it was my turn to tackle the exterior upholstery.
This chair had zig-zag springs which were in great condition, so they didn’t need to be tightened or replaced. The first step was to cover the springs with burlap, which was stapled to the top edge of the seat. Burlap keeps the springs secure, while providing a good foundation for the layers that follow. After the burlap was secure, I added a 1” thick section of high density foam which covered the entirespring/burlap seating area. A few staples held the foam in place.
Next, raw cotton was liberally layered on top of the foam, creating a nice “crown” for the chair’s seat. The raw cotton can be purchased per yard, or per a 10 yard bulk, which is the preferred method as it is less costly per yard. The final layer was a 1/4” foam, which was also stapled to keep it secure. I always give it the “sit” test, which is when I sit on the chair and test its softness and support. You shouldn’t feel the springs when sitting on a chair. If you feel springs, there’s not enough padding. I was satisfied with the thickness of the padding, so I cut the fabric for the seat and made the “V” cuts carefully around the arms and legs for a perfect fit.
This was my first fluted back chair, so I researched how to create the “flutes,” or “channels.” However, before I could get to the fluted portion of the chair, I had to pad the arms and create new fabric panels for the sides. Using raw cotton and foam, I made sure both arms would be soft as well as supportive enough for the new fabric. I chose not to use the old fabric as templates. Instead, I made my own templates from muslin. This allowed me to customize the arms and create a “partial sewn” arm instead of just folding fabric and stapling in place. The fit was perfect.
I can’t say enough about making an accurate template for upholstery work! It is an essential part of getting that perfect fit. And with plenty of muslin at my disposal, I was able to create accurately measured templates for each arm, then sew them together to test them before I cut the fabric. Templates can save a lot of time and fabric and ensure accuracy and a proper fit. Measuring is also essential. The more accurate the measurements, the better turnout.
For the flutes, or channels, I used the original fabric as templates. I took apart the original fluting, separating them into individual units. (I like to iron the old fabric. This flattening makes it easier when cutting the new fabric).
Once the flattened templates are laid on the new fabric, it’s necessary to allow a few inches to the top and bottom lengths, so there is enough material to pull underneath the seat and over the chair's frame. The individual units are then sewn together. Once they are attached, they are sewn to the backing fabric on lines you have created by measuring the original fabric. The lines on the backing fabric must be narrower than the flutes to create enough space for the fiber fill or cotton. My channels measured 5-1/2”, so I drew lines that measured 4-1/2”.
Prior to attaching the flutes, I made marks on the top rail of the chair to line up the fabric to keep it centered. The last fabric panel I attached was the back. After it stapled to the frame, I created the double cording, or piping. This is used to cover the staples and add a customized look to the chair.
The fabric I used for this project was burgundy, with a diamond motif, that I had used last year to reupholster a bench. My customer saw this fabric on the blog and loved it, so she wanted it for her chair. Luckily I was able to get the same fabric! It’s one of my personal favorites. You can view that bench by clicking on this link: http://finalefurniture.blogspot.com/2021/11/antique-bench-trash-to-treasure.html
This chair was a true challenge, but with each project, I learn and advance my upholstery and sewing skills, which I truly enjoy.
View of repairs |
Cedar Chest After |
Cedar Chest Before |
My customer had used it as a coffee table with a glass top, so it will be protected and serve a dual purpose for many years. Cedar chests are one of my favorite furniture items because they are so versatile. In addition to storing linens, they make great toy boxes, a place to hide Christmas presents from snooping children and a great place to store seasonal clothing because of their natural moth repelling fragrant interiors. There’s nothing quite like the smell of a cedar chest. The cedar tree is one of many nature’s beautiful contributions to a family’s needs in the form of storage, seating and beauty.
In addition to their versatile properties, cedar chests come in various shapes, sizes and styles. The waterfall cedar chest is very common with its curved front top and heavy lid. Many of these cedar chests were built in the 1940’s, used for linens and towels. Some cedar chests have legs with drawers, in addition to the lid-top storage interior. My personal cedar chest has a built-in shelf that is a perfect place to keep smaller items like my husband’s ties, socks and table runners. I love it for storing my quilts and extra sheets. If you don’t have a cedar chest, you may find one at an estate sale or at an antique store. If they need to be restored, you may get it for under $100.00. The best deal I got on my first cedar chest which was a 1945 waterfall style, was $5.00 at an estate sale. I doubt I’ll ever find one that cheap again!
You can see the other cedar chests we’ve refinished by clicking on these links:
https://finalefurniture.blogspot.com/2019/11/solid-cedar-chest.html
https://finalefurniture.blogspot.com/2016/08/1948-lane-cedar-chest_22.html
https://finalefurniture.blogspot.com/2015/04/elegant-cedar-chest-revival.html
https://finalefurniture.blogspot.com/2013/12/1945-lane-waterfall-cedar-chest.html
https://finalefurniture.blogspot.com/2012/06/my-waterfall-cedar-chest.html
Antique Desk After Painting |
Antique Desk Before Painting |
This small lovely antique desk was in great shape, but my customer wanted it, along with a matching chair, painted white to surprise his daughter for her birthday.
This desk had quite a bit of detail, nice features and scalloped edges on the front and rosettes on each side and the center as well as spindled legs. The wood was mahogany, but had seen some wear, so painting was a nice alternative to refinishing. Many people love the natural look of wood, but there are times when painting is a great option. My customer chose a soft white for the set which looked amazing once it was painted. I prefer white for painting furniture because it’s always a fresh, light look that will match any décor.
Antique Desk Open After |
Antique Desk Open Before |
The chair was a simple school style with narrow spindles and a form fitted seat bottom. This chair was a perfect complement to the desk as it could be used for many activities. The set was adequate to provide a nice work space but small enough to fit into a tight spot or tucked into a corner of a small room.
Chair Before Painting |
Chair After Painting |
Buffet Before Refinishing |
This antique buffet had been stored in someone’s garage for many years before we got it. My customer had gotten it from one of her students (she’s a music teacher) in exchange for music lessons. Who knows how long it had been stored in a garage, but it was evident it had taken on some deterioration as a result of being stored outdoors.
Buffet After Refinishing |
The top veneer was in bad shape, some of it peeling up. We were unable to remove it, so we stripped and sanded it prior to adding stain and polyurethane (3 layers) to protect it from further deterioration.
Portions of the decorative wood pieces had broken off such as the second drawer front center which is a continuation of the design on the top drawer. The far left spindle was also broken off. Luckily they had the piece and Jim was able to reattach it, but there was still another section of this piece missing completely which he had to create and make it fit in the open space. It’s difficult to create a piece that is missing entirely because you can’t measure it against anything.
The first step in the restoration process requires removing all the hardware, drawers, doors and pieces that are easily taken off the piece, such as the top. By removing these sections, it’s easier to work on them as you can reach more areas to strip, sand and stain before re-assembling it. Jim removed the decorative center on the back top as well as the top which he sanded separately, then reattached when completed. He had to create the missing spindle and glue those pieces back into place. The broken drawer sections were re-glued back on.
This buffet had a “hidden” secret drawer which was the third and bottom drawer that forms the bottom decorative edge. Jim replaced the bottom portion of that drawer because it had a felt lined bottom that was difficult to open and close so he removed and replace it. It was common to store silverware in these drawers and they were frequently lined with felt which is a deterrent for discoloration of silver. The last step for any project such as this one is cleaning and polishing the hardware. This adds that special final touch that really completes the restoration process.
Guitar Pick Table Before Stripping |
Guitar Pick Table After Stripping |
Someone had decided it was a good idea to spray paint it black. Perhaps it had belonged to someone’s grandmother and when they acquired it, they wanted a “modern” look, not realizing that it was already a mid-century classic without the need for paint. Luckily someone rescued it from the garbage truck and saw the beauty of this table.
Whomever had dumped this beauty, clearly did not know what they had thrown own or its value. After we had researched this table, we found they were selling on eBay for between $1600-$1700.
Like Lane cedar chests, you can tell the age of the piece by looking at the serial number (usually found on the bottom) and backward, it tells you the date the furniture was made. This table’s serial number was 610250, which translates to May 20, 1961. This little tidbit of information is fun to know when browsing estate sales or resale shops while looking for or at Lane furniture.
The unique two-tone, notched top characteristic was still visible, despite the paint. Luckily its tell-tale markings could still be seen beneath the thin layer of black spray paint. This table needed plenty of stripping and sanding to reveal the beautiful wood covered by the paint. Once that was removed, it revealed the beauty hidden for so many years. The two-tone wood was a perfect complement to the original cut and style of this table, making it a masterpiece for many years to come.
Cabinet After |
Cabinet Before |
There was also a piece of wood missing along the top in the back which Jim replaced with a matching piece of oak that looked like it had belonged there and was a great addition.
The rest of the piece was in pretty good condition but needed full stripping and refinishing. This piece had some lovely original features including detailed wood carving on the drop-down desk area right below the leaded glass panel which was a separate place to store knick-knacks. Three storage drawers were right below the desk area, a nice place to keep stationary and other desk items.
Interior of Desk Area |
Working with antiques are never cut and dry as each piece is unique and requires a lot of thought, time and improvisation. We always try to maintain the original integrity of the antique and the end result shows the time and dedication we put into every piece. This one is a great example of the process of refinishing as well as innovation mixed in with creativity and a great deal of time commitment.
Mid-Century Chair w/Needlepoint After |
Mid-century chair before refinishing |
It’s amazing how styles from the past tend to pop up fifty or sixty years later, as if the idea is brand new. This mid-century modern chair is classical 1960’s style, wide, low back and clean lines which were commonly seen in living rooms across America which mimicked the Scandinavian style. I loved the lines of this chair.
This chair was extremely well made, quite strong and needed no tightening or repairs. The back had a few missing veneer pieces, which were easily filled in and stained so that it was hardly visible.
I made the choice to completely strip this chair instead of touch-up because I felt that this is what it needed. In order to be true to the piece, you must determine what’s the best course of action to make it look the best it can. In this case, I stripped off the old finish, luckily wasn’t too difficult to remove as old stain mostly is. It came off easily and once that was done, I thoroughly sanded it, removing the excess stain and stripped. I cleaned it with lacquer thinner and sanded it smooth.
I was very happy with the way the chair turned out. The light cherry stain was definitely the perfect color to offset the dark color of the needlepoint. A nice foam padding finished off the seat so that the chair is as comfortable as it is pretty.
I chose cherry stain to keep the color light which I felt complimented the lovely needlepoint seat that my customer made just for this seat. This was the third seat such as this that I had made for this same customer. The other two were benches. She is making a needlepoint seat for each of her grandchildren. She makes the needlepoint then finds the chair or bench which is the right size for the needlepoint. So far she’s been pretty lucky!
To see one the previous needlepoint benches I made for this customer, check out the link below. Unfortunately, I don’t have a photo of the other one, but it had a blue background with a black bench.
https://www.blogger.com/blog/post/edit/5936537173467203420/24816612440806533