Showing posts with label antique chair. Show all posts

Tuesday, May 21, 2024

Antique Chair Revival

Chair After
Chair Before
This chair was a challenge. Not only because there was a lot of fabric to replace, the chair was also very heavy. My estimate for this chair was that it was made in the late 1920's to early 1930's, based on the original material of which I found a small scrap on either side of the arm padding. The wood was cherry.

Once I removed all the sections of the chair, (you start on the back, which is the last section added to a chair) I removed the seat stuffing, which consisted of horse hair and straw. This is another clue as to the age of this chair. Prior to modern-day foam and fiber fill, upholsterers used horse hair and straw for the seat. Once I removed the nasty chair stuffing, it exposed the springs. The seat springs were in pretty good shape, but needed some overall tightening and re-tying, but not a complete eight-way tie. The back of the chair also had springs, which were in good condition. 

The chair had the original webbing on the underside, but the most recent upholsterer attached new webbing to the bottom to strengthen the integrity of the springs without removing the springs. I usually remove the chair's springs and replace the webbing when necessary, but this chair was in good enough shape with the original springs, thus needed a bit of extra tying. Once the springs were secured, I covered them with premium muslin instead of burlap. This allowed me to really pull and tighten the springs to keep them in place for the next step, which is adding the padding. Since this particular chair had a bit of wood showing, I touched up the wood with matching stain and used satin polyurethane to protect it. This is done prior to adding material.

The first layer of padding was a section of raw cotton, which comes on a large roll and can be pulled apart and placed directly on the chair's seat. The next layer was a 1" section of premium foam, then another layer of raw cotton. All these seat toppers were finished with another section of muslin which holds everything together and gives the chair its "crown," where it is higher in the middle section. The springs were held tightly and the bounce was perfect.

Fabric was next. My customer chose a lovely Kelly Ripa Home fabric with a nice design. After careful measuring, I covered the seat first with the material. Once I was satisfied with the seat, I chose to do the arms next. I stapled foam to the top of the arms and Dacron to the sides. This formed a nice cushion to support the arms without a lot of bulk. Using the chair's arms for measurement, I cut the right amount of material to each arm, attaching it from the back side to the front of the arm then pulling it back before attaching it to the back of the chair. I chose to do the arms prior to doing the interior back so that I had easy access to it. 

The back proved challenging because this chair was fairly large, so a generous section of fabric was required to cover it. I wrapped the fabric around to the back of the chair, curving at the top edges instead of the original style which was made with side inserts and welting. Each upholsterer does things a little differently. Once the fabric was firmly in place, the buttons were next. I made each button using a button kit that covers the metal button fixtures with the same fabric as the rest of the item. 

The buttons are pulled through the thick front to the back using extra long needles, then tied off in the back of the chair through the webbing. This is a tricky procedure because you are going through about 6"-8" of material and padding to reach the back. I use a strong waxed thread for added strength. I chose to put the buttons in a different configuration than the original (personal choice) which I felt matched the design of the chair better.  

After the buttons were in place, I stapled and nailed "curve ease" to the back edge of the chair so that I could attach the fabric, then it gets hammered it in place to cover the hardware that attaches it. I glued double welting to the arm fronts for clean finish. Once the entire chair was done, I stapled chambray to the underside. This is a "dust cover" to protect the chair from dirt and debris that can enter from the underside of the seat. It's a good way to finish off a chair. I love the way it turned out and boy, was it comfortable!

Sunday, May 29, 2022

Grandmother’s Antique Chair Gets New Upholstery


Antique Chair Before

Antique Chair After
This was an antique chair had a lovely harp design on the back also had a heart-warming history. This chair was my customer’s husband’s grandmother’s chair and was given to the couple as a wedding present. Although grandma passed away twenty-seven years ago, the chair had been kept by family members and had been well cared for. The chair had come to us refinished, but needed new fabric, as well as spring tightening. 

The previous upholsterer used inadequate material on the springs as you could see them right through the seat fabric. When I sat on the the chair, I felt as though I would fall right through, that’s how bad it was. Everything was so thin, the springs popped right through, so I got to work and stripped it all off. Once I removed the old fabric, was what revealed was; the springs had been covered with a thin layer of shabby white fabric a rusty ring outlining each spring beneath. Next was a thin layer of raw cotton and a super thin layer of foam. That was it! The common denominator was “thin.” 

After I removed all the fabric, thin foam and the rest, I removed the springs. There were only four strips of webbing beneath the springs, which was inadequate. I replaced them with six strips of webbing, which I criss-crossed, making the webbing tight which lends proper support for the springs and a much better feel for the chair’s seat. 

The springs were pretty rusty and greasy, so I used my grinder’s brass wheel and cleaned and polished each spring, removing the grime and rust, revealing the nice metal beneath. It made them easier to work with and of course, much nicer looking. Evening though nobody will see these newly cleaned springs, I knew they were clean and that made me happy. Having the right tools for this type of work is essential! This spring cleaning step was not necessary, but a good idea to clean the interior parts of the chair. Plus, it gives me a feeling of doing it right.

Once the springs were cleaned, I hand sewed each one into place with strong waxed upholstery thread. Each spring was marked with a black sharpie, 2 inches away from the chair’s inner frame. This is a very important step, keeping the springs in line with each other for equal support. Once this is complete, the springs receive an eight-way tie. You start with the horizontal rows and tie each spring together, secured to the chair’s frame with staples (or nails) depending on the condition of the wood. If the wood is damaged from too many nails from previous reupholstering, staples are preferable. They are my personal favorite as I feel they are much faster and easier to use. Repeat the process with vertical ties, again securing each row, looping the string around each spring to keep them tight and the same height. Once the horizontal and verticals are secured, you repeat the process, now from corner to corner, in the shape of an “X” until you have eight strings overlapping one another. I added a couple more rows on the edges of the outer springs for extra strength. 

The next step is securing all the freshly tied springs with a layer of burlap, secured with staples to the edge of the chair’s frame. After the burlap, I added a 1” layer of high density foam, a thick layer of raw cotton batting, a thick layer of dacron and a layer of batting. I finished this with a layer of muslin to keep it all in place before I finished it with the fabric. After sitting on the newly finished seat, I no longer felt the springs, a good indication of a properly layered seat.

This chair was finished with decorative trim, or gimp, which was used to cover the staples that secured the fabric to the top of the chair. The back of the chair also needed to be reupholstered. The previous upholsterer used no webbing for the back, so I added a couple of strips for extra support and strength. Then I added a thin layer of closed cell foam and batting, which was appropriate for the back of the chair (unlike the seat, the needs a lot more layers of multiple materials so you don’t feel the springs.) Again, I used gimp trim to cover the staples which finished it off nicely. The gimp complemented the fabric, adding a decorative, finished look to the chair.

Check out the photos below to see the before and after springs and you can see the way an 8-way tie is properly done with chairs that have springs.

Chair Before Proper
Spring Tying and Less Webbing
Chair After Proper Spring
Tying and Six Strips of Webbing

Tuesday, December 14, 2021

Antique Caned Chair Replaced Seat


Caned Chair Before

Caned Chair After
This is an antique parlor chair which had a broken caned seat. It’s not uncommon for this to happen with old caned chairs. They don’t hold up well to a knee or an active child who decides to jump on the chair as if it were upholstered. Caning is pretty durable but does have its limits.

Caning comes in many sizes, so it’s important to measure the holes in the diameter of the chair’s seat and get the caning that fits those holes. This chair had 1/4” holes, so it used 1/8” caning, which is considered medium. Caning also comes in super fine, medium and larger sizes. The procedure is the same, but I prefer working with the medium size cane since it is stronger than the finer sizes and holds up to the pulling and tugging that comes along with installation. 

Chairs get a lot of use, so the upper portion tends to get dirty from the oils from our hands, so they require cleaning and polishing for them to look fresh again. This one needed a good cleaning and a touch up of polyurethane instead of a complete strip. If a full strip isn’t in the budget, a partial strip usually works well. Either way, the chair is always better than it was prior to the restoration. This chair was made of maple, a hardwood, so it will hold up for many more years to come. If you have a caned chair that is a big saggy, simply lay a damp towel on it overnight and it will tighten the caning again to its original tautness. Just a little tip that allows you to get more use out of the chair before investing in a complete cane renovation. 

Monday, November 29, 2021

Six Chairs Get New Seat

Chair After

Chair Before

This was one of a set of six oak chairs. The chairs were a bit wobbly, but overall in good condition. At one time these chairs had caned seats, but the caning was long gone and replaced with a thin board and covered with vinyl. That was also a long time ago and the vinyl then needed to be replaced. In addition to replacing the seat, we tightened up the loose joints and gave each chair a good cleaning. The customer chose a dark brown vinyl, which was much like the old covering. She’d wanted to keep the same look.

Sometimes jobs are tough and other times they’re fairly simple. This was was a combination of both. The tightening of loose joints can be time consuming because in addition to gluing up the joints, the correct way to repair them is to glue and clamp them, usually overnight. It’s essential to use the right glue (you’d be surprised how many chairs we get with the wrong glue!) Wood glue is preferred, but you can use other glue, as long as it can be used for wood in addition to other surfaces.

This is called a “ladder back” chair. It has curvy horizontal back support with simple spindles on the bottom four sides. These chairs are one of many styles we have worked on over the years. We try to keep each chair as original as possible, when it’s what the customer wants. 

Thursday, September 16, 2021

Antique Chair Updated to 21st Century


Antique Chair Before

Antique Chair After
Every household has chairs, usually lots of them. There are as many styles chairs as there are other types of furniture, but not many other furniture items are used as much as chairs, therefore they tend to get more wear than other furniture. 

Antique chairs are unique because the materials used in the 1920’s or 1930’s were limited and not as “user friendly” as they are today. This antique cherry chair was in relatively good condition, meaning it had good bones, but was in dire need of refinishing and new fabric. The fabric on this chair was not only very worn and threadbare, but no longer usable and likely had a zillion or more dust mites. 

For this type of project, Jim takes care of the refinishing and restoration process while I handle the new fabric. Jim used a custom mixed stain consisting of 25% mahogany and 75% chestnut, which looked fabulous. When the chair was finished and protected with two coats of polyurethane, I took over and tackled the fabric. I don’t claim to be an expert upholsterer (I’ll leave that to my local expert) but I can handle certain projects. Seat covers is much easier than working with an attached seat because you must allow for the fabric to go around the arms and back of the chair, which is a nail-biting experience. 

This chair originally had horse hair stuffing for the back and worn out springs for the seat. My experience with chair springs isn’t terrific, so I prefer to replace them with a sturdy new wood bottom and 2” of high density foam. The foam is covered with thick batting for extra cush for the tush, and finished with the customer’s fabric of choice. My customer chose a lovely paisley pattern,  definitely a 21st century fabric. With the freshly refinished wood and the new fabric, this chair will last another 125 years.


Thursday, August 12, 2021

Antique Chair Newly Caned


Caned Chair Before

Caning is one of the fun parts of my work as a furniture restorer. It didn’t start out that way. In fact, the first chair I ever caned was kind of sprung on me. A customer had asked if I could cane a chair and I told her honestly, I don’t know but was willing to learn and see what I could do for her. So then it began. 

Caned Chair After
I educated myself by watching a few videos and quickly discovered a few things about caning. One, it isn’t for everyone and not everyone would enjoy the process or even attempt it. Two, there are various types of caning styles and many, many more chair styles, each one individual in how the caning is done. Three, practice makes perfect. Or, if not perfect, a whole lot better with noticeable results.

This little chair’s wood was immaculate and needed no refinishing, but was in need of a new seat. The old seat had a minor tear in it, but this type of damage only gets worse, not better and needed to be replaced. This was strand caning, which means that the caning is done by weaving through the holes surrounding the chair’s seat, using the six-step method by weaving first vertically, then horizontally twice, the third time crossing over the first vertical row, then the diagonal weave, first from the upper right corner to the lower left corner all the way across the chair before you finish with the opposite diagonal weave. (You can see this in the video to the right). 

The final top step is binding the cane by looping cane strands up and through the holes, pulling the cane strands through the holes, locking in the top binding. 

The very last step is securing the bottom strands that hang loose during the process. I wrap each one underneath the tight cane then loop and tie them off, clipping the extra. This is why it’s called strand caning, because you are working with individual strands of canes that are usually about 12-14 feet in length when they come in a tightly wrapped “hank” of 500 feet. It requires soaking and mist spraying while working so the cane remained pliable thought the weaving process.

This was my best chair so far and went together very quickly because I learned a few tricks and techniques along the way. While caning can be a daunting task, it can also be a time where you can relax and enjoy the “flow” of your work. I enjoy listening to audiobooks as I work which passes the time and makes it fun. Now I enjoy the caning process and each time it gets a little easier.

Thursday, March 6, 2014

Tiny Antique Chair


Antique Chair Before
Antique Chair After
A nice woman had contacted about a small chair she had wanted refinished. The chair had been caned at one time, but had since been reupholstered, a seat had replaced the caning. The replaced seat cushion had been done a very long time ago. She said the chair was very old, but didn't know how old. I told her I guessed it was from the 19th Century because of its structure and the way it was put together.

She simply wanted the seat cushion fabric replaced and the wood refreshed. I removed the old seat and replaced the fabric with a lovely paisley tapestry fabric I had left over from a previous job. It was the perfect color and texture for this chair. I completely sanded and stripped the wood and made minor repairs to the bottom rails (they were a bit wobbly) and then stained the chair with red mahogany. Once complete, this little chair became a real beauty.

My customer was thrilled! She also purchased another chair from me and I supplied her with additional fabric so that the two chairs, while different in design, had the same seat so they could be used as a pair. This was a fun project as I'm always pleased to make my customers smile.

Antique Chair Seat Before
Antique Chair Seat After


Thursday, January 30, 2014

Old Chair, New Seat

Chair Before
Chair After


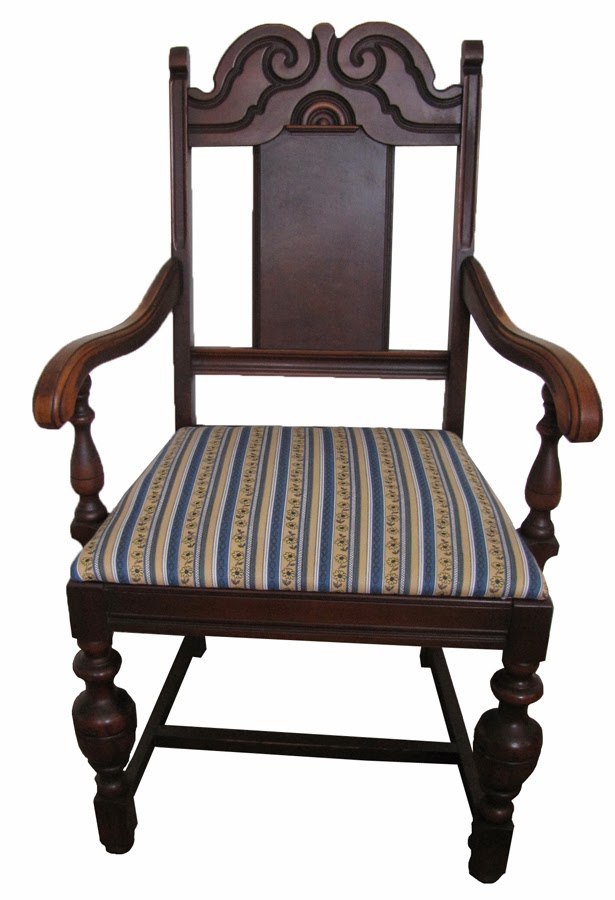
This was the third chair in a sequence of chairs we refinished for a friend. Using the same striped fabric, it makes a great mate to the other chairs. This one required very little, only a good cleaning and protection with boiled linseed oil. The reupholstered striped fabric is perfect for the period and gives this once-old, neglected chair a new personality.


Seat Before

Seat After

Aging Chair Gets Facelift

Chair Before
Chair After
I acquired this chair from a friend who wanted it refinished. This was one of three dining room chairs that needed a new look. The original cushion was worn and dirty, so I reupholstered the seat with a traditional striped fabric, suitable to the style of the chair. I used boiled linseed oil to give the chair's natural luster a boost. The wood responded well and the results speak for themselves.

With great bones, the newly refinished, reupholstered chair is ready to shine.


Wednesday, January 15, 2014

Finale's Finest

Chair Before
Chair After
This chair is from the 1920's. One of three chairs, this one is my personal favorite. It's made of oak and had a great deal of detail in the framework. It was also dirty and so covered in grime and old varnish, that the only way to bring out its luster was to strip it and apply brand new stain. This was one of three chairs I acquired from a friend who had passed away last October suddenly. It was one of the many pieces he'd kept from family members. I knew the chair was worth the work and got right to it. The stripping process was long, messy and tedious, but I wasn't surprised to see the gorgeous wood that lie beneath the layers of grime. I've included photos of the chair during the restoration process. There was a great deal of detail sanding involved!
Chair After Stripping
Chair After Stain
I chose the printed fabric to coordinate with the other two chairs, featured in the above articles, that have complementary striped fabric. These chairs, while completely different, would make an eclectic group for a sophisticated dining experience.


Chair Seat Before
Chair Seat After