Showing posts with label primed. Show all posts

Tuesday, September 27, 2022

Bedroom Set Gets Updated with Paint

High Boy Dresser
After Paint

High Boy Dresser
Before Paint
This was a well-made high boy dresser which was about fifty years old. It was one of three pieces of furniture in this bedroom set (four if you include the mirror, which is not pictured). This was the high boy, there was also a low dresser and a nightstand. 

My customer had wanted an updated look, so I recommended painting as opposed to refinishing it with stain. After showing her several paint samples, she did her own research and found a lovely neutral creamy beige color, which complemented the design of the furniture, bringing out the details.

Both dressers had plenty of drawers, which each had to be painted individually, thus removed from the dressers so they can be masked off and primed, then ultimately painted. We use a high quality paint that holds up well to daily usage. It’s on the costly side, but is well worth it. Painting requires a lot of prep work, so it’s better to use high quality paint. 

Low Dresser After
Painting
Low Dresser Before
Painting
All in all there were fifteen drawers to mask off. The reason for this masking is so that the non-painted portions of the drawers remain unpainted. 

Our customer had the foresight to label each drawer so that they are easily reinstalled into their proper places in the dressers. You’d think that you could put drawers anywhere within the same dresser, but that’s not always the case. There are times when the drawers only fit in one spot, so marking them ahead of time is a great idea. Just one of those little trick you pick up along the way. A couple of the drawers had lost their bottom tracking, so Jim reinstalled them so they once again worked properly.

Nightstand After
Nightstand Before

Since my customer had opted to use the same hardware, we cleaned them up on the polishing wheel. Since they were made of brass, they polished up nicely and looked great with the newly painted furniture. Brass polishes up great, but if it’s brass plated, using the wheel exposes only the steel, not the brass.

The finished bedroom set looked terrific once it was painted. As refinishers, we love working with “real” wood, because it refinishes much better than some of the newer products which are made nowadays. The wood made a half a century ago was made really well and if preserved properly, will last another half century or more. Antique furniture is by its nature made to last as generations of these special pieces have survived many decades of everyday use with minimum wear. But when they require refinishing or updating, we make it lovely again.

Sunday, September 18, 2022

Desk and Chair Gets Fresh Paint

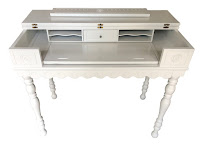
Antique Desk After Painting
 
Antique Desk Before Painting

This small lovely antique desk was in great shape, but my customer wanted it, along with a matching chair, painted white to surprise his daughter for her birthday. 

This desk had quite a bit of detail, nice features and scalloped edges on the front and rosettes on each side and the center as well as spindled legs. The wood was mahogany, but had seen some wear, so painting was a nice alternative to refinishing. Many people love the natural look of wood, but there are times when painting is a great option. My customer chose a soft white for the set which looked amazing once it was painted. I prefer white for painting furniture because it’s always a fresh, light look that will match any décor.

Antique Desk Open After
Antique Desk Open Before

The desk had an unusual feature; you could use it as is, or flip the top to
expose a hidden area which has a pull-out area and a slots which could be used for stationary storage and supplies. It’s a really unique and valuable feature of this dainty desk.

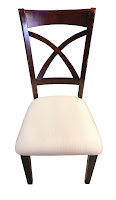
The chair was a simple school style with narrow spindles and a form fitted seat bottom. This chair was a perfect complement to the desk as it could be used for many activities. The set was adequate to provide a nice work space but small enough to fit into a tight spot or tucked into a corner of a small room. 

Chair Before
Painting
Chair After
Painting

Tuesday, February 8, 2022

Corner Chair Painted Black, New Seat Fabric


Chair Before

Chair After
This little chair is called a “corner chair,” because it can go perfectly into a  corner and you can sit on it facing either way. It’s a perfect place to sit and put your shoes on (or off) or just for additional seating. This little chair was an antique, likely made in the 1920’s or 1930’s. 

It was in great shape, but my customer wanted an updated look so she opted for satin black paint. After sanding, priming and painting, it was ready for a new upholstered seat.

The seat was covered with suede, which had seen better times, so she chose a gray tweed fabric which worked well with the black paint. The seat had been reinforced with very old, likely original metal strips on the underside and had been nailed with 2” nails! They were way to long for the 1/2 “ wood, so I had to turn the entire seat upside down and pry up the nails before removing them. 

Once that was done, I replaced them with seat webbing, weaving three rows in each direction for extra strength and support. Foam and batting added, then the new fabric was stapled in place. A black cambric finished off the underside of the chair. The black was satin, and looked fabulous with the fabric, a perfect blend of color and texture. 

Ice Cream Parlor Chair Painted and Re-Caned

Chair After
 
Chair Before

These chairs were once popular in ice cream parlors across the United States. The familiar shape is reminiscent of generations before ours sitting in an ice cream parlor, enjoying a cone of their favorite flavor. 

This chair was quite old, an antique, that had been painted a few times. It was likely part of a set but was a lone chair that needed new paint and a newly caned seat. Many caned seats either got painted with the chair, or stained, depending on the  manufacturer or whoever refinished it prior. My choice is to leave the caning natural and allow it to age which gives it a unique patina that only time can create.

Caning a round chair is a completely different process from caning a square or rectangle chair. This is because you have to go through the same hole many times and skip holes with the weaving process because of the round shape. It’s a bit tricky, but follows the same principles of basic caning in every other way. The white paint was a great choice for this little chair which matches the little table perfectly. It will eventually be used as a place for homework or other projects for a little one.

Chair with table, finished


Friday, October 29, 2021

Drum Table from Bleak to Beautiful Black

Drum Table Painted
Drum Table Before

 A classic drum table is one of the most loved furniture items in traditional homes. This popular table has many uses and can fit almost anywhere. This drum table had a unique top with what we originally thought to be leather, but it had a paper origin and couldn’t be removed, so stripping and staining it was not an option. I recommend painting it black and it was unanimously agreed that would be the best solution for the most attractive outcome. 

This table had wheels that were kept, but in addition to the original brass hardware needed cleaning. It’s amazing just how great brass hardware polishes up. What you almost don’t notice becomes the star of the show! Hardware is like the “bling” or jewelry for any furniture. If you like the original look but want to it show up better, polishing it is a great option. We’ve also had luck with painting hardware when polishing either isn’t desired, or the customer wants a different color. So many choices! 

Many of these tables were made in the late 1930’s, but some, like this one, is a reproduction. You can usually tell by looking at how the table is assembled whether or not is is an original. Older, antique furniture makers used much larger screws and their assembly techniques were significantly different than factory reproductions. The antiques are actually easier to work on because the wood is usually much higher quality and refinishes perfectly. 

There are some die-hard traditionalists that don’t like the look of painted furniture, but sometimes it’s the best option when the wood used either isn’t that great (as in mixing and matching) or doesn’t take the stain well. In our experience, if a piece comes to us painted, there’s a 50/50 chance it won’t stain well. But each piece has a different story and history, so until you strip, you can’t know for sure. But one thing is for certain and that is the end result is always better than what you started with, no matter what option you choose.

Wednesday, July 7, 2021

Antique Stained Glass Door Revival


Door Interior
Before
This antique door was well over 100 years old and had seen plenty of years of wear and weathering. The cracking was pretty severe and the windows, while amazingly weren’t broken, needed some TLC because the framework was deteriorating and held in by glaze. Unfortunately, upon removing some of the paint we discovered the door was not stainable, so our customer chose a fresh coat of paint.


The stripping process is always the most tedious in any refinishing project, but for doors a lot of the difficulty comes in with the type of paint that was used. The older the door, the harder it is to remove the paint. Milk paint was frequently used back then and with our experience, is quite difficult to remove. We either use a chemical stripper or a heat gun (or both) when we remove the old paint from most projects. 


Sometimes it’s just not possible to remove all the paint so we remove as much as we can then sand it smooth and prep it for paint. A coat of primer is necessary for any paint project whether it has had paint on it previously or not. Especially raw wood projects which always require primer. Once primed, painting flows smoothly. 


Door Interior
After
This door required more work because the customer needed the door knob and hardware moved to the opposite side because of where the door would be located, so it was necessary to remove the old hardware, fill the holes left with wood pieces, dowels and filler, sand it smooth and drill new holes on the other side of the door so that it opens correctly. The new hardware they chose was brass.


This door required refinishing as well as carpentry work. Jim made new moldings for the stained glass panels and replaced the center clear glass. The door was out of square so he made sure all was square and plumb which is necessary for a smooth installation.


As you can see in the photo to the right, once installed, the stained glass looked fabulous, adding charm and character to the kitchen. The color of the glass was not visible from the exterior due to the angle of the photo. Photos below are of the exterior before and after photos.


Door Exterior
Before
Door Exterior
After


Tuesday, April 27, 2021

Dining Table Upgrade and New Cushions on Chairs

Dining Table Before
Dining Table
and Chairs After
This lovely Queen Anne dining table had a well-worn top, but was overall in great condition. Our customer had wanted to have the top refinished and the legs painted black. I completely stripped the top in an afternoon and Jim took care of the side edges, preparing them for paint. 

Once it was primed, I painted the side of the table edge while he spray painted the legs. You simply can’t beat the look of spray painting furniture when able to do so. It isn’t possible for everything, but when we can, we chose spraying. Brush painting isn’t too bad though and with black, it is an easy color to blend well with any color stain you decide to use with it.

Chair After


Chair Before
She had purchased the table alone and needed chairs, so she found four chairs separately that matched the table perfectly. The chairs were in great shape, but she wanted the seats reupholstered and chose a black vinyl with a diamond shape, a small rectangle of gold accents to finish off the design. The material was very elegant and made a great seat cover to match the black portion of the table. Even though the chairs and table wasn’t a family at first, when all was done, they got along just fine and made a great addition to this lovely kitchen.

Tuesday, October 27, 2020

Little Black Chess Piece Table

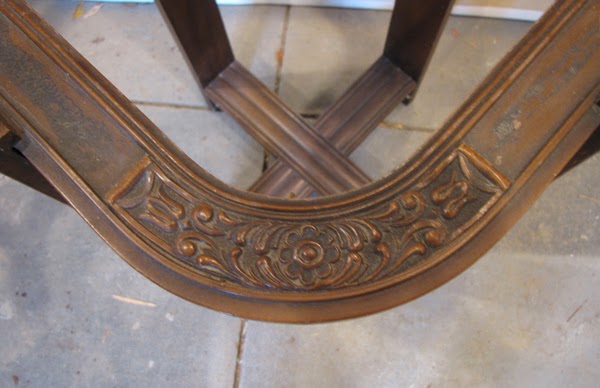
Chess Piece
Table Before
This little gem is another furniture item to add to our collection of painted black tables. As like the previous posting, our customer had envisioned this table being stripped and stained, but like the last table the wood beneath the gray paint was simply not stainable. It was splotchy and had absorbed the paint into the wood grain. There were two coats of paint on this table, black then gray on top of the black. It was also never primed, which contributed to the discoloration of the
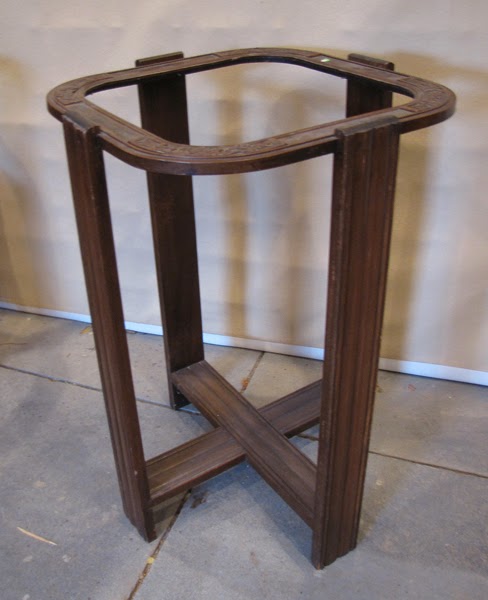
Chess Piece
Table After

wood, making it not stainable. 

So, black was chosen once again as the color choice because it is popular for modern life and matches everything. This little gem was only about 16” in diameter and only about 24” tall, so not very big but big enough to keep a lamp or set down a cup of coffee. 

Needless to say the stripping process was intense and took a couple of days to remove all that paint enough for it to be properly primed and prepared to receive the new paint, which for this table we chose to spray on since it was late summer. We generally can’t paint in the colder months because it’s just too cold and the spray painting doesn’t work very well in cold weather. The finished black table was outstanding and made a huge difference. I told Jim I think the table looked like a large chess piece because of the interesting detail on the underside of the top, lending it a chess piece look. Very cute and very functional, this little chess piece table is once again a nice addition to the customer’s room.

Friday, August 30, 2019

Antique Dry Sink Gets Painted

Dry Sink Before
Dry Sink After
This old dry sink had so many layers of paint on it, the surface was distorted. This meant that instead of scuffing and priming, it required a total strip to remove all those layers of paint and expose the wood. This is truly the right and best way to prep this type of project to accept new paint.

Our customer had wanted this old dry sink to be painted black, but wanted a white knob, so I chose to replace the original one (which was damaged) with a porcelain knob. That little bit of white on this black piece of furniture was perfect and added a little touch of whimsy. It’s the little things that can make a big difference and have a great impact on any furniture job. For this antique dry sink, the paint color really worked.

Friday, July 12, 2019

Antique Table and Chairs Whitewashed and Painted

Antique Table Before
Antique Table After
This antique table had been in the customer’s family for generations, however, she wanted an updated look for her lake house and decided that lighter and brighter would accomplish that. I recommended painting the chairs and legs and then using a “whitewash” technique for the table top. This was not an entirely new experience for me, as I had done something similar with a teak table and chairs set. However, this one was slightly and required a few additional steps. The table top was stripped and the legs got a better-than-average sanding, Next step was two coats of primer on the legs, then two coats of Sherwin-Williams "Pure White" paint. This table had a unique feature; the leaf extensions pulled out from each side then lifted up to the same level as the rest of the table. Because of this feature, the underside of these extensions had to be painted white to match the legs, since you could see them when the extensions were being used.

Thursday, October 11, 2018

Country French Table

Table Before Refinishing
Table After Refinishing

Tables are probably the most common refinishing jobs we acquire and most of the time we refinish and stain the entire table. Sometimes we paint tables. For this table, we combined both techniques, using stain and paint to create a harmonious new look, a perfect facelift.

This table had been stored in a barn for many years until someone had started working on the top, stripping off most of the paint. The base, however, still had a few layers of paint on it. For this table there were at least two, maybe three coats of paint, which required a great deal of time to remove. Wood carving tools were used to get into the "nooks and crannies" of the surface as it was quite porous, therefore it had absorbed all the original white paint. Since the top would be stained, it was necessary to remove every spec of paint. If you don't remove all the paint, it will still be visible when you apply stain, especially dark stain as in this table, which was stained dark walnut.

Since the original casters were well worn, we replaced them with new black rubber casters. The sides and base were painted antique white, which completed the "Country French" look the customer had wanted to achieve. This table had great bones and needed a bit of creative elbow grease to bring it back to life. Mission accomplished!

We had also done a dining room set using the same technique, combining paint and stain in the same way. Check out this blog post to see that: https://finalefurniture.blogspot.com/2017/02/from-amish-to-amazing.html

Wednesday, August 6, 2014

My Favorite Dresser

Dresser Before
Dresser After
This is probably my favorite dresser so far that I've done. It was a sad, old dresser which I found in the basement of an estate sale in Eastpointe. It was buried under old LPs, grade school photos, contact paper and various cans of bug spray. I spotted this piece and knew I had to have it. It had great potential but boy, was it a mess!

After the young man helped me load the dresser into the van, I got it home and assessed it. The drawers were filled with memories of a man who'd gone to a school in Detroit; report cards, school photos, a pink pearl eraser, pencils, torn photographs of kids in baseball uniforms and old utility bills from 1970. This wasn't just a dresser. It had been a part of someone's life. This dresser was just crying out, make me beautiful!
Dresser Top Before
Dresser Top After

I wanted to paint the dresser (as opposed to staining it) because the wood, while sturdy and in good shape, was a bit rough. There was

Tuesday, February 11, 2014

Peace Sign Mosaic Table


Table After Paint & Mosaic


Table Before Painting & Mosaic
I wasn't sure exactly what I had wanted to do with this table, but as I studied it, a plan took shape in my mind. The wood was nothing special, so I decided on painting it gloss black. Next, it needed a top. At one time there may have been a piece of glass in there, but it was long gone. After I replaced the top with a section of wood to fit the square-round shape, my idea became concrete. I would apply mosaic to the center and turn this old, worn out relic into a work of art.

As with all projects, it was necessary to first sand all the surfaces. I lightly sanded the entire table then primed it and painted it gloss black. It was the right choice as black lends itself to the most creative of choices for other applications. It also made my mosaic detail easy since I had decided on using mirror and cobalt blue glass.

Corner Before Painting
Corner After Painting
As the design took shape, I knew it needed a detail in the center so I selected a peace sign, an inspiration from my seven year old granddaughter. It was perfect. To complete the project, I painted the corner detail flowers with blue and white paint to accentuate the design, which was hidden until the paint revealed the hand-crafted detail that someone took a great deal of time to do a long time ago. The once worn and ugly table had been successfully turned into a usable work of art. I think you'd agree that this table took on an entirely different transformation and it only took two weeks!

Table Top Before
Table Top After


Special Dresser Gets A Makeover

Dresser Before
Dresser After
This dresser belonged to my friend's mother who passed away in 2008. My friend had to put it in a storage unit after her brother passed away last October. She needed to empty the storage unit and asked if I was interested in this dresser. "Of course!" I told her. I liked the retro design and style of this piece, so I brought it home and began sanding it with the intention of staining it a shade or two darker.

Unfortunately, the wood wouldn't accept the stain and the piece got severely discolored. Before adding more stain and making it worse, I quit while I was ahead and made the executive decision to paint it instead. As much as I prefer staining to paint, at times it's the best solution, as it proved to be with this dresser. I chose semi-gloss white and after priming, I got busy painting it bright white. It was a good fit because it gave this old 1950's style dresser a fresh, clean and brand new appearance. I decided to have fun with it and add colorful polka dot knobs. The transformation was complete and the dresser was now a usable, yet smaller scale piece of furniture that functions well.

Dresser After


Monday, February 10, 2014

Furniture Goes to the Navy!

China Cabinet Before
China Cabinet After
I'm always up to a challenge, and this job was no different. I received a
call from a client who had an antique China cabinet and matching buffet she wanted painted a dark navy blue. When I arrived at her house, she showed me the two pieces, which were lovely, but worn out and tired looking. A new coat of paint was just what the doctor ordered!

She told me she wanted a very dark, almost black navy, so I gave her the Sherwin-Williams color palette so she could choose the color. She selected #6244, Naval. It was the deepest navy blue they offered. I told her I agreed it was the right color. She preferred a "high gloss" finish, which I also thought would be a perfect choice that would complement the original brass hardware.

The process was a long, tedious one which involved a lot of preparation. We removed all the hardware, which would have to be polished. All drawers had to be removed since they'd be painted separately. There was a broken center bottom molding on the buffet, which had to be repaired and reinstalled. Other than minor repairs, the furniture was in great shape.


Buffet Before
Buffer After
The next step was sanding all the surfaces smooth. Jim took care of this while I painstakingly removed the molding, glass and filigree wood inside of the China cabinet's doors. The glass was held in place with 1/4" trim molding and attached with 5/8" nails. Luckily there weren't a lot of nails, but the ones I removed were difficult, as I didn't want to damage the molding. I carefully slid a thin metal putty knife between the interior of the door and the molding and gently pried the molding forward, revealing each nail. When I was certain I could grab the nail, I used my vice grips and tugged, until all nails were out, then carefully peeled the molding away from the edge. This took over an hour for just two doors. After I had removed the molding, I then marked each edge so that reassembly would be easy. (When working on this type of job, it's important to think ahead!)