Tuesday, April 27, 2021

Dining Table Upgrade and New Cushions on Chairs

Dining Table Before
Dining Table
and Chairs After
This lovely Queen Anne dining table had a well-worn top, but was overall in great condition. Our customer had wanted to have the top refinished and the legs painted black. I completely stripped the top in an afternoon and Jim took care of the side edges, preparing them for paint. 

Once it was primed, I painted the side of the table edge while he spray painted the legs. You simply can’t beat the look of spray painting furniture when able to do so. It isn’t possible for everything, but when we can, we chose spraying. Brush painting isn’t too bad though and with black, it is an easy color to blend well with any color stain you decide to use with it.

Chair After


Chair Before
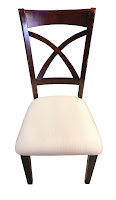
She had purchased the table alone and needed chairs, so she found four chairs separately that matched the table perfectly. The chairs were in great shape, but she wanted the seats reupholstered and chose a black vinyl with a diamond shape, a small rectangle of gold accents to finish off the design. The material was very elegant and made a great seat cover to match the black portion of the table. Even though the chairs and table wasn’t a family at first, when all was done, they got along just fine and made a great addition to this lovely kitchen.

Wednesday, April 21, 2021

Oak Chairs Refinished

Oak Chair After
Oak Chair Before

We restore more chairs than anything else and the reason is simple. Everyone has them and eventually, they get pretty worn, damaged and no longer look good so they will require an overhaul. 

Depending on the amount of damage a chair retains, refinishing can be “lightweight,” meaning a little clean up and perhaps touch-up staining to a total restoration which requires the chair to be stripped down to bare wood (the preferred method), sanded thoroughly, wiped clean and stained with the choice of the customer.

This is one of two identical chairs that needed complete restoration. This one had some water damage on the top, but was overall in pretty good condition. Still strong and not requiring gluing of loose joints, once the stripped and sanding was complete, we applied a fresh coat of English Chestnut stain and two coats of semi-gloss polyurethane. Not only did the refinishing repair the damage, it brought out the luster and beauty of the wood which had been hiding under years of water damage and grime. Never underestimate the power of refinishing a chair! 

You’d be surprised how many people dumpster dive and bring us chairs that someone else had tossed and we made pretty again. The old saying “One man’s trash is another man’s (or woman’s) treasure,” is really true. It’s a shame to thing someone had tossed furniture away only to have it completely turned into a usable treasure, so keep that in mind when you look at an old item of furniture and think, “Is it worth it?” I can tell you with absolute certainty that it is always worth it if the furniture item has good bones. Furniture made of solid wood is built to last a lifetime. And not just the lifetime of a person, but several lifetimes throughout generations if it is taken care of. Maintaining the integrity and classic look of an old piece of furniture, be it a chair, table, dresser or cedar chest is keeping a part of history that we can learn from for generations to come.

Wednesday, April 14, 2021

Antique Eastlake Cabinet Upgrade

Cabinet Before

Cabinet After
Once used as a tall dresser, this antique cabinet was in pretty rough condition prior to restoration. Actually, upon receiving it and getting started on the refinishing process, it sort of, well, fell apart. The piece had seen plenty of use over its sixty-plus years and many of the joints had come unglued, so it made sense to simple separate those loose joints and disassemble it to properly strip, sand and stain it the right way. 

The interior of this cabinet had three adjustable shelves, which had a unique adjustability system. The wood in the rear and front of the cabinet had slots which held small sections of wood that each shelf rested on and were easily removed so that they were easily adjustable to whatever height you needed. 

The bottom drawer was an unremarkable feature of the cabinet, the lovely brass drawer pulls blended into the background. It was also in need of a new bottom since the original one had been damaged and was no longer usable. Once the new bottom was built and installed, it was once again strong and usable. 

The hardware was polished, which included the drawer pulls and hinges. The bottom drawer, once almost invisible, was a focal point, the brass pulls looked like new. The keyhole slots were original, but two out the three were broken and had to be replaced with newly constructed, custom made key slots which looked almost identical to the original. When a piece of an old item of furniture is missing, it’s almost impossible to find that exact piece so a bit of ingenuity and design comes in handy to create a replica. 

The right side of the cabinet did not have glass, but plexiglass that was held closed with a piece of cardboard. Of course this wouldn’t do, so we replaced the plexiglass with glass and added a magnet at the top of the right (opening) door so that it would stay closed. A new stain and three coats of polyurethane to protect the surfaces and this old beauty got a major upgrade. Amazing how beautiful wood that hides beneath years of usage becomes when it is revealed with refinishing. This was indeed a lovely piece of furniture that we enjoyed working on.