Showing posts with label stain. Show all posts

Sunday, November 6, 2022

A Very Old Rocking Chair Revival

Rocking Chair After
Refinishing w New Leather
Old Broken Chair
Before Refinishing
When we get an item of furniture, it varies in degrees of just
how bad it is and how much work it requires to get it looking good again. Jim and I love a challenge. The uglier it is, the more we love restoring it, because it provides us an opportunity to make it beautiful once again, in most cases, better than new. 

This old rocking chair was exactly the type of piece that gets us both excited in anticipation of what’s inside, what we’ll find and how to best treat the piece with the care it needs. And this one needed a lot of love. The springs were literally popping through the deteriorated fabric (see photo below). The stuffing was long gone and the webbing was hanging from the underside of the seat.

The first step in this type of restoration is removing all the old materials. And this chair had a LOT of decorative (at one time) nail heads that needed to be removed. Nail heads usually get bent when they are installed because the wood is so hard, it bends the nails, so they can seldom be reused. I recommended instead of using nail heads, I’d replace them with new welting, which is also known as cording or piping. This is a cleaner, more updated look and still appropriate for this type of chair.

Tuesday, April 27, 2021

Dining Table Upgrade and New Cushions on Chairs

Dining Table Before
Dining Table
and Chairs After
This lovely Queen Anne dining table had a well-worn top, but was overall in great condition. Our customer had wanted to have the top refinished and the legs painted black. I completely stripped the top in an afternoon and Jim took care of the side edges, preparing them for paint. 

Once it was primed, I painted the side of the table edge while he spray painted the legs. You simply can’t beat the look of spray painting furniture when able to do so. It isn’t possible for everything, but when we can, we chose spraying. Brush painting isn’t too bad though and with black, it is an easy color to blend well with any color stain you decide to use with it.

Chair After


Chair Before
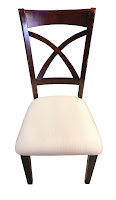
She had purchased the table alone and needed chairs, so she found four chairs separately that matched the table perfectly. The chairs were in great shape, but she wanted the seats reupholstered and chose a black vinyl with a diamond shape, a small rectangle of gold accents to finish off the design. The material was very elegant and made a great seat cover to match the black portion of the table. Even though the chairs and table wasn’t a family at first, when all was done, they got along just fine and made a great addition to this lovely kitchen.

Monday, September 25, 2017

Waterfall Headboard and Footboard

Waterfall Headboard Before

Although getting the "before" photos of this headboard was a bit tricky because of where it was located at the time, it shows enough to see the wear and scratching that had happened over the many years of being used.
Waterfall Headboard After

This headboard matched the waterfall dressers and nightstand in this bedroom set with matching "V" shaped veneer in the center and decorative wood panels that were set in on each side. A rather large piece, this headboard required refinishing on both the inside and the outside to do it justice. It required many hours of stripping and then sanding, using various grits of sandpaper to best prepare the newly exposed surface for stain.

As in the other items of furniture, I close golden pecan stain to replicate the original color and bring out the luster and gleam of the wood beneath. The results were awesome! Furniture of this era is well worth preserving and holding onto because as they say, "they just don't make them like they used to!"

Waterfall Footboard Before
The footboard had the actual waterfall feature, the curved top, and required a lot more preparation than the headboard because it had water damage on the interior side and some broken veneer here and there. Using a hot, dry iron, I was able to heat up the original glue and flatten the lifted, curling veneer enough so that it lay flat.

For the rest of the veneer that didn't want to flatten out, I carefully applied wood glue through a wood syringe (which allows you to tuck the glue into small places), and used many clamps to secure the veneer until the next day, when I was able to remove them and proceed with the stripping and sanding. Using an iron is also how you would completely removed old, damaged veneer by keeping the iron on the wood and moving it slowly while you follow it with a sharp putty knife and lift the old veneer off. It works well, but requires patience and attention to detail.
Waterfall Footboard After

The footboard, like the dressers, took a long time to refinish, but it looked fabulous when it was done.


Tuesday, September 5, 2017

Dining Table Top Refinished

Table Top Before
Table Top After
We all know how much we use our tables, therefore the top of them tends to get plenty of use, which is okay, because that's what they're for. This solid oak table was purchased twenty-five years ago and got plenty of use, so the top had some wear on it. Nothing too bad, but enough to justify a refinish, top only. It also had two leaves, so the owner wanted those refinished as well.

This great table was made by the Amish and the quality of the workmanship showed. Amish are known for their precision and attention to details as well as simplicity in structure so their furniture is easy to use and guaranteed to last a long time. The woodgrain of this table was beautiful, which became apparent after I totally stripped the top.

I kept the leaves on the table and stripped them in place (much easier) and made sure the sides of the

Wednesday, April 5, 2017

Antique Secretary

Secretary Before
Secretary After
A secretary desk such as this was quite popular in the
early 1900's, used for writing letters and keeping track of bills. Like many items of furniture of this era, it showed its age with missing sections of veneer here and there as well as the wood grain practically gone as aged finishes darken, hiding the lovely wood grain beneath. The lovely details on this secretary included a hand carved decorative rope on the front bottom, a curved drawer and fancy brass handles.

The interior had a built-in cubby section with its own little drawer, perfect for keeping postage stamps, pens and note pads. The back of the secretary was damaged, so we replaced it with a matching section of wood which matched the stain perfectly. This piece was a handful. Because of the detail, stripping was tediously time consuming, especially the rope scrollwork on the the drop down front and the edges of the shelf beneath it. It's hard to see this in the photo, but the shelf edges had three layers carved into it.

Secretary Open Before
Secretary Open After
Having a variety of woodcarving tools is a necessity to remove the old finish down to the bare wood. In order to do the job right, it was necessary to take it apart and strip the components separately. Not only does it look better, it's much easier than trying to get your hand inside those tiny compartments. It's also easier to polish the hardware, a little thing that has a large impact on the finished item. The difference is in the details.


This secretary was made of tiger oak, which has a lot of "movement" and visible grain. This wood looks gorgeous when refinished. One of the many joys of removing old varnish and stain is revealing the hidden wood grain just below the surface. Age darkens the original finishing, thus hiding the beauty of the wood. You never really know beautiful something is until you remove all those layers!

Tuesday, April 4, 2017

Antique Writing Desk

Writing Desk Before
Writing Desk Before
Long before e-mails, texts, instagram, Facebook and Twitter, people spent a lot of time composing handwritten letters as a way of corresponding with friends and family. There was a sense of satisfaction in holding that special pen and putting it to paper, allowing your thoughts to flow through your hands in a script scral that reflected your unique personality and penmanship. With the electronic, fast paced world we live in, writing letters by hand has all but become a lost art. It's definitely faster to write using a keyboard, but there's something special and magical about writing "old school," using a pen and a piece of lined paper we used in school. While writing that way now gives me writer's cramp (as does long periods of working on my Macintosh), I still enjoy the art of letter writing using fancy stationery and my favorite ink pen. It's a timeless craft that never goes out of style.

Writing Desk After
This antique writing desk was likely used for composing letters by hand and keeping track of bills and correspondence with its five generously sized cubby slots to easily organize one's life. Made of solid walnut, this writing desk had great bones, with surface scratches on the split top and really rusty screws that held the original hinges in place. I knew this would be a very challenging piece to refinish because of the many components and my favorite pet peeve, spindles.

The drawer was removable, which was great because it's much
Writing Desk After
easier to strip and sand a section of an item if it can be removed. Upon further inspection, I discovered that the cubby insert section was also removable, held in place by side boards that slid out, allowing the entire cutty section to be removed. This was a great bonus since it was quite difficult to reach in there to strip the old stain, mostly because I couldn't really see what I was doing. By removing it, I was able to strip it and see all the way to the back so it was done right. Once the removable components were stripped, I began the long, tedious task of stripping the spindles. They are the most difficult and time consuming part of any stripping project because there is simply no fast way to do it.

Saturday, January 21, 2017

Antique Wash Stand Refinish

Wash Stand Before
Long before indoor plumbing was introduced into society, people used a large basin and a wash stand such as this early American style to clean up after a busy day of working in the fields or at a factory.
Wash Stand After

With the ultra-modern technology available to us in this twenty-first century, it's hard to imagine life without a steam shower or a soaker tub, but people made use of what they had. This wash stand restoration was a pleasure because it was made of solid oak and pretty much exactly the same as it was well over a hundred years ago. It had seen some wear, to be sure.

If this wash stand could speak, it would have plenty of stories to share. I wonder how many people used this old beauty to clean up over the years? Did it belong to a man who had seen his

Wednesday, November 2, 2016

Edwardian Console

Console Before Refinishing
Console After
This console was an extraordinarily large piece of furniture. It's hard to judge the scale of this piece standing alone, but it comes up to the center of my five foot frame and is approximately six feet wide and twenty-one inches deep in the middle.

It had many surface scratches and had seen some wear, mostly on the top where the veneer had worn off and on the sides where the veneer had peeled off on one side and was half gone on the other. Before anything else could be done, I needed to repair that veneer on the one side and add a section to the missing left side. Luckily I was able to match the existing veneer pretty close. With veneer it's a gamble, because most of these pieces were done many years ago and the veneer they used was quite different from today's selection, but I was satisfied the veneer was appropriate for this piece and blended quite nicely.

Thursday, October 27, 2016

Table Top Makeover

Table Before Refinishing
Table After Refinishing
This tabletop had seen many years of use and was crying out to be refinished. It was also extremely heavy, therefore needed a firm grip just to get it onto our work surface. Made of solid birch and about 1-1/2" thick, the table seated at least 8 people. The legs required nothing because they were made out of metal, which was a perfect foundation to turn this 1980's table into an "industrial urban" table. Giving new life to an outdated piece of furniture is the greatest reward of the inevitably tedious amount of work that these projects require.

Thursday, August 18, 2016

Beautiful Oak Table Refinish

Oak Table Before
This great oak table had strong "bones," but the surface had minor surface scratches and required gentle sanding and a new finish of golden oak stain to create a better than new look. Oak is one of my favorite woods to work with because it handles sanding well, allowing the grain, commonly hidden by layers of grime and
Oak Table After
wear, to come to light. 


Decent sized, this table was the couples' primary dining table, so I made sure I put a "rush" on it and got it done quickly. Lots and lots of sanding and three coats of polyurethane, this little gem was once again a great piece of furniture that can be used for years to come.

Tuesday, October 27, 2015

Antique Desk Cabinet

Cabinet Before
This lovely old cabinet came to us in less than perfect condition. It had seen a lot of use over the years, judging by the scratches and wear, however, we were able to detect the high quality of the wood (tiger oak) and the overall structure of the piece and knew we would be able to breathe new life
into it making it shine again. 
Cabinet After

We determined that this cabinet once had a large door, likely glass, which had opened on left side where the shelves were located, but the owner no longer had the door and didn't mind not having one. The cabinet had only three of the four original wheels. Luckily we had the same style of wheels leftover from a previous job, so we were able to add the fourth wheel, making this piece much easier to move around. (It's a good idea to save hardware!)

Monday, April 13, 2015

Elegant Cedar Chest Revival

Cedar Chest Before
This was a classic antique cedar chest, similar to the others we've done, but the first one with a combination lock on the front. It was in the family of my customer for many years, so she wanted it refinished to maintain of her family's treasures. It had seen better days, for sure, but that didn't deter us from making it better than new.

First, like most project we do, total stripping and sanding was in order. This revealed the beautiful linear design of this remarkable cedar chest. It was in great shape already, so a little refinishing made a huge difference. We were so glad the veneer was in tact, as many older chests lose their original veneer over the years, because they get used and see a lot of wear.

Cedar Chest After
After stripping and sanding, we applied a light stain which brought out the true beauty of the cedar. We added the proper hardware to the interior, which had an incorrect hinge set on the back and nothing holding it up safely. The front combination lock needed to be polished. It looked fabulous!

Once everything else was accomplished, a good interior cleaning and the chest was complete. My customer was speechless over the results. This chest was truly a unique piece of furniture which deserved all the TLC we could give it. Check out the other cedar chests we've worked on at these links: http://finalefurniture.blogspot.com/2012/06/my-waterfall-cedar-chest.html
http://finalefurniture.blogspot.com/2014/10/solid-cedar-chest.html
http://finalefurniture.blogspot.com/2013/12/1945-lane-waterfall-cedar-chest.html

Thursday, October 30, 2014

Table With A Twist

Table After
Table Before

My friend, Frances, had asked me to refinish this unique table which
belonged to her husband. I had never seen one quite like it. What made this table so different was that the entire top swiveled. Perhaps it had been used as a television table many years ago. In any event, what she saw was an ugly table was merely a nice table with an ugly, worn finish. It just needed a little love.

First things first, I removed the pivoting top to reveal a large metal swivel mechanism which needed some persuasion, therefore, I greased the bearings and cleaned the metal, making the mechanism much easier to rotate. It was mounted to a rather thin, broken piece of masonite, which I replaced with a piece of 1/4" plywood. Much better.

Monday, September 29, 2014

Charming Antique Desk

Desk Before
Desk After
This antique mahogany desk was an amazing yard sale find. Although the top left edge molding was broken, the bones were good, more importantly, the handles were all intact, a huge plus! I also knew it was a big refinishing job since I wasn't sure how to replace that top rail.

My first goal was to remove all the hardware before stripping the entire desk. I put all the pieces in a closed container so I don't misplace them. (This is the preferred method to which I keep track of small items.) This desk was unique, since all four sides needed stripping, as the backside can face the room if chosen. Normally the back of furniture remains unfinished, since most are placed against a wall. Because the back had been allowed to be seen required additional stripping and sanding.

The edge molding needed a great deal of detail sanding with an orange stick, all done by hand. The lower left edge molding was missing, so that too would need to be addressed. I ended up scrapping the top molding because it would be impossible to replace it and have it look the same, but not all was lost as I was able to salvage it and create the missing molding on the center drawer edge as well as the missing molding on the lower left inside of the desk. That was I was guaranteed to match the red mahogany stain, while maintaining the integrity of the piece.

After I removed all the brass hardware, I started the intense stripping process. It was quite time-consuming, between camping trips and other projects. I would spend evenings sitting on my desk polishing the various components of the hardware. Each drawer had seven (7) individual pieces; the handle, two coin-shaped brass rings, two screws and two nuts, which were round, making them a bit challenging to remove. This is one of the features of a very old piece of furniture; the hardware is usually not exact and quite different from modern hardware, down the the nuts (no pun intended.) I used copper cream, which works beautifully to remove tarnish from brass, then an actual brass polish to really give it a shine.

Taking the extra time to clean the hardware to its original condition makes any furniture piece look 100% better! The clean hardware is the "bling" to the furniture's new finish and well worth it.

Wednesday, August 20, 2014

Cute Corner Table

Corner Table Before
Corner Table After
I got lucky when I found this adorable corner table while visiting an antique store in Birch Run, while staying there for a night earlier this year in February. We love checking out local antique stores and estate sales while traveling. You just never know when you're going to find that "special" item you've been searching for. This was the case with this little gem of a corner table, which was exactly the right size.

The top shelve, edging and drawer is cherry and the other two shelves are pine, not uncommon for an old piece such as this. I decided to remove the edging, making it easier to remove the old finish, therefore sanding each piece and making repairs on one broken one, gluing together, then clamping it so it stayed secure. The table has a name and what could be a serial number on the bottom of the drawer; Butler, Style #517 - 1105. I researched it, but couldn't find anything other than there is a furniture company by the name of Butler.
Corner Table Top After

Corner Table Top Before

A little refinishing was all it needed, so I got busy sanding and stripping the entire table, paying special attention to the ridged detail in the front of each shelf. I used many sheets of folded sandpaper and sanding blocks which work great for the minuscule ribbing on the front of the shelves. If I wouldn't have removed all the finish, the new stain wouldn't have been absorbed, thus that area would have looked odd. It paid off, because the cherry stain I used looked great.

I finished off the piece with two coats of polyurethane and chose an antique porcelain knob to replace the almost invisible knob that had previously occupied the drawer's front. I was quite satisfied with the results, as this little table now graces the landing leading to the upper level of our house.

Corner Table on Landing

Friday, August 9, 2013

Buffet Painted Black

Buffet Before Painting
A customer on Craig's List contacted me about painting a
buffet. She was undecided on the color, so I suggested she go mat black. It turned out to be a great choice. You simply can't go wrong with black paint. It's a versatile classic that matches any decor. What a great piece of furniture!

This piece was solid mahogany and needed lots of TLC, sanding and patience, but the results speak for themselves. The customer decided to keep the original handles which take on an entirely different personality with the elegant black paint. After a lot of sanding and clean-up, this buffet is better than new!

Buffet After Painting