Showing posts with label cherry. Show all posts

Thursday, September 16, 2021

Antique Chair Updated to 21st Century


Antique Chair Before

Antique Chair After
Every household has chairs, usually lots of them. There are as many styles chairs as there are other types of furniture, but not many other furniture items are used as much as chairs, therefore they tend to get more wear than other furniture. 

Antique chairs are unique because the materials used in the 1920’s or 1930’s were limited and not as “user friendly” as they are today. This antique cherry chair was in relatively good condition, meaning it had good bones, but was in dire need of refinishing and new fabric. The fabric on this chair was not only very worn and threadbare, but no longer usable and likely had a zillion or more dust mites. 

For this type of project, Jim takes care of the refinishing and restoration process while I handle the new fabric. Jim used a custom mixed stain consisting of 25% mahogany and 75% chestnut, which looked fabulous. When the chair was finished and protected with two coats of polyurethane, I took over and tackled the fabric. I don’t claim to be an expert upholsterer (I’ll leave that to my local expert) but I can handle certain projects. Seat covers is much easier than working with an attached seat because you must allow for the fabric to go around the arms and back of the chair, which is a nail-biting experience. 

This chair originally had horse hair stuffing for the back and worn out springs for the seat. My experience with chair springs isn’t terrific, so I prefer to replace them with a sturdy new wood bottom and 2” of high density foam. The foam is covered with thick batting for extra cush for the tush, and finished with the customer’s fabric of choice. My customer chose a lovely paisley pattern,  definitely a 21st century fabric. With the freshly refinished wood and the new fabric, this chair will last another 125 years.


Tuesday, April 27, 2021

Dining Table Upgrade and New Cushions on Chairs

Dining Table Before
Dining Table
and Chairs After
This lovely Queen Anne dining table had a well-worn top, but was overall in great condition. Our customer had wanted to have the top refinished and the legs painted black. I completely stripped the top in an afternoon and Jim took care of the side edges, preparing them for paint. 

Once it was primed, I painted the side of the table edge while he spray painted the legs. You simply can’t beat the look of spray painting furniture when able to do so. It isn’t possible for everything, but when we can, we chose spraying. Brush painting isn’t too bad though and with black, it is an easy color to blend well with any color stain you decide to use with it.

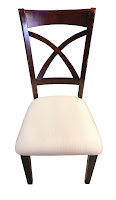
Chair After


Chair Before
She had purchased the table alone and needed chairs, so she found four chairs separately that matched the table perfectly. The chairs were in great shape, but she wanted the seats reupholstered and chose a black vinyl with a diamond shape, a small rectangle of gold accents to finish off the design. The material was very elegant and made a great seat cover to match the black portion of the table. Even though the chairs and table wasn’t a family at first, when all was done, they got along just fine and made a great addition to this lovely kitchen.

Wednesday, October 10, 2018

Bloodwood Chair

Chair Before Refinishing
Chair After Refinishing

Strong, sturdy and comfortable, this chair was somewhat of a surprise to my customer who thought it was an oak chair. After stripping, I discovered that it was not oak, but actually made from exotic bloodwood, found in Brazil and Australia. This wood is unique in that when the tree that it comes from is cut, you can see red “blood” dripping on the cut piece, hence the name. It is a hardwood with lots of color and movement. In addition to the run that runs through this wood, there are also yellow and gold shades, which complement the luscious red tones. It’s a gorgeous chair to be sure.
The stripping process revealed a lot of red in the wood, which had already been seeping through the old, worn surfaces, especially around the arms.

With the natural red tones of this chair, golden oak stain which was what my customer had originally requested, would not have worked. I opted for red mahogany, which not only brought out the chair's natural color, but worked well with the varied tones which gave the chair the exotic look that it deserved.

After using the red mahogany stain, I finished it with two coats of semi-gloss polyurethane so that this chair will last for many years to come.

Update as of May 12, 2019: I just finished the “sister” chair for this one, except it was a rocking chair. You can read about it here: http://finalefurniture.blogspot.com/2019/05/bloodwood-rocking-chair.html

Tuesday, June 19, 2018

Antique Cedar Chest Revival

Cedar Chest After Refinishing

One of my favorite projects to refinish and restore is a beautiful cedar chest such as this lovely antique. The best part of this restoration was that it had retained all the original details such as the four vertical rows of rope braiding that embellished the front as well as the decorative trim surrounding the lid and another row of trim along the bottom. The chest was in pretty good shape overall, with surface scratches marring its top. Otherwise, it was in excellent condition.

Unlike other cedar chests I've done, this one had separate ball type feet which lifted it off the ground, allowing for easy relocating while working on it. Unfortunately, all that detail requires a great deal of time to remove the old finishes which requires a lot of time, patience and the right tools.
Cedar Chest Before Refinishing 

Never underestimate the power of an old toothbrush! Yes indeed a toothbrush is a key element to removing all that yucky, sticky residue that clings to the wood after you brush on the nasty stripper.

A good stripper will burn your skin on contact, so wearing gloves is essential while stripping. (I also keep a clean bucket of water on hand just in case I need to stick my hand into it. Ah, the burn!) A toothbrush, wood carving tools and a good brass brush are a great combination of tools to remove gooey varnish from all those nooks and crannies that would otherwise be impossible to reach. The ultimate goal is to reveal bare wood, that once sanded, is ready for staining. For this lovely cedar chest I used red mahogany stain and semi-gloss polyurethane, which brought out the natural beauty of the wood, showing its grain.
Cedar Chest After

Cedar Chest Before
It never ceases to amaze me just how awesome the wood looks once all the old finishes are removed and the lovely wood beneath is revealed. This was definitely one of my favorite cedar chests to work on because it had all those lovely details, which shows off its unique qualities and of course, the lovely craftsmanship that went into making it.

For other cedar chests I've refinished, you can click on these links:
http://finalefurniture.blogspot.com/2016/08/1948-lane-cedar-chest_22.html
http://finalefurniture.blogspot.com/2017/04/decorative-walnut-antique-cedar-chest.html
http://finalefurniture.blogspot.com/2017/05/solid-cedar-chest-with-copper-accents.html
http://finalefurniture.blogspot.com/2015/04/elegant-cedar-chest-revival.html
http://finalefurniture.blogspot.com/2013/12/1945-lane-waterfall-cedar-chest.html
http://finalefurniture.blogspot.com/2012/06/my-waterfall-cedar-chest.html
http://finalefurniture.blogspot.com/2014/10/solid-cedar-chest.html


Monday, September 25, 2017

Waterfall Headboard and Footboard

Waterfall Headboard Before

Although getting the "before" photos of this headboard was a bit tricky because of where it was located at the time, it shows enough to see the wear and scratching that had happened over the many years of being used.
Waterfall Headboard After

This headboard matched the waterfall dressers and nightstand in this bedroom set with matching "V" shaped veneer in the center and decorative wood panels that were set in on each side. A rather large piece, this headboard required refinishing on both the inside and the outside to do it justice. It required many hours of stripping and then sanding, using various grits of sandpaper to best prepare the newly exposed surface for stain.

As in the other items of furniture, I close golden pecan stain to replicate the original color and bring out the luster and gleam of the wood beneath. The results were awesome! Furniture of this era is well worth preserving and holding onto because as they say, "they just don't make them like they used to!"

Waterfall Footboard Before
The footboard had the actual waterfall feature, the curved top, and required a lot more preparation than the headboard because it had water damage on the interior side and some broken veneer here and there. Using a hot, dry iron, I was able to heat up the original glue and flatten the lifted, curling veneer enough so that it lay flat.

For the rest of the veneer that didn't want to flatten out, I carefully applied wood glue through a wood syringe (which allows you to tuck the glue into small places), and used many clamps to secure the veneer until the next day, when I was able to remove them and proceed with the stripping and sanding. Using an iron is also how you would completely removed old, damaged veneer by keeping the iron on the wood and moving it slowly while you follow it with a sharp putty knife and lift the old veneer off. It works well, but requires patience and attention to detail.
Waterfall Footboard After

The footboard, like the dressers, took a long time to refinish, but it looked fabulous when it was done.


Wednesday, September 13, 2017

Art Deco Footboard and Headboard

Art Deco Footboard Before
Unfortunately I didn't get the opportunity to take a "before"photo of the headboard and footboard of the art deco bedroom set, so I used the original photo my customer had sent me (left).

The footboard and headboard had extensive veneer damage and required large sections of veneer to be replaced. This was accomplished by using a hot (no steam) iron and removing the old veneer, then sanding the surfaces so they were smooth enough to accept the adhesive prior to dry fitting the veneer in place.

For the headboard and footboard we used two different veneer styles; oak and mahogany, but stained them both with cherry. This gave the piece a beautiful look with contrasting finishes that completed one another, similar to the original style. I love the way the richness of the wood comes through with using these two excellent quality of veneer products!

Once the veneer was cut a bit larger than the surfaces that they would be adhered to, we carefully laid them in place. Then the stripping, sanding and refinishing could be done easily. After final sanding with fine grit sandpaper, we applied cherry stain and two coats of semi-gloss polyurethane. The headboard and footboard turned out great! Luckily I was able to get an "after" photo of the footboard, seen below.
Art Deco Footboard After Refinishing
Check out the other items of this bedroom set by clicking on the links below:
Art Deco Nightstand
Art Deco Vanity
Art Deco Dresser

Art Deco Nightstand

Art Deco Nightstand Before

This art deco nightstand matches the dresser and vanity as part of an
Art Deco Nightstand After
art deco bedroom set restoration. This vanity had broken veneer on the top left and bottom left panels as well as noticeable amount of water damage.

To do this right, we removed the handles, drawer and door (as in the dresser) and replaced the broken veneer sections with new matching veneer, then continued the process of stripping, sanding and staining, using cherry stain and three coats of semi-gloss polyurethane to match the other two pieces in the set.

The lower portion of this nightstand opened like a door and had a single shelf on the inside which was just a piece of cardboard laid on top of two flimsy strips of wood that weren't original to the cabinet. We made a new shelf stained it to match and nailed it to the wood strips; much stronger than cardboard and allowing more options for storage on the bottom of this nightstand.

Tuesday, September 5, 2017

Art Deco Vanity

Art Deco Vanity Before Refinishing
Art Deco Vanity After Refinishing
This was the second item in the art deco bedroom set we refinished. It matched the art deco dresser,  with the same wood and matching handles. It too was made of cherry. This vanity had two sections of damaged veneer; upper right front panel and lower left, beneath the drawer. It's possible to patch small sections of broken veneer, but other times it must be replaced, as it was here. The process of removing old veneer doesn't involve any special skills or tools, just a hot (no steam) iron, a pressing cloth and patience. The iron heats up the old veneer just enough to warm up the old adhesive so you can easily slide a putty knife between the veneer and wood beneath, gently lifting it off until it's removed. This was the process I used to replace the veneer on this lovely vanity. Once the old veneer was completely removed, I glued the new veneer in place, then used a sharp utility knife to remove the excess, then my mini dremel to smooth the edges.

Art Deco Dresser

Art Deco Dresser Before
Art Deco Dresser After
This lovely art deco dresser was one item of a complete bedroom set with other art deco items. This dresser is a classic example of timeless beauty with clean lines and elegant design. Made of lovely cherry, this dresser had a great, solid structure and plenty of use left, albeit a bit worn around the edges. It needed a good, solid comeback and had been crying for a total restoration. But no restoration is easy. This dresser required a lot of attention to details.

First we removed the hardware (which would later be cleaned and polished by hand) and the drawers, some of which had bottoms that weren't completely attached. A few nails in the exact center of the support board in the back of these drawers reinforced the bottoms, so they were once again strong enough for perfect functionality. Each drawer was then completely stripped, sanded and stained with cherry stain, then put aside while we did the same work on the body of the dresser. The stain brought out the beauty of the wood's grain, always my favorite part of any restoration.

Handles before and after
Measuring at 52" tall, this dresser offered plenty of storage with deep drawers and a solid body. The bottom decorative rail had been loose and fell off during the pick up drive, therefore it wasn't show in the "before" photo, but we glued and nailed it back after refinishing it as well. After applying two coats of semi-gloss polyurethane, this deco beauty was once again the star of the show. The handles had been polished and after they were reinstalled, added the "bling" which was the perfect touch in another great refinishing job.

Tuesday, April 4, 2017

Artistic End Table

End Table Before
Leather on an end table such as this was commonly used for furniture as a decorative effect for the top. It worked nicely when new, but over the years these tables' leather got pretty beat up. Scratches, gouges, tears and discoloration became more common than shiny new leather and it no longer looked pretty, just old and worn out.
End Table After

While I wasn't quite sure what I would do to replace the leather which was peeling up on one side, it needed to be completely removed, which had proven to be quite a task, as the non-lifted portion adhered quite well. I had to use a small heat gun to soften the adhesive enough to carefully slip my putty knife under the leather and slowly peel it off the wood. It took about 30 minutes, but I was successfully able to lift the last corner of the leather and tear it off. Goodbye old leather, hello new design.

I used a chisel to scrape remaining paper left by the leather section, then sanded the surface smooth. While I was unsure exactly what I would do to replace the leather, I knew that when the time came, I'd have exactly the right treatment, so I got to work on the rest of it. I stripped, sanded and stained the end table using cherry stain, which brought out the gorgeous tones in the cherry wood the table was made from. Making a decision on stain can be tricky, since you don't really know how it will look until you apply it. A darker stain would have hidden much of the wood grain, so cherry was the perfect choice for this end table.


Once stained, I put this table aside while working on other furniture items for this project, (while my I left my subconscious work on the creative side of how to make the top stand out). Eventually I had formulated an idea which involved my trusty carpenter, my husband Jim. I had asked him to make custom veneer sections out of oak and mahogany, so he sliced up sixteen 1-1/2" sections of veneer, more than enough to experiment with a workable design for the tabletop.
End Table After

Using the freshly cut veneer sections, I laid out the pieces and worked up a design, much like one would put together a puzzle, only you create the design as you go. It took a while as I played around with the length of each piece, layout and design, but eventually I had created a random pattern I was satisfied with, then applied adhesive to the table and each veneer section, then let everything dry for fifteen minutes before I carefully positioned each section into place. There's no forgiveness when you work with adhesive cement on both sides of the wood. Once they're down, they're down, so it's a good idea to "dry fit" them before you apply the adhesive.

After sanding the tabletop to get all the veneer sections level, I applied golden pecan stain. Because of the two distinct woods, each wood had taken on a different tone, which created an interesting, artistic and contemporary tabletop. Once the stain was dry, I applied two coats of polyurethane to the lower areas and legs of the table and three coats to the top for added protection. It looked fabulous! This was definitely one of my favorite projects as I was able to blend the craft of refinishing, with the art of creating a custom made veneer design that gave this old beauty a modern, updated look.

This table was one of four pieces of furniture we did at the same time. Click on the links below to see the others:

http://finalefurniture.blogspot.com/2017/04/antique-secretary.html
http://finalefurniture.blogspot.com/2017/04/antique-writing-desk.html
http://finalefurniture.blogspot.com/2017/04/antique-piano-bench.html

Sunday, January 22, 2017

Family Heirloom Buffet Restoration

Buffet Before
Buffet After
This lovely old buffet was handed down to a man who wanted to preserve its history and keep its place in the family. It had been crying out to be refinished, as it had seen a lot of use over the years, showing wear. The top was splotchy, scratched and had remnants of water stains. The sides had water stains as well. The entire piece needed some major TLC and detailing, so we got straight to work.

Each restoration project has similarities but differences too. This one needed to be taken apart first; remove the cabinet doors, take off the hinges, remove the handles and sand all the pieces individually then tackle the body. The top back piece was not in place and had to be reconnected to the buffet. The sides were the only part of this piece that had veneer, which had split on the bottom. Once everything had been stripped and sanded, each piece got stained.

Thursday, August 18, 2016

1940's Hutch Makeover

Hutch Before
Hutch After
This 1940's hutch caught by eye at a local antique shop here in Marine City. I fell in love with the great lines and gentle curves of this unique piece of furniture. A plain glass door was functional enough, but I could envision something much more suited to this beauty, so I added a leaded glass panel with bevels and glue chip glass to enhance the hutch adding classic, timeless styling.

With relish, I peeled off hideously sticky contact paper circa 1965 from the interior and painted the shelves with serenity blue chalk paint to give it a modern flair and fresh appeal to today's contemporary styles. I replaced the broken back with a section of bead board, which added vertical lines and created additional texture. It looked great! The exterior was in overall terrific shape, but needed refinishing, no easy task. Section by section, I carefully detailed
and stripped, using my special set of tools to remove many years of old finish which hid the beautiful cherry beneath.

Monday, November 23, 2015

Watertown Slide Table Era 1889-1910

Cherry Table Before
Cherry Table After
In this business you never quite know what type of project you will recieve. This was one of those projects which came with a few surprises. What you see in the left photo is a table with a hidden agenda, it extends to about ten feet and can accommodate between 3-4 leaves which makes it a huge table! Unfortunately, my customers had purchased this table without any leaves and decided to use it as is. The slide mechanism was made by the Watertown Slide Company located in Watertown, Wisconsin. Judging by the style and materials used in the table, I estimate it to be made between 1889-1910, but likely is was made in the early 1900's. (This company only made the slide mechanism for the leaves of the table, not the table itself.)

Thursday, May 14, 2015

Antique Vanity Makeover

Vanity Before
Vanity After
This vanity had been in my customer's  in-law's family for a few generations. Neglect and time took its toll on this lovely vanity as the scratched surface attested to. However, I assured my customer I would make it shine and indeed, I did. The first step was to remove the hardware then get it ready for sanding and stripping, which was immensely tedious because the sides have a fluted rounded edge which required a metal brush to remove all the previous finishes, all part of the stripping process. 

Monday, January 12, 2015

1906 Victrola Makeover

Victrola Cabinet Before
A customer had contacted me about refinishing an old Victrola Gramophone cabinet to be used as a bathroom vanity for her remodeled basement bathroom. The cabinet had the music apparatus removed, but still had the split top and a hole on the side where the crank had once been. The cherry was quite beautiful, but in its condition, it was difficult to envision just how nice it truly was.
Victrola Cabinet After

Stripping the cabinet was first on the list of things to do. After all the previous old stain had been painstakingly removed, it was then sanded and re-stained with cherry stain. In order to prepare the top for the bowl-style vessel sink, it was necessary to fill in the space between the two sides with wood filler then stain over it. Since the top had a left and a right side which the customer had wanted to keep, this was the most feasible solution and it looked pretty good.

My customer had discussed replacing the hardware, but I assured her she'd have plenty of time to choose that once the cabinet had been refinished. I'm sure she'll have fun searching for the perfect hardware because there's so much to choose from. This was definitely a unique refinishing item but as always, very rewarding because this old gem has many years of use left it in as it makes its debut as the most beautiful vanity. What a great way to use an old piece of furniture...
Old Victrola in Customer's Basement Complete

Saturday, December 20, 2014

Charlevoix Cherry Antique Dresser

Dresser Before
Dresser After
While on vacation, we came across this dresser at an estate sale at real date written somewhere on it that we could refer to! As with most antiques, it had great bones but needed some love. We found it at a beautiful house on Lake Michigan in Charlevoix.

There was an inscription written in the upper right corner of the

Tuesday, November 25, 2014

Danish Chair

Danish Chair Before
Danish Chair After
I love taking on projects that involved such a lovely piece of furniture as this Danish cherry chair. The chair was extremely well made, thus also quite heavy, but after removing the cushion, I realized the weight wasn't in the wood, but in the cushion. Once that was removed, the chair itself was fairly light and easy to handle.

On the back of the chair was a stain, as if someone had spilled a darker stain on top of it and it made its way down the rear left leg. Someone tried to cover up the damage by adding glaze over the legs, which

Wednesday, August 20, 2014

Cute Corner Table

Corner Table Before
Corner Table After
I got lucky when I found this adorable corner table while visiting an antique store in Birch Run, while staying there for a night earlier this year in February. We love checking out local antique stores and estate sales while traveling. You just never know when you're going to find that "special" item you've been searching for. This was the case with this little gem of a corner table, which was exactly the right size.

The top shelve, edging and drawer is cherry and the other two shelves are pine, not uncommon for an old piece such as this. I decided to remove the edging, making it easier to remove the old finish, therefore sanding each piece and making repairs on one broken one, gluing together, then clamping it so it stayed secure. The table has a name and what could be a serial number on the bottom of the drawer; Butler, Style #517 - 1105. I researched it, but couldn't find anything other than there is a furniture company by the name of Butler.
Corner Table Top After

Corner Table Top Before

A little refinishing was all it needed, so I got busy sanding and stripping the entire table, paying special attention to the ridged detail in the front of each shelf. I used many sheets of folded sandpaper and sanding blocks which work great for the minuscule ribbing on the front of the shelves. If I wouldn't have removed all the finish, the new stain wouldn't have been absorbed, thus that area would have looked odd. It paid off, because the cherry stain I used looked great.

I finished off the piece with two coats of polyurethane and chose an antique porcelain knob to replace the almost invisible knob that had previously occupied the drawer's front. I was quite satisfied with the results, as this little table now graces the landing leading to the upper level of our house.

Corner Table on Landing

Tuesday, August 5, 2014

Yard Sale End Table Revival

End Table Before
End Table After
I got lucky with this little table. I needed an end table for the living room and couldn't seem to find one that worked in size. The previous one dollar garage sale Ikea table wasn't tall enough, so when I got this table at a yard sale, I knew I had finally found the right one. I'm glad I didn't pay much for it because it turned out to be quite difficult to strip. For whatever reason, there seemed to be endless amounts of lacquer on this table, requiring a LOT of coats of liquid stripper and more labor than I thought possible for such a small item! Wow! My arms were killing me after I had completed the top only and I still had the legs to do. Geez.