Friday, November 8, 2019

Old Pine Chest Makeover

Pine Chest

This old pine chest was once covered with a natural fibrous material, then after it was removed, someone had painted it with gloss black paint directly over the residue of glue and fibers left over from the previous surface. (Look below to see how the background looked as well as the fiber that had covered the chest).

The customer thought it was a cedar chest, but it turned out to be made from pine boards, not cedar, which has a distinct look and fragrance.
Top of Chest

Since the side surfaces were so rough, the only
way to make it look good again was to cover it with fabric. We were able to sand the top enough for it to accept paint and look pretty good, so we decided to paint the top and bottom with “gingerbread brick” paint and spray glue tan canvas duck fabric to the sides. It covered the rough exterior very well and gave it a fresh, new look and a chance at a new life.

With polished hardware, it turned out to be a nice piece of furniture. This was a decent sized storage chest, but light enough to be easily relocated if desired. I decided on adding two rows of rope to the top and bottom edges for more texture and to create a “pirate” chest look. For a final embellishment, I created a swash design, then transferred it to the front with a Frixion pen (which is easily removable once the project is complete) and then followed my hand drawn pattern with shiny brass tacks. These tacks not only created a lovely design, they help to keep the fabric in place, which I had adhered with Gorilla spray glue. All in all, a very fun fall project.

Sample of exterior

New Canvas on Background w/new handle

Solid Cedar Chest

Cedar Chest Before
Over the many years I have been restoring cedar chests, this is only the second one that was made of solid cedar. Many cedar chests have a decorative outer layer, which is created by carefully piecing many veneer sections together to create a vast style of designs and patterns.
Cedar Chest After

This cedar chest had no veneer, therefore the natural beauty of the cedar could be seen. As you can see, the cedar itself is such a lovely wood that it needs no embellishments. The hardware was made of copper, dulled by age, hiding the color beneath years of oxidation. Our customer had not wanted this cedar chest stained, just left natural and then protected with polyurethane only.

This chest had been painted at one time and the paint had been mostly removed, except for the left front foot. Why anyone would paint a cedar chest is beyond me, but it happens. Cedar is a natural moth repellant, so it makes for an excellent place for storing linens, quilts and seasonal items.

For this cedar chest, we removed the hardware prior to sanding the exterior to remove any remaining old finish, then filled the holes with a medium-tone wood filler. There had been a few gouges, other than that the exterior was in pretty good condition. All hardware was removed and polished. The oversized tacks were treated with black patina so that they would contrast well with the brass. Since it was being use as a coffee table as well as a storage chest, we replaced the worn interior hinge with a friction lid hinge, which is adjustable, so that it doesn’t fall on tiny fingers when it is being opened and closed. Once it was sanded and gouges filled, it received two coats of satin polyurethane and looked better than new.

Check out other cedar chests we have refinished by clicking on these links:

https://finalefurniture.blogspot.com/2016/08/1948-lane-cedar-chest_22.html
https://finalefurniture.blogspot.com/2015/04/elegant-cedar-chest-revival.html
https://finalefurniture.blogspot.com/2013/12/1945-lane-waterfall-cedar-chest.html
https://finalefurniture.blogspot.com/2012/06/my-waterfall-cedar-chest.html
https://finalefurniture.blogspot.com/2020/01/painted-cedar-chest-revival.html

Cedar Chest Before Open
Cedar Chest After Open


Monday, October 21, 2019

Antique Child’s Rocking Chair

Rocking Chair Before
Rocking Chair After
This antique child’s rocking chair had been painted white many, many years ago. With painted furniture, you never know what is hidden beneath the paint, so removing the paint from this special little chair would prove to be quite time-consuming, involving a lot of work and much, much detailing.

This type of restoration job generally uses my personal arsenal of tools including many types of sanders, wood carving tools (which I used to scrape away hard-to-reach painted places), a small dremel tool with an assortment of miniature sanding discs and diamond drill bit heads that work extremely well for tiny projects such as this. Of course, my most useful tool, my hands.

Any type of stripping/sanding work requires a lot of hands-on use, but the smaller the project, the harder the hands work. This causes super dry fingertips, sore finger joints, along with cuts, scrapes and bruises; all par for the course. Thus are the “hazards” of furniture restoration. I use a product called “Ghost Glove,” which is a lotion you apply prior to doing any type of hands-on work. This “invisible” lotion protects your skin from drying out and makes it easier to wash off in the event you are a mechanic working on a greasy engine. It’s one of many little things that makes the job just a bit easier.

Anyway, back to the chair. You’d think a small project is a quick one, well think again. This little gem took an entire week to strip clean of the old paint. Every tiny crevice, dowel end, edge and other hard to reach places had to be completely free of paint residue, or it would be visible when applying the stain. After a week of stripping, I spent an afternoon sanding the chair thoroughly, using folded sandpaper to get into the edges and grooves. Finally it was ready to be stained! I used “gunstock” stain, as I had for a few other jobs. This is a lovely golden tan color that really brings out the highlights of the wood.

This chair was actually my third “bloodwood” chair. I had done two other ones, so I recognized the signature “bleeding” red at the chair’s joints. You can see my other bloodwood chairs by clicking on these links: https://finalefurniture.blogspot.com/2019/05/bloodwood-rocking-chair.html
https://finalefurniture.blogspot.com/2018/10/sturdy-cherry-chair.html

Since it had only one coat of white paint on it, I knew this red I saw was the wood itself. It actually took the stain very well and I was happy with the results. I used two coats of satin polyurethane to protect it, let it dry for two days then began the tedious process of weaving new cane into the seat. The previous seat had a herringbone style weave. I chose a “New England Style Porch” chair design, which was perfect for this size rocking chair. Once the caning was complete, this little rocking chair was complete, with a major transformation.

Antique Oak Cabinet

Cabinet Before Refinishing

Cabinet After Refinishing
Oak is one of my favorite woods to work with. This antique
cabinet was made from solid oak, which had been previously stained in a medium golden color. While it wasn’t in terrible condition, it needed to be fleshed up, thus refinished. The first step as in most restoration jobs is to strip off the old finishes, including old stain and any lacquer or varnish.

The top of this piece had a bit of water damage as some one had left a planter on top and didn’t place anything beneath it. This is a commonly seen problem with wooden furniture if it is used to keep plants. If you don’t have something to protect the top from water, eventually even the most protected furniture will begin show signs of water damage, including a milky looking top coat to a deeper, darkening of the wood beneath the top layer which is harder to mask as it affects the fibers of the wood and is usually deeper than the surface. Either way, it’s always best to keep your plants on a porous barrier such as a plastic or aluminum pie pan or plate to properly protect your furniture from water damage.

Old Drawer Lining
New Drawer Lining
Once this cabinet was stripped, I chose “gunstock” stain, followed up with two coats of satin polyurethane.

The inside of the cabinet drawers and door area had been lined with outdated 1960’s era contact paper (it had to go!) I opted for wallpaper that had been used for a great replacement of headboard when we added a half bath to our upstairs. It worked well for drawer liner and mimicked the headboard front of the cabinet door. I used this for the three drawers and the shelf inside the cabinet. The final step is polishing the hardware and viola! We have a newly restored, lovely piece of oak furniture which will look great for many years.

Friday, September 27, 2019

Old Mahogany Desk

Old Mahogany Desk Before
Old Mahogany Desk After
Antiques are simply the best furniture to refinish and restore
because they are well made, have plenty of character and solid wood. This old mahogany desk is a great example of those characteristics as it was in supreme condition with everything still intact, no broken pieces. This is uncommon for such an old piece of furniture, estimated to be built around the early 1900’s based on the design and materials used. As with many antiques, this one had also seen some wear and a refreshing would bring back its original beauty.

The amount of detail on this desk was incredible. It had a wooden beaded border which surrounded the bottom edge, and again on the top portion of the legs. The drawer, which had no handles, did not stand out. In fact, unless you realized it was a drawer, it was easy to overlook. The fluted legs, carved rosettes and rippled crosspieces show elements of the time and craftsmanship that went into the process of building this old desk. Made of mahogany, it was also a sturdy and somewhat heavy piece of furniture.

The same elements that make an item of furniture beautiful such as all those details, also make it quite challenging to refinish and restore. We utilize many hand tools to remove the old finishes that accumulate between the details of each finely carved piece of wood that creates the unique design of an item of furniture, differentiating it from mass-produced pieces. This desk took several days to strip, sand and remove the residue of old finishes.

Staining was also a tedious process because there were many nooks and crannies that needed careful application of stain, as not to be missed. I chose chestnut gel stain which worked well on the vertical surfaces. Gel stain is great because it doesn’t drip onto everything beneath it and you have more control to where the stain ends up. I chose to spray two coats of semi-gloss polyurethane instead of brushing because of the many vertical surfaces. Spraying mush be carefully applied to avoid runs and drips, but is ultimately much faster than using a brush. The end result was a beautifully refinished antique, which once again glowed with its inherent character.

Thursday, September 26, 2019

Maple Rocking Chair Refinished With New Caning

Rocking Chair Before

This antique rocking chair had seen many years of use, unfortunately had gotten a knee through the seat and broke the original caning. The chair is well over 100 years old and likely a host to many relaxing moments, conversations and stories while gently rocking and listening to the many tales told.

Caning Process With Pegs
The chair had aged, the wood darkened, hiding the beautiful wood grain beneath. Since my customer had wanted the chair refinished as well as replace all the caning.

If you are unfamiliar with the chair caning process, there are two types of cane; "strand" cane and "pressed" cane. This chair had “strand” caning, which means you create the weave by measuring the holes and finding center, then string very long strands of cane back and forth through the holes, first vertically, then horizontally and both ways diagonally. While you are weaving, you keep the cane in place by using “caning pegs,” which fit into the holes, keeping the cane tight as you carefully move across and down the chair. If you’ve done all the steps right, you will have the “holes” as a result of the weave.
Rocking Chair After

Because this chair needed refinishing as well as new cane, it was necessary to snip away all the old caning first. This in itself was a time-consuming process because the original cane had been lacquered over so it was stiff and difficult to snip and remove. Once that was complete, the old cane comes easily through the holes, which vary in size. This chair had 1/4” holes and required size 3 medium cane.

After all caning was removed, I began the tedious process of stripping the old finish and revealing the true beauty of the wood, which was maple. Considering the age of this chair, it was in remarkably beautiful condition with no breaks in the structure. Indeed, it was as sturdy as it was the day it was made.

Once I had removed all the old stain using a variety of tools, including a toothbrush, brass brush and lots of in between sanding, I chose chestnut gel stain and finished it with semi-gloss polyurethane. I allowed the chair to dry for two days prior to caning it. It was a fairly large chair and had ultimately required three bundles (called hanks) of caning. I had originally ordered only two hanks, so I had to wait a few days while the third hank was on its way, catching up on other projects in the meantime.

The caning process for this chair took ten days, five days for the bottom and five days for the upper portion of the chair. I spent an average of four hours per day on caning this chair. It can be a strenuous activity, so taking frequent breaks is essential to avoid lower back pain. While caning isn’t super difficult, it does require patience, time and a skill set similar to weaving a basket. It is intensly  gratifying to see the final product after a few hundred feet of caning has been woven through it. Here’s to another one-hundred years and many more stories to share...

Wednesday, September 4, 2019

Tiger Oak Chair Refinished


Tiger Oak Chair Refinished
Tiger Oak Chair Before
This very old chair was one of the most unusual chairs I had ever refinished. I nicknamed it “The Bulky Chair,” because it has very manly characteristics, with wide armrests and a sturdy frame. The original caning was still intact, so I left it alone. Hidden under man-years of oxidation which causes the finish to darken, was a beautiful tiger oak finish, waiting to be visible.

I began by painstakingly removing the old stain and varnish (always a messy job) which took almost a week with a few hours per day dedicated strictly to this chair among other ongoing projects. The right armrest had a large ring stain on it which took a lot of patient sanding to remove as the stain had penetrated into the fibers of the wood.

It looked like a black paint can had been left there and had soaked into the armrest, thus leaving a dark ring which would not come off after stripping alone. After tedious sanding, starting with 80 grit and working up to 220 grit, I was able to remove the unsightly ring. I simply couldn’t leave it there, as it would have been visible even after the new stain was applied. It’s always best to remove marks that have been left whenever possible because it makes for a much cleaner finish. The hard work paid off!

The nature of chairs, with various sizes and surfaces, generally require a lot of hand sanding, especially when there are spindles. Because of the spiral legs on this chair, I used sandpaper exclusively, since curves such as these could not be sanded with a power sander. As you could imagine, this took a great deal of time.

I chose chestnut gel stain, which proved to be a great choice as it brought out the gorgeous tones of the wood. I let it dry for a day, then finished it off with two coats of satin polyurethane, waiting a day between each coat. So after about ten days, the chair was completely refinished.

Made of a unique style of tiger oak, this chair was a great candidate for refinishing. The seat was easily removable and made of black leather, adding to the “manly” style and size of the chair’s design. I believe this is a one-of-a-kind chair, much like the German Rocking Chair I had refinished many years ago. You can read about that chair by clicking on this link: https://finalefurniture.blogspot.com/2012/06/antique-secretary-desk-german-rocking.html

Monday, September 2, 2019

Drop Leaf Table Painted

Drop Leaf Table Before
Drop Leaf Table After

Every so often we get a unique job such as this drop leaf table. It was small, pretty and in need of a new look. The request was to paint the legs a soft white and paint the top black. This was a dramatic change for the white, yet worn table.

The unique feature of this table was that the center spindles opened up to support the leaves when the table was opened. This made the table easy to store as it was only ten inches wide when the leaves were down. Then when needed, easily opened to accommodate a few chairs and have tea time in ten minutes. I realized after I had begun working on this little gem that one of the bottom sections of a spindle was broken, held together with tape and painted over.

In order to repair the break and do it right, I removed the top from the legs along with all the hinges. This way I was able to reach the hard to get to places to properly prep the table for painting. It required a bit of stripping, a lot of sanding and three coats of spray paint on the legs and three coats of brush on paint for the top. I also cleaned the hinges and screws on my polishing wheel. I believe if you are going to take a piece of furniture apart, cleaning the hardware is part of the restoration process. It looks so much better than using the rusty hinges (or other hardware) and makes it easier to install.

TIP: A trick I’ve learned is after removing the rust from the screws, I scrape each screw along the edge of a bar of soap. This little extra step makes the screws easier to re-install as the soap acts as a lubricant without damaging the wood or the metal. To do a restoration right, it’s well worth the many steps involved since the results will be obvious and appreciated.

Drop Leaf Table Finished and Open

Friday, August 30, 2019

Antique Dry Sink Gets Painted

Dry Sink Before
Dry Sink After
This old dry sink had so many layers of paint on it, the surface was distorted. This meant that instead of scuffing and priming, it required a total strip to remove all those layers of paint and expose the wood. This is truly the right and best way to prep this type of project to accept new paint.

Our customer had wanted this old dry sink to be painted black, but wanted a white knob, so I chose to replace the original one (which was damaged) with a porcelain knob. That little bit of white on this black piece of furniture was perfect and added a little touch of whimsy. It’s the little things that can make a big difference and have a great impact on any furniture job. For this antique dry sink, the paint color really worked.

Tuesday, July 30, 2019

Antique Oak Buffet Refinished

Buffet Before
Buffet After
A lovely antique buffet made of tiger oak was an absolute joy to refinish and restore. Our customer wanted this old beauty to be lighter so to match her dining table and chairs, also tiger oak. This piece, refinished with lighter stain, really brought out the lovely pattern in the woodgrain, enhancing its natural beauty.

This buffet was comprised of two main components; the bottom with drawers and doors and the top which was a beveled mirror framed by curved oak pieces that matched the overall design of the buffet. Lots of craftsmanship went into the construction of this fine piece, therefore it deserved the best refinishing treatment possible. Each piece was carefully stripped, sanded and stained, then preserved with two coats of satin polyurethane. As always, we take the time to polish all the hardware so it too sparkles and shines, as does the newly refinished buffet. The hardware was all in tact and original, made of solid brass, the “jewelry” or “bling” of the furniture.

That beautiful beveled mirror really added so much elegance to this buffet. The interior was reinforced with a few nails (to secure the bottom panel) and the shelf was reinstalled upon delivery. This was one of our favorite pieces as it shows just how rewarding the restoration process can be.

Friday, July 26, 2019

Updated Cricket Maple Rocking Chair

New Silk Fabric Replaced Original Corduroy

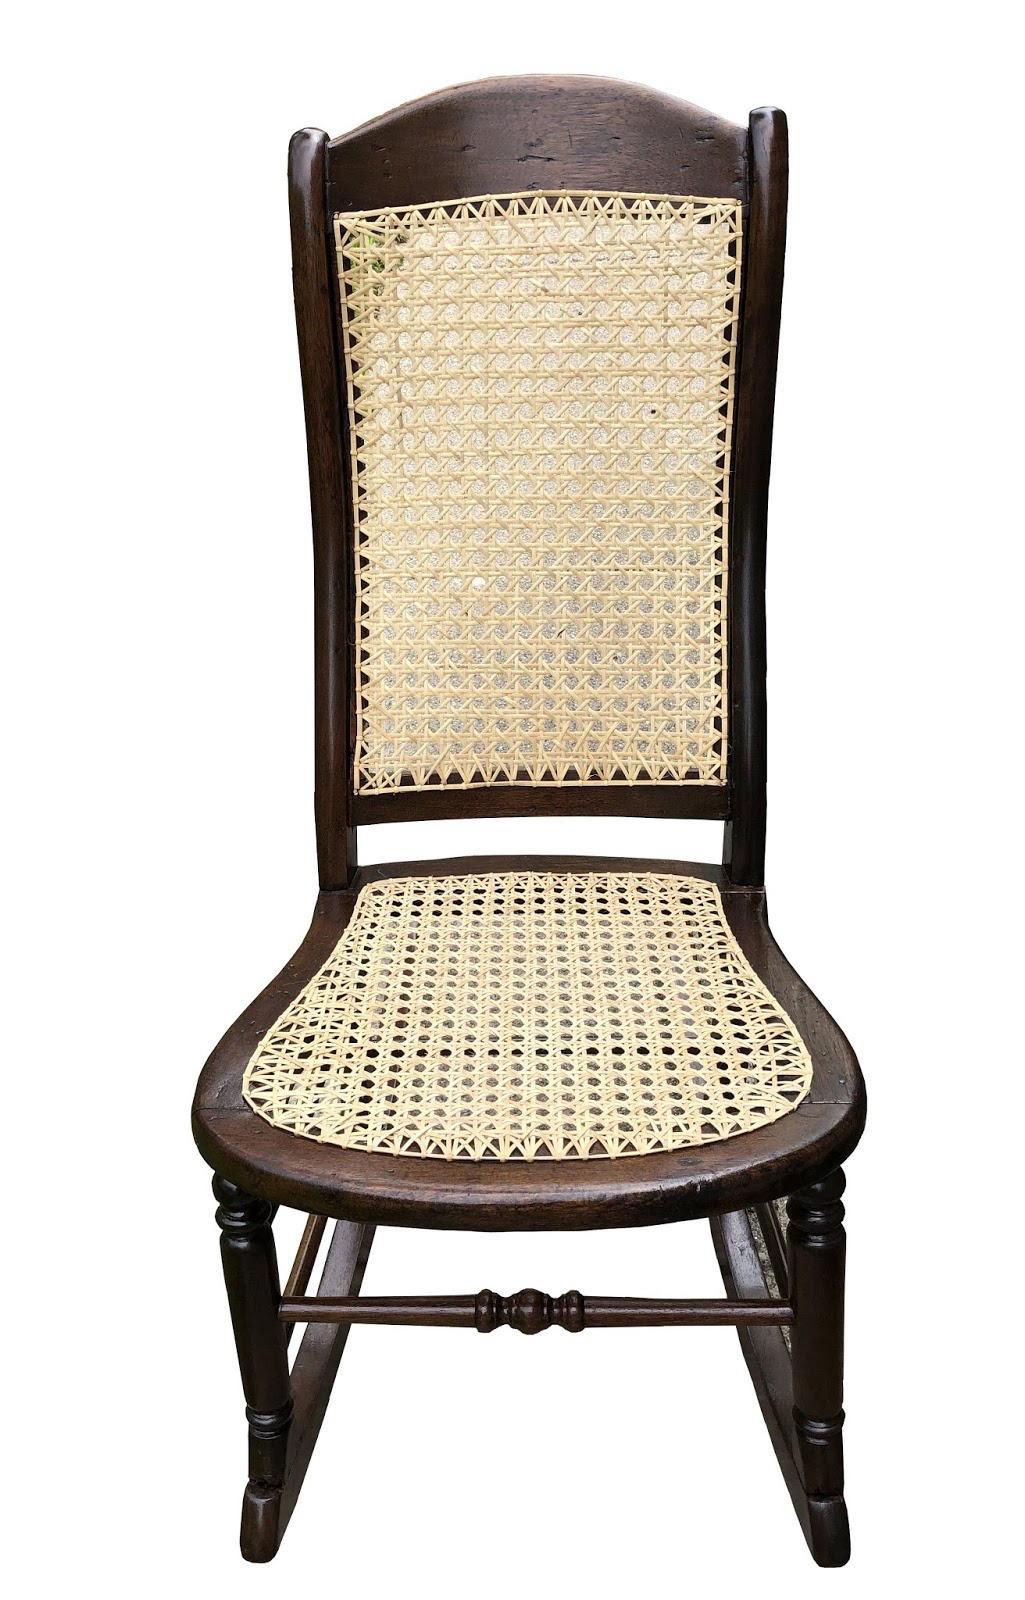
This is what is called a “cricket” rocker. The rocking mechanism is actually hidden underneath the seat and skirting of this cute little chair, allowing it to rock without moving the legs, as in a traditional rocking chair. I have done a chair similar to this one many years ago. It had the same rocking mechanism, but was a Windsor style chair with more exposed wood and no arm rest covers. You can see that chair here:
http://finalefurniture.blogspot.com/2012/09/the-ugly-rocking-chair.html

While similar to the other rocking chair, this one had many more components, thus required more work. But, since I had done a similar chair, I knew what to do on this one and in what order to work on each segment. As with the other checkered gingham chair, I began with the seat cushion. Like the gingham chair, it too had cording running along the top and bottom edges that curved around the shape of the foam. Luckily I was able to use the same foam for this chair. The fabric, a high-quality woven silk, required each raw edge to be serged so that they would not fray over time, causing the seams to split apart long before their time. This was an additional but necessary step.

fter I finished the seat cushion, I chose to work on the skirting and bottom part of the chair. I replaced the old, pushed in webbing with new upholstery webbing which is 3 inches wide and much stronger than the old rubbery plastic that was used. I attached the webbing with upholstery tacks (preferable to staples) and protected each raw edge with string tape. Once the webbing was done, I replaced the original webbing cover with another piece of the new fabric, with finished edges that were cut at angles in the corners to match the original.

I measured the two skirting sections, front and back, and cut two very long, continuous strips of fabric for each one. I measured each pleat to be 3 inches between pleats and it worked out to be the perfect amount to fit evenly from beginning to end for the front and again for the back. Remembering the difficulty I had attached the pleats in the other chair I had done, this time I stitched the pleats on the sewing machine, then carefully measured them against the chair before attaching them permanently.

After the skirting was complete, I made the arm rests, copying them from the original pattern as I did with the rest of the pieces and attaching them to the arms with two sets of Velcro straps so they don’t slide off. They were tricky because I cut the fabric to flow with the curve of each arm’s end. It looked much better having these arm covers fit the exact shape of the wood beneath.

The back cushion had its own challenges. The original cushion had four snaps that held it in place from the back of the chair. Anticipating the outcome, I made the new snap straps long enough to be adjusted when the time came to attach them. Prior to sewing the cushion front to back, I placed the straps where I thought they would go, pinned them in place, then sewed them to the back side of the cushion with long basting stitches. Once the cushion was done, I realized the straps didn’t quite reach the snaps, but no worries. I opened up the seams and pulled the straps further out to reach the snaps. Boy, was I glad I left additional fabric to reach the snaps once the cushion filled the fabric sides. (Experience really is the best teacher). Because the other chair also had snaps, I knew longer fabric would be necessary to make the new straps reach. (The other chair had three snaps on the top edge only, while this chair had two snaps on the top and two on the bottom).

Each cushion received a zipper in the back and bottom for easy removal if they require washing or dry cleaning. Making these type of seat cushions isn’t my favorite thing to do, but it is a great feeling to know that it is a skill I have developed with experience and a LOT of patience.

Vintage Wing Chair Gets New Fabric

New Gingham Fabric

This chair had an outdated blue and white plaid fabric which had been popular in the 1970’s. While still in good condition, an updated look was in order, so my customer choose this lovely gingham checkered fabric which suited the style of the chair as well as the era.

This chair was quite challenging because of the many components and sections it had. Because of these many components, I had to carefully remove them all, taking good photos and tagging each one, so I could refer to them later when I put the new fabric on each section. I decided to tackle the hardest piece first and worked on the bottom cushion, then the back cushion. Unfortunately, I have no photos of the chair before I began working on it, but I did take a photo of the cushion so I knew how to put it together.
Old Cushion

Because the bottom cushion had cording on the top and bottom edges, all the way around, and wrapping around the chair’s arms, I knew this was going to be a difficult job because I had done a chair such as this before and knew what was involved. Lining up the cording to match the curves is difficult, to say the least as you have a very narrow and sharply curved area in which to create a tightly fitted, finished corded seat. This was indeed the hardest part of the cushion.

Once that was complete, I “tested” it by slipping it over the cushion and was not pleased that the brand new seat I had just spent four days on no longer fit the original cushion. I opted for not making another cover, but getting a brand new cushion, custom made to fit my cover. The Foam Factory was a life-saver! I took my fabric piece there and left it in their capable hands to make a workable cushion that would look great and be extremely comfortable and fit well. Indeed, the new cushion was perfect and all the work I did was worth it because the seat was super comfortable and fit the chair perfectly.

The wing chair portion had fabric that faced the inside and outside, so each piece had to be marked, “inside facing right, outside of fabric, inside of fabric," etc. This method of marking my photos proved to be invaluable when I put it all together. The padded armrests were yet another story. The original foam was deteriorated and had suffered “dry rot,” which happens when foam cushions basically fall apart, leaving a dusty yellow residue. I replaced them with leftover cushion from another project which worked great. I used my scroll saw to cut and shape the 3” cushion. You can use an electric knife to cut thick cushions, but since I don’t own an electric knife, my scroll saw worked wonderfully, slicing right through the foam like butter. Having the right tools is essential for any project! Finally, the chair was done with new fabric and look pretty good if I do say so myself.

Maple Plant Stand

Plant Stand Before
Plant Stand After
Once in a while we get a small job, such as this solid maple plant stand, which was custom made by my customer’s husband. This plant stand resembled a giant chess piece and was made from three solid pieces of maple, which must have been cut from the actual tree, using each section as a whole piece as there were no splices within the piece. While smaller by comparison to most jobs we do, it was nonetheless very time-consuming to sand down to the bare wood. This was due to the nature of the hardwood itself as well as the finish used, which was varnish. I estimate it was made sometime in the 1960’s by the color and style, but I’m not sure. I used my favorite tool, my orbital sander for the top and bottom and a small hand sander for the posts in between.

Unfortunately, the hand sander wasn’t adequate to smooth the grain sufficiently to make it smooth enough to stain, so I ended up using the orbital sander on its side to get access to the sides. It took a long time and by the time I was done, my right hand was quite sore from holding the sander with one hand and supporting the object with the other hand. I chose Varathane Walnut stain which brought out the natural tones and colors of the beautiful maple. After two coats of satin polyurethane, it was done. Short and not too simple, but nice looking when completed.

Sunday, July 21, 2019

Old Steamer Trunk Renewed

Steamer Trunk Before
Steamer Trunk After

They say “every picture tells a story.” Well, if  This antique steamer trunk could tell a story, it sure would have plenty to say. We estimated this trunk dated back to around 1846, based on its condition and the materials used to create it (blunt end nails and very old leather straps). The exterior had seen better days (that’s the understatement), and the interior wasn’t much better. Needless to say we had our work cut out for us. Where do you begin on this type of enormous project? How do you start? It’s not like it comes with its own “restoration" manual.

Friday, July 12, 2019

Antique Table and Chairs Whitewashed and Painted

Antique Table Before
Antique Table After
This antique table had been in the customer’s family for
generations, however, she wanted an updated look for her lake house and decided that lighter and brighter would accomplish that. I recommended painting the chairs and legs and then using a “whitewash” technique for the table top. This was not an entirely new experience for me, as I had done something similar with a teak table and chairs set. However, this one was slightly and required a few additional steps. The table top was stripped and the legs got a better-than-average sanding, Next step was two coats of primer on the legs, then two coats of Sherwin-Williams "Pure White" paint. This table had a unique feature; the leaf extensions pulled out from each side then lifted up to the same level as the rest of the table. Because of this feature, the underside of these extensions had to be painted white to match the legs, since you could see them when the extensions were being used.

Tuesday, June 18, 2019

Very Old Pie Safe

Pie Safe Before
Pie Safe After

This pie safe was very, very old. My customer had told me it belonged to her great-great grandmother and had originally come from West Virginia. She believes it dates back to the mid-1800’s. It is one of the oldest pieces of furniture we have restored and refinished so far. (Another one is a steamer trunk, also from the mid-1800’s which will hopefully be done this month, so stay tuned!)

This pie safe had been through many, many years and oh, the stories it could tell if it could speak! It had been around during the civil war, the great depression and had paralleled the election and death of many presidents as well as welcoming many children, grandchildren and great-grandchildren to this world.

While it had “good bones,” it needed a great deal of work and of course, time. The top was bent and warped, the metal and body had been painted numerous times and was literally “caked” on, so it made sense to take this oldie apart and restore each piece separately as this allowed better access to the metal work and gave Jim a chance to straighten out and repair a few things, such as the broken bottom drawer and bent, warped top.

After removing a few layers of paint from the body, Jim painstakingly began a 7-week process of removing all the paint from the tin, which had a lovely pattern which was all but hidden beneath that paint. He chose to use a drill bit that matched the size of the holes to remove the paint which had seeped into each hole, then used a wood carving tool to remove the rest. This was a very long, tedious process, but it was the only way to do it right. Once done, he had to prime then paint the metal and let it dry completely before I could paint the body.

The customer had originally wanted the pie safe stripped and stained, but once the old paint was removed, the wood used to create this pie safe wasn’t stain-worthy, so we opted for painting it white with copper spray paint for the metal inserts which had a beautiful circular design, practically invisible under all that paint. The copper was an excellent choice, as it highlighted the beautiful paint color, Sherwin-Williams "Cotton White.” For a finishing “fun” touch, I selected polka dot knobs to replace the old wooden ones to add a touch of whimsy.

After this old beauty was done, the results were absolutely stunning, one which will go into our “Finale Hall of Fame,” for sure. Definitely a great and beautiful item of furniture which will be lovingly used for many years to come.


Monday, June 17, 2019

Ship’s Wheel Stripped

Ship's Wheel Before
Ship's Wheel After Stripping

Every once in a while we get an unusual job, not your everyday furniture. This teak ship’s wheel was such a job. He had also brought two other small things, a cup holder and a t.v. remote (or cell phone) holder. The customer had wanted this ship’s wheel to match his boat, so he wanted it stripped only. He would take care of the staining.

I started with the wheel lying flat on the table, then decided it would be easier to work on in an upright position, so I had Jim cut a small hole in my work table and I used this to position the ship’s wheel in it and spun it as needed to get into all the small areas on the spindles. It turned out to be a great idea as it helped me access areas that would otherwise have been very difficult to reach otherwise. This ship’s wheel took a full three days of detailed, time-consuming hand-stripping and sanding to remove the worn, peeling polyurethane.

The wheel had no stain on it, just polyurethane, but had begun to wear off and in some areas had suffered water damage. While sanding, I focused on those areas, but after it was to be stained, it would cover those areas completely. When I had completed the sanding, I took an old toothbrush and used brass cleaner to remove the oxidation from the center, which was made of solid brass. It look great when all that oxidation was removed and with a bit of elbow grease and brass polish, it shined up and looked brand new. This final touch made the ship’s wheel look great.

Ship's Wheel hole in Table


Spline Caning Chairs

Spline Caning Before

This dining chair was one of two which needed new caning installed in
Spline Caning After
the back only. The old caning had been broken (not uncommon for dining chairs) and needed replacement. This chair required the spline caning, which of the caning styles is the easier one compared to strand caning, which is much more time consuming.

While easier than strand caning, this particular chair was a bit harder due to the extreme curve of the top. This required paying attention to keeping the caning straight while installing because it becomes quite noticeable if caning is crooked. Therefore, keeping it straight and taut throughout installation is essential for a properly caned chair. Although the customer didn’t request the seat to be replaced, the new caning back  freshens up the chair and looks much better than the old, broken caning.

Sunday, May 19, 2019

Antique Rocking Chair w/caning

Rocking Chair After
Rocking Chair Before
This antique rocking chair was quite wobbly and needed the caning replaced. This chair had been made using "strand" caning, a different style than the push in caning which is held in place by using a spline. Unlike spline caning, this chair's construction was designed for using strand caning because of the holes surrounding the border of the back and seat.

First things first. After I removed the original, damaged caning, Jim took care of the broken and loose joints by taking the chair apart, then gluing it back together so it would be strong enough to endure the caning process, which required a lot of pulling and pushing through the strengthened holes. Then I sanded the old finish and stained it with walnut stain. Once the stain had dried, I sprayed the first coat of semi-gloss polyurethane so it would have some protection for caning. Then came the "fun" part.

I had done spline caning before, but this was the first time I had done "strand" caning and I have to tell you, it was extremely time-consuming work as you have to draw each strand of cane through the holes, secure the cane with pegs and work your way throughout the entire chair, first going front to back, then side to side, then the weaving starts. There are six (or seven) steps involved in this type of caning, the last steps are the diagonal weave, which creates the "holes" that define the design. It is tedious work, but if you follow the steps in the instruction booklet, you can do this yourself. I also watched a YouTube video put out by the manufacturer that we had purchased the chair kit from and found it extremely useful and referred to the video as well as the booklet many times during the process. The finished product was a lovely antique chair that will look elegant as it graces the parlor of a sitting room, hopefully for another century.


Sunday, May 12, 2019

Bloodwood Rocking Chair

Bloodwood Rocking Chair Before
This chair was the rocking chair version of a chair I had done previouslyhttp://finalefurniture.blogspot.com/2018/10/sturdy-cherry-chair.html This chair was identical to the first one, except for it being a rocking chair. I made an interesting discovery while stripping this chair. I  thought the first chair was made of cherry, thus the extreme reddish tones and variations of color throughout the chair.
Bloodwood Rocking Chair After
for the same person. You can read about that chair by clicking on this link:

This rocking chair had even more differential color tones in red, yellow and gold, so after some research, I was able to identify the true wood as bloodwood, an exotic hardwood grown in Brazil and Australia. I had never actually worked with bloodwood, but was familiar with it just by working with various woods over the last seven years. As you can see by the “before” and “after” photos, the old stain was hiding the glorious colors and tones of this unique wood.

The stripping process was tedious and very time consuming for this rocking chair, but necessary to expose the beauty beneath. Once stripped and thoroughly sanded, I chose red mahogany stain, as I did for the first chair which brought out the natural beauty. It seemed like the best choice as it worked well before. As with the first chair, I applied two coats of semi-gloss polyurethane for a smooth, even finish.


Monday, March 25, 2019

Antique Dresser With A "Secret"

Antique Dresser Before
Antique Dresser After
We love antiques. We love the look and feel of them as well as working with them, because unlike mass-produced furniture you tend to see in today's market, antiques have a unique profile, form and structure that is lacking in "modern" furniture. This specific dresser has a great story as well as a unique feature that was discovered after we brought it home.

The photos on the left and lower right are the dresser as we had seen it in the antique store (top) and after we got it home (bottom right). We had purchased the dresser right here in Marine City in December, 2015. Jim and I were