 |
| Armchair Before |

Tuesday, June 19, 2018
French Dining Chairs Reupholstered
Antique Cedar Chest Revival
 |
| Cedar Chest After Refinishing |
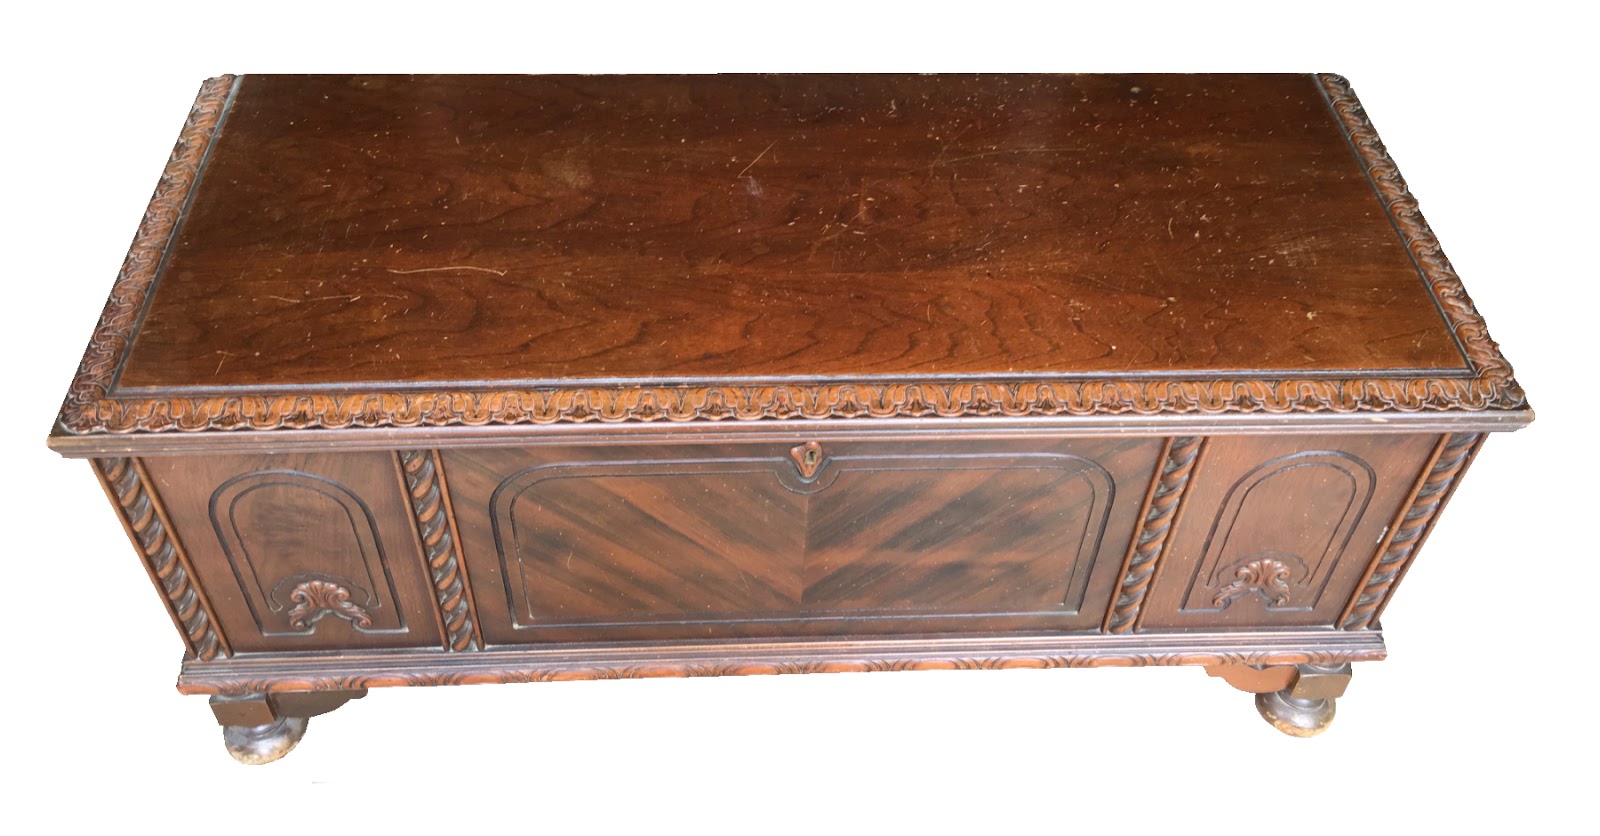
One of my favorite projects to refinish and restore is a beautiful cedar chest such as this lovely antique. The best part of this restoration was that it had retained all the original details such as the four vertical rows of rope braiding that embellished the front as well as the decorative trim surrounding the lid and another row of trim along the bottom. The chest was in pretty good shape overall, with surface scratches marring its top. Otherwise, it was in excellent condition.
Unlike other cedar chests I've done, this one had separate ball type feet which lifted it off the ground, allowing for easy relocating while working on it. Unfortunately, all that detail requires a great deal of time to remove the old finishes which requires a lot of time, patience and the right tools.
 |
| Cedar Chest Before Refinishing |
Never underestimate the power of an old toothbrush! Yes indeed a toothbrush is a key element to removing all that yucky, sticky residue that clings to the wood after you brush on the nasty stripper.
A good stripper will burn your skin on contact, so wearing gloves is essential while stripping. (I also keep a clean bucket of water on hand just in case I need to stick my hand into it. Ah, the burn!) A toothbrush, wood carving tools and a good brass brush are a great combination of tools to remove gooey varnish from all those nooks and crannies that would otherwise be impossible to reach. The ultimate goal is to reveal bare wood, that once sanded, is ready for staining. For this lovely cedar chest I used red mahogany stain and semi-gloss polyurethane, which brought out the natural beauty of the wood, showing its grain.
 |
| Cedar Chest After |
 |
| Cedar Chest Before |
For other cedar chests I've refinished, you can click on these links:
http://finalefurniture.blogspot.com/2016/08/1948-lane-cedar-chest_22.html
http://finalefurniture.blogspot.com/2017/04/decorative-walnut-antique-cedar-chest.html
http://finalefurniture.blogspot.com/2017/05/solid-cedar-chest-with-copper-accents.html
http://finalefurniture.blogspot.com/2015/04/elegant-cedar-chest-revival.html
http://finalefurniture.blogspot.com/2013/12/1945-lane-waterfall-cedar-chest.html
http://finalefurniture.blogspot.com/2012/06/my-waterfall-cedar-chest.html
http://finalefurniture.blogspot.com/2014/10/solid-cedar-chest.html
Sunday, June 17, 2018
Beautiful Antique Buffet Refinished
 |
| Buffet Before Refinishing |
 |
| Buffet After Refinishing |
buffet was cherry while the rest of it was solid mahogany. The four front legs had detailed spindles which required a great deal of time and effort to strip thoroughly. I removed the back upper edge so the veneer that had been peeling away could be glued back in place before it was securely glued into the original holes.
Two front drawers and two cabinets, one on each side, gave this buffet a nice, balanced look. I chose to use dark walnut stain with satin polyurethane after everything was stripped and sanded to bare wood, always the first step of any refinishing project. The top received four coats of polyurethane for extra protection and durability.
Brand new hardware made all of our hard work "pop" and looked beautiful with the newly refinished surface. And boy, did it ever look great once it was all done.
Dresser Chalk Paint Makeover
 |
| Dresser Before Chalk Paint |
 |
| Dresser After Chalk Paint |
It's hard to believe that this lovely oak dresser was once used to store tools. It had been in a garage for many years being used as a tool bench and work surface so there was a bit of warping, but overall it was still in great shape. Although it had seen better times, the bones and structure were still good and we knew we could make it pretty again. We were both up for the challenge. (This was the last item in the "chalk paint makeover" using Annie Sloan's chalk paint.)
This dresser required some carpentry work before any painting could be done. The top had been split into two pieces, so Jim had to "biscuit" the two sections together and clamp them tight, then fill in the seams so that once painted, you would never know it had been broken. The left front leg had its back part broken off completely, so Jim re-engineered a new leg section, forming it perfect to match the right leg which was still in tact. Some of the drawers didn't open and close very well, so they required a bit of shaving on the table saw.
After he was done with his part of the job, I then sanded the sides and got busy painting. For this dresser, I mixed three parts graphite with one part French Linen which yielded a gorgeous color of a slate-ish gray, perfect for this particular piece of furniture. The thick, rich paint went on smoothly and looked terrific. I knew I would love this piece, since I just knew it would take on the largest transformation of the other pieces I had painted. Using clear wax on the entire dresser with black only on the bottom for accent was just enough to give it a sultry, rich look and a durable surface
The new brass drawer pulls provided the last touch of "bling," which was absolutely the crowning jewel for this amazing old girl. Wow!
Bench Gets White Chalk Paint
 |
| Bench Before Paint |
 |
| Bench After Paint |
Chalk paint doesn't require a great deal of sanding or other prep work commonly needed to guarantee a greatly finished painted product, but I chose to lightly sand the entire bench anyway because that's just how I roll. Call it a pet peeve, but I feel that a little bit of sanding is better than no sanding.
I chose to brush the paint instead of spraying because I feel that you still get better coverage and a thicker, richer end product with brushing and for this piece of furniture, it worked quite well. That's another benefit of chalk paint; you don't see the brush strokes as it dries very smooth. The Old White paint was a light and bright color which literally changed the personality of this bench from outdated to outstanding. I added the customized stencil flower for a little something extra and it looked great. This bench received clear wax only so it will be protected from scratches and will be easy to care for.
Couch Table Chalk Painted
 |
| Couch Table Before Painting |
This [behind the] couch table was the second project I painted using "Annie Sloan's" chalk paint and wax system. As in the Queen Anne Table in the blog post below, I used Annie Sloan's French Linen chalk paint.
I gave this table a shabby chic "distressing" by
 |
| Couch Table After Painting |
Once the wax had dried 24 hours later, I was able to lightly buff the table until it had a smooth finish which will be easy to maintain and provide a lovely, durable piece of furniture for many years.
Queen Anne Table Chalk Painted
 |
| Queen Anne Table Before |
 |
| Queen Anne Table After |
Chalk paint is great to work with. The first coat shows the brush strokes, but this goes away after you paint the second coat giving you great coverage. It also dries very quickly, in 20 minutes so you can easily finish a project from start to finish the same day. Chalk paint has unique qualities and those qualities allow you to experiment with finishes, such as waxing. Prior to this project I had not heard of chalk paint waxing, but I was willing to give it a try.
Subscribe to:
Posts (Atom)