Showing posts with label antique desk. Show all posts

Sunday, September 18, 2022

Desk and Chair Gets Fresh Paint

Antique Desk After Painting
 
Antique Desk Before Painting

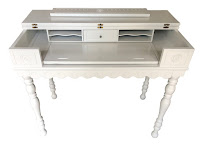
This small lovely antique desk was in great shape, but my customer wanted it, along with a matching chair, painted white to surprise his daughter for her birthday. 

This desk had quite a bit of detail, nice features and scalloped edges on the front and rosettes on each side and the center as well as spindled legs. The wood was mahogany, but had seen some wear, so painting was a nice alternative to refinishing. Many people love the natural look of wood, but there are times when painting is a great option. My customer chose a soft white for the set which looked amazing once it was painted. I prefer white for painting furniture because it’s always a fresh, light look that will match any décor.
Antique Desk Open After
Antique Desk Open Before

The desk had an unusual feature; you could use it as is, or flip the top to
expose a hidden area which has a pull-out area and a slots which could be used for stationary storage and supplies. It’s a really unique and valuable feature of this dainty desk.

The chair was a simple school style with narrow spindles and a form fitted seat bottom. This chair was a perfect complement to the desk as it could be used for many activities. The set was adequate to provide a nice work space but small enough to fit into a tight spot or tucked into a corner of a small room. 

Chair Before
Painting
Chair After
Painting

Monday, September 29, 2014

Charming Antique Desk

Desk Before
Desk After
This antique mahogany desk was an amazing yard sale find. Although the top left edge molding was broken, the bones were good, more importantly, the handles were all intact, a huge plus! I also knew it was a big refinishing job since I wasn't sure how to replace that top rail.

My first goal was to remove all the hardware before stripping the entire desk. I put all the pieces in a closed container so I don't misplace them. (This is the preferred method to which I keep track of small items.) This desk was unique, since all four sides needed stripping, as the backside can face the room if chosen. Normally the back of furniture remains unfinished, since most are placed against a wall. Because the back had been allowed to be seen required additional stripping and sanding.

The edge molding needed a great deal of detail sanding with an orange stick, all done by hand. The lower left edge molding was missing, so that too would need to be addressed. I ended up scrapping the top molding because it would be impossible to replace it and have it look the same, but not all was lost as I was able to salvage it and create the missing molding on the center drawer edge as well as the missing molding on the lower left inside of the desk. That was I was guaranteed to match the red mahogany stain, while maintaining the integrity of the piece.

After I removed all the brass hardware, I started the intense stripping process. It was quite time-consuming, between camping trips and other projects. I would spend evenings sitting on my desk polishing the various components of the hardware. Each drawer had seven (7) individual pieces; the handle, two coin-shaped brass rings, two screws and two nuts, which were round, making them a bit challenging to remove. This is one of the features of a very old piece of furniture; the hardware is usually not exact and quite different from modern hardware, down the the nuts (no pun intended.) I used copper cream, which works beautifully to remove tarnish from brass, then an actual brass polish to really give it a shine.

Taking the extra time to clean the hardware to its original condition makes any furniture piece look 100% better! The clean hardware is the "bling" to the furniture's new finish and well worth it.