Showing posts with label black. Show all posts

Monday, January 10, 2022

Two-Drawer Dresser Makeover


Two Drawer Dresser
Before

This cute little two drawer dresser was original much lighter and our customer had wanted a completely different look, so she chose two stain colors, black stain on the body and a warmer wood tone on the drawers and top. It was a great choice. We used “Minwax True Black” and “Varithane Carrington” for the wood tone. The two colors married well to create a dynamically elegant piece of furniture. 

Two Drawer Dresser After
She had also wanted artistic gold tones to highlight the bottom decorative scallop and edging as well as the natural curves along the bottom front and side edges. 

After Jim finished with the stain, I applied a craft ink called “Vegas Gold,” to achieve the accent paint she had wanted. I used a small sponge to dab the ink on the scallop decorative area and switched to a tiny paint brush for the thin criss-cross lines on the drawer fronts. I love doing the “crafty” parts of restoration as this gives it a unique look that stands out from the rest. This one was a real beauty.


Monday, September 2, 2019

Drop Leaf Table Painted

Drop Leaf Table Before
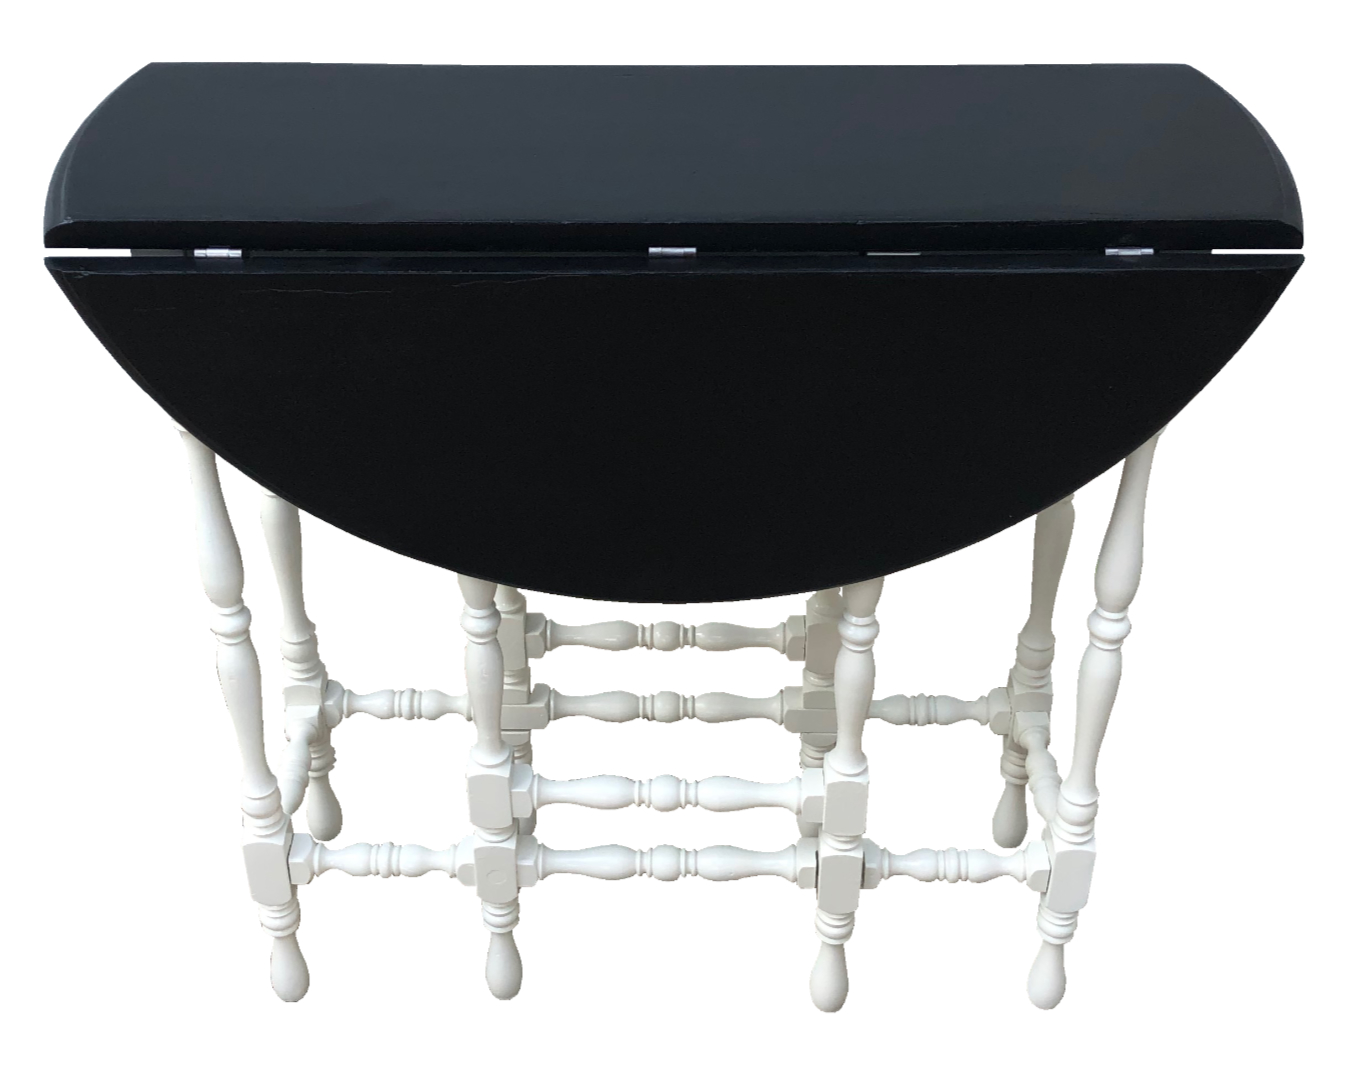
Drop Leaf Table After

Every so often we get a unique job such as this drop leaf table. It was small, pretty and in need of a new look. The request was to paint the legs a soft white and paint the top black. This was a dramatic change for the white, yet worn table.

The unique feature of this table was that the center spindles opened up to support the leaves when the table was opened. This made the table easy to store as it was only ten inches wide when the leaves were down. Then when needed, easily opened to accommodate a few chairs and have tea time in ten minutes. I realized after I had begun working on this little gem that one of the bottom sections of a spindle was broken, held together with tape and painted over.

In order to repair the break and do it right, I removed the top from the legs along with all the hinges. This way I was able to reach the hard to get to places to properly prep the table for painting. It required a bit of stripping, a lot of sanding and three coats of spray paint on the legs and three coats of brush on paint for the top. I also cleaned the hinges and screws on my polishing wheel. I believe if you are going to take a piece of furniture apart, cleaning the hardware is part of the restoration process. It looks so much better than using the rusty hinges (or other hardware) and makes it easier to install.

TIP: A trick I’ve learned is after removing the rust from the screws, I scrape each screw along the edge of a bar of soap. This little extra step makes the screws easier to re-install as the soap acts as a lubricant without damaging the wood or the metal. To do a restoration right, it’s well worth the many steps involved since the results will be obvious and appreciated.

Drop Leaf Table Finished and Open

Friday, August 30, 2019

Antique Dry Sink Gets Painted

Dry Sink Before
Dry Sink After
This old dry sink had so many layers of paint on it, the surface was distorted. This meant that instead of scuffing and priming, it required a total strip to remove all those layers of paint and expose the wood. This is truly the right and best way to prep this type of project to accept new paint.

Our customer had wanted this old dry sink to be painted black, but wanted a white knob, so I chose to replace the original one (which was damaged) with a porcelain knob. That little bit of white on this black piece of furniture was perfect and added a little touch of whimsy. It’s the little things that can make a big difference and have a great impact on any furniture job. For this antique dry sink, the paint color really worked.

Tuesday, November 25, 2014

Wine Bar

Cabinet Before
Jim found this lonely cabinet in an antique shop in Kalamazoo.
Wine Bar After

It may have been used as a place to put silverware and linen napkins. The cabinet had definitely seen better days, but seeing its potential, Jim bought it with a thought in mind.

A wine bar, sparked by the top two drawers which lent themselves to lying bottles of wine horizontally, as they
should be kept. This required a bit of ingenuity. First, he removed the old tile top and stripped the entire cabinet free of it's prior red

Thursday, June 19, 2014

Dressers Painted Black

Dresser Before
Dresser After
I found this little treasure at an estate sale along with another dresser (at bottom, which also had a special design detail at the lower edge). I especially loved the top drawer, which was slightly longer than the other three and had a great curvy top, reminding me of an Art Deco style. The dresser was pine, and while the wood was in great shape and would have look good stained, I chose black paint instead.

I knew the two dressers would look great painted black, as long as I could find matching knobs. As always, a full stripping was necessary before priming and painting. I was fortunate to find online sixteen knobs that were light gray porcelain with a "crackled" look. This was the detail needed to link the two different style dressers together so that they made a matched set. It never ceases to amaze me how much paint changes the look and feel of a piece of furniture. In this case, choosing the right paint linked two totally separate pieces together as a matched set.
Dresser Before
Dresser After

Tuesday, August 20, 2013

Petite Old Dresser Painted Black

Petite Dresser Before
Petite Dresser After
This little dresser was in really rough shape when we found it at an estate sale on Ursuline Street in St. Clair Shores two weekends ago, and we almost overlooked it. After we gave it a second glance, we knew we found a treasure. Seldom deterred by "ugly," Jim saw the potential in this unique petite piece and knew he could transform its outdated, rough look and give it a new and unique personality.
The dresser sports fluted sides, a rounded backdrop and the front two legs rest on rounded pegs for support. This little piece shows true craftsmanship of days gone by. Its five drawers were in excellent condition, but the exterior was in need of new paint. Given the luck we've had with black paint for the other dressers we've recently restored, we decided to use black paint again. We purchased new drawer pulls that we felt best suited the dresser's unique style and just as we thought, the dresser assumed a whole new identity, not at all resembling the sad little dresser we originally bought at the estate sale. It's now a respectable piece of furniture that anyone would be proud to own. With a little elbow grease, time and patience (of course vision), this old beauty has a modern, timeless look.

Here's another dresser that needed paint and TLC: http://finalefurniture.blogspot.com/2013/08/old-dresser-new-life.html

Friday, August 9, 2013

Antique Dresser Painted Black

Dresser Before Paint
I picked up this sad-looking dresser at a garage sale on the street I used to live on twenty years ago, right here in St. Clair Shores. It was smothered with kid's toys and dishes in the corner of their garage. I knew it was a buried treasure, so I asked the owners if they could pull it out for me. It was a little scary looking but I'm not that easily intimidated by old furniture. The scarier it looks, the better it turns out!) Bring it on! I had a vision and it was to be another black dresser with white knobs. So I bought it and had two young men load it into the back of the mini-van.

First thing was to take photos. The next step was to replace the sides as they had water damage and were deteriorating, but otherwise, this old piece was in amazingly good condition. After the repairs, Jim sanded the entire thing down to bare wood and primed, then painted it. Black was a great choice! Isn't it amazing what a little elbow grease and paint can do?

Here's another terrific dresser that needed paint and love: http://finalefurniture.blogspot.com/2013/08/petite-old-dresser-goes-modern.html
Dresser After Paint