Showing posts with label labor intensive. Show all posts

Saturday, July 26, 2025

19th Century British Plantation Chair Re-Caned

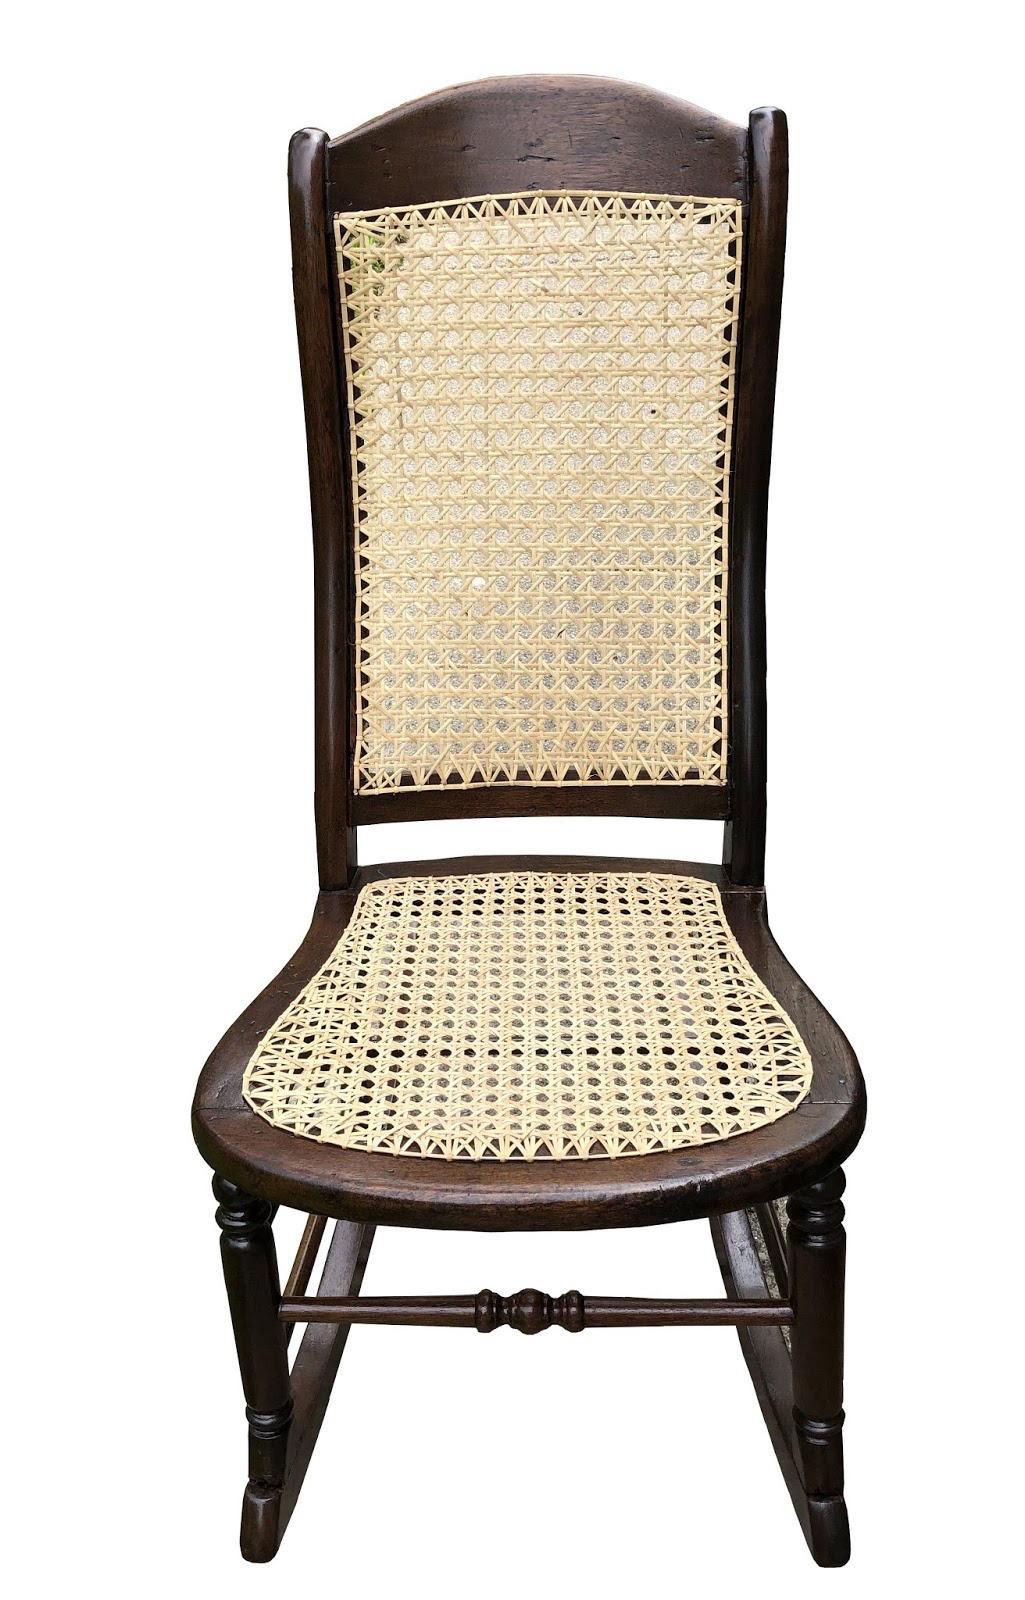
Plantation Chair
After
Plantation Chair
Before
Large, one of a kind and very labor intensive, this is a 19th Century British Plantation chair which was in dire need of new caning due to the broken seat area. This was definitely the largest caning chair I had ever done and possibly the largest chair I had ever worked on. I had never seen anything like it, so after some research, I discovered its origin. Used by plantation owners, chairs such as this were preferred for veranda seating due to the caning, which allowed easy air flow to cool its occupant. 

This chair had a feature that I had never seen, dual caning. The front of the chair had strand (woven) caning and the rear had press-in caning. I knew I had a great deal of work ahead of me when I took on this project and I was absolutely right. Because of the sheer size of the chair, it was difficult to reach the farthest points in the curved portion of the chair. There was a lot of stretching and reaching to achieve the results required to make this chair work.

I had to be creative with following the curve of the seat by using a cardboard sleeve to keep the caned strands somewhat even while weaving the strands from the top to the bottom edges of the chair. Since the strands had to follow the lines of the chair and stay loose, it was hard to determine just how loose they needed to be. This was quite difficult. Once I accomplished that, it was time to begin the actual horizontal weave. The farther down I got, the more difficult it became. I had to twist and turn my body to reach these distant areas. (See photo below). Eventually I finished the entire front and tackled the back. This was difficult because the front caning came through the part where the back push-in spline had to go. Suffice it to say it was quite challenging. I was extremely happy to be finished with this chair that took about six weeks of labor intensive work to complete.

Rene's weaving of
the plantation chair


Sunday, May 19, 2019

Antique Rocking Chair w/caning

Rocking Chair After
Rocking Chair Before
This antique rocking chair was quite wobbly and needed the caning replaced. This chair had been made using "strand" caning, a different style than the push in caning which is held in place by using a spline. Unlike spline caning, this chair's construction was designed for using strand caning because of the holes surrounding the border of the back and seat.

First things first. After I removed the original, damaged caning, Jim took care of the broken and loose joints by taking the chair apart, then gluing it back together so it would be strong enough to endure the caning process, which required a lot of pulling and pushing through the strengthened holes. Then I sanded the old finish and stained it with walnut stain. Once the stain had dried, I sprayed the first coat of semi-gloss polyurethane so it would have some protection for caning. Then came the "fun" part.

I had done spline caning before, but this was the first time I had done "strand" caning and I have to tell you, it was extremely time-consuming work as you have to draw each strand of cane through the holes, secure the cane with pegs and work your way throughout the entire chair, first going front to back, then side to side, then the weaving starts. There are six (or seven) steps involved in this type of caning, the last steps are the diagonal weave, which creates the "holes" that define the design. It is tedious work, but if you follow the steps in the instruction booklet, you can do this yourself. I also watched a YouTube video put out by the manufacturer that we had purchased the chair kit from and found it extremely useful and referred to the video as well as the booklet many times during the process. The finished product was a lovely antique chair that will look elegant as it graces the parlor of a sitting room, hopefully for another century.


Tuesday, June 19, 2018

French Dining Chairs Reupholstered

Armchair Before
If you have ever wondered why reupholstering a chair is costly, this is why. It's a LOT of work! Today I finished working on six dining room chairs which included two French armchairs and four regular chairs with caning for the back. The French armchairs had a padded back which was open (so the fabric was actually on front and back) as well as the seat. I was uncertain exactly how the fabric was attached to the chair, as there were no nails or staples visible. The reason for that was that the staples were hidden in a 1/2" deep groove, which was created with a router so the welting could be pushed into it.