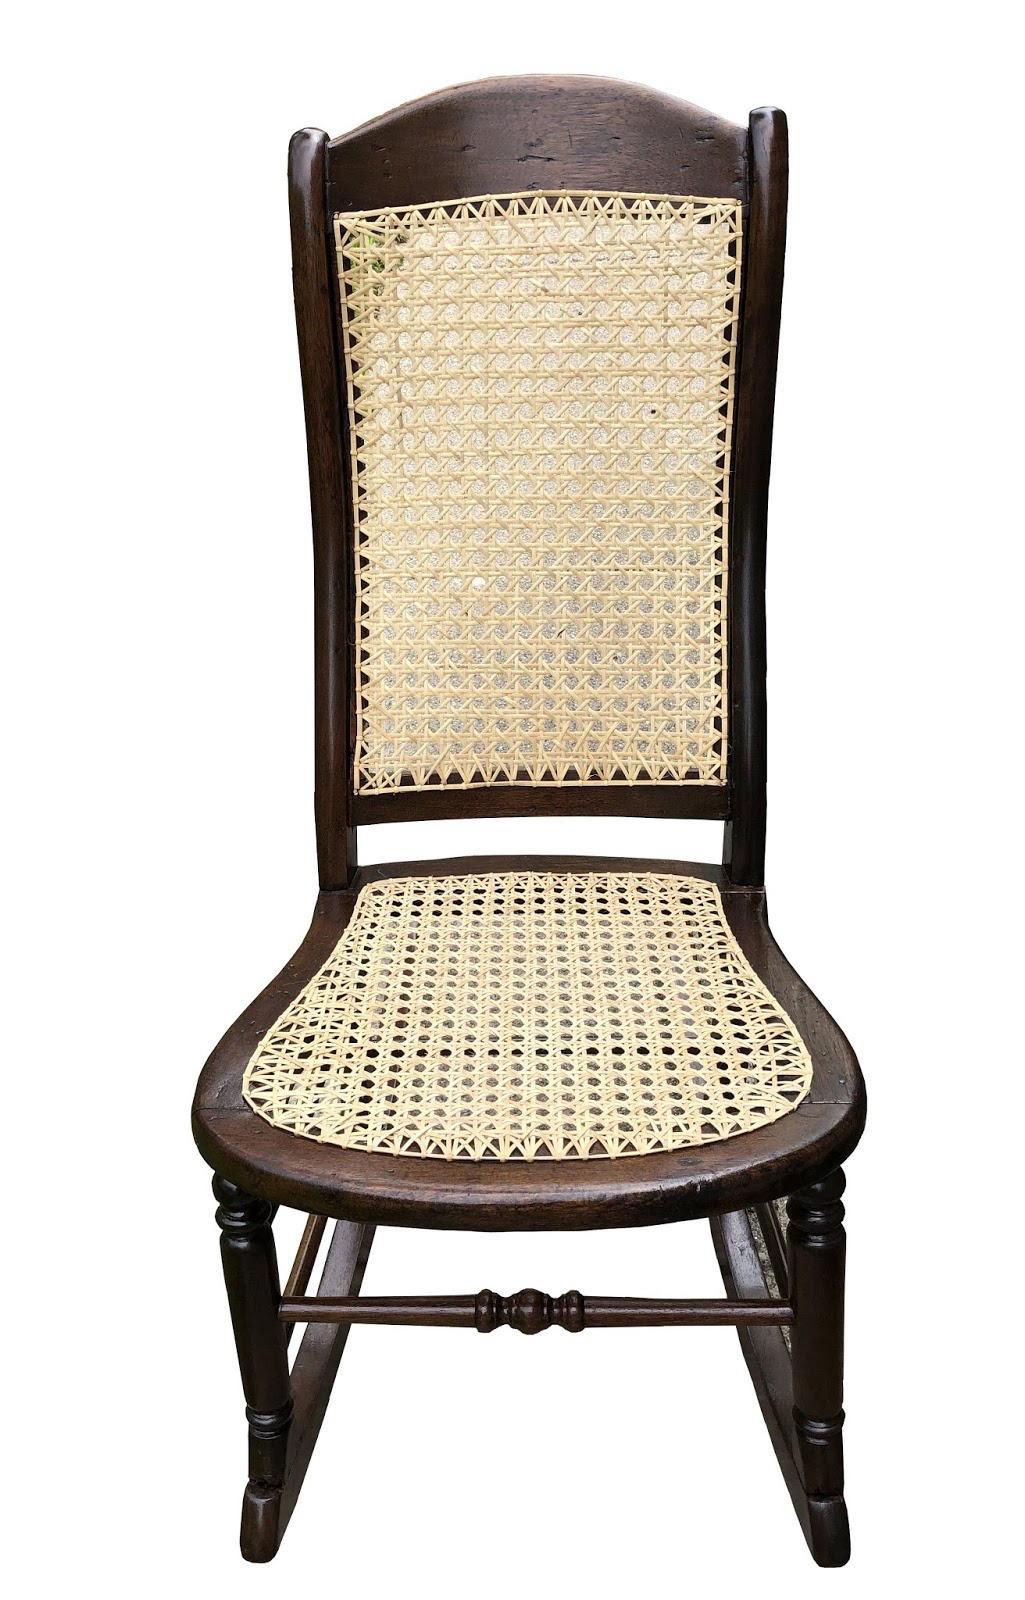
Showing posts with label strand caning. Show all posts

Thursday, March 11, 2021

Caning an antique rocker video

Caning a chair, final step

Video for caning a chair, final step - click here to view!

This is just a quick video that I wanted to share with my blog followers or anyone who wants an idea on how the process of caning is done without getting into the nitty-gritty. There are plenty of videos on all the steps, but I just wanted to highlight my favorite part of the process and what I’ve learned along the way. I have linked a few other videos on caning on my Youtube channel if you’re interested.

Enjoy!

Rene

😀

To view the entire seven-step process, click on the Peerless Rattan instruction video on the link below: 


Note: The Hammond video shows a pretty straightforward caning method, which uses a rectangular chair. You have to learn the differences in how to cane when you have a rounded back chair or a completely round chair. The part that varies at this step is that you must use the same holes several times to even out the front and rear caning. If you have more holes in the front than you have in the back of a chair, you’ll have to double up the amount of holes in the back to accommodate those extras in the front.

Monday, October 26, 2020

Newly Caned Dining Chair


Cane Chair Before
    My caning abilities are really being tested these days, but the
Cane Chair After
more caning I do, the easier it becomes and the more enjoyable. I’ve rounded another curve in my progress and have become more than just sufficient, in fact, I'm pretty darn good at it. This exquisite dining chair was likely the last survivor of a six to eight set of predecessors, therefore it deserved special treatment and caning done right. 

    This chair had been caned many years prior and had been broken, likely by a knee or a child that used it as a way to sneak cookies out of grandma’s cupboard. Cane gets brittle after so many years, therefore it is vulnerable to breakage as it ages. My choice to keep the cane original (not stain it) is to add years of service to the chair by allowing it to age naturally.

    This chair was “strand caned,” meaning the cane comes in 6’-8’ lengths, then carefully woven, one strand at a time through pre-drilled holes surrounding the chair’s seat. It’s a labor intensive process, both in removing the old cane as well as weaving the new cane. Cane comes in various widths from very fine 2mm to medium 3mm or larger sizes 4mm and up. It’s important to determine the size of the cane in relationship to the holes, or it becomes very difficult the further you get into the process if the cane is too large since you will be pulling many strands through the same holes over and over due to the nature of the weaving. While the caning process is repetitious, each chair is unique in the way it is woven to accommodate the shape of that particular chair. 

    This chair had a curved seat, wider in the front than in the back, therefore it was necessary to double up the strands in some holes and omit others for that direction. The most difficult part of the chair was near the arms, because the cane moves around them beneath the chair so getting the cane to slide through those holes was tricky. Having the right tools is essential as they make the difference between a mediocre job and an excellent one. Strand caning is done is six parts; front to back, left to right, front to back again, diagonal one direction then diagonal in the opposite direction and finally, binding. When you first begin weaving, you use caning pegs (see photo below) to keep the cane in place. Eventually the cane becomes tight so they are no longer needed. 

    The very last step is the tie off the cut cane beneath the chair by tucking it up under the loops created by the weave then tie them tightly prior to snipping off their ends. It was really a nice looking chair one the new cane was in place.

Caning pegs hold cane in place
during weaving process


Sunday, May 19, 2019

Antique Rocking Chair w/caning

Rocking Chair After
Rocking Chair Before
This antique rocking chair was quite wobbly and needed the caning replaced. This chair had been made using "strand" caning, a different style than the push in caning which is held in place by using a spline. Unlike spline caning, this chair's construction was designed for using strand caning because of the holes surrounding the border of the back and seat.

First things first. After I removed the original, damaged caning, Jim took care of the broken and loose joints by taking the chair apart, then gluing it back together so it would be strong enough to endure the caning process, which required a lot of pulling and pushing through the strengthened holes. Then I sanded the old finish and stained it with walnut stain. Once the stain had dried, I sprayed the first coat of semi-gloss polyurethane so it would have some protection for caning. Then came the "fun" part.

I had done spline caning before, but this was the first time I had done "strand" caning and I have to tell you, it was extremely time-consuming work as you have to draw each strand of cane through the holes, secure the cane with pegs and work your way throughout the entire chair, first going front to back, then side to side, then the weaving starts. There are six (or seven) steps involved in this type of caning, the last steps are the diagonal weave, which creates the "holes" that define the design. It is tedious work, but if you follow the steps in the instruction booklet, you can do this yourself. I also watched a YouTube video put out by the manufacturer that we had purchased the chair kit from and found it extremely useful and referred to the video as well as the booklet many times during the process. The finished product was a lovely antique chair that will look elegant as it graces the parlor of a sitting room, hopefully for another century.