Showing posts with label functional. Show all posts

Wednesday, December 1, 2021

Art Deco Vanity Better Than New


Vanity after w/o mirror

Vanity Before without mirror
Jim picked up this old vanity from the 1930’s, "art deco style," at an antique shop in Port Huron. It’s got the classic curvy waterfall style as we commonly see in cedar chests. It had five drawers but only four drawer pulls. I had envisioned something completely different, a
refreshing update, so I opted for paint. I chose Sherwin-Williams “Cotton White,” which is one of my favorite off-white colors. This painting preserved the antique look, but with an updated, twenty-first century functionality.

Vanity painted with mirror

Of course, as with every wood project, it’s essential to use a good primer so that the paint will adhere as it should. I actually used two coats of primer for the vanity and mirror. When Jim brought the vanity and mirror home, they were detached, so I had to take the photos separately since we didn’t put it together just for photos. Mirrors are super hard to photograph because they reflect whatever is opposite them, therefore I used a white sheet to block out the basement background (my workspace) but you get the idea. 

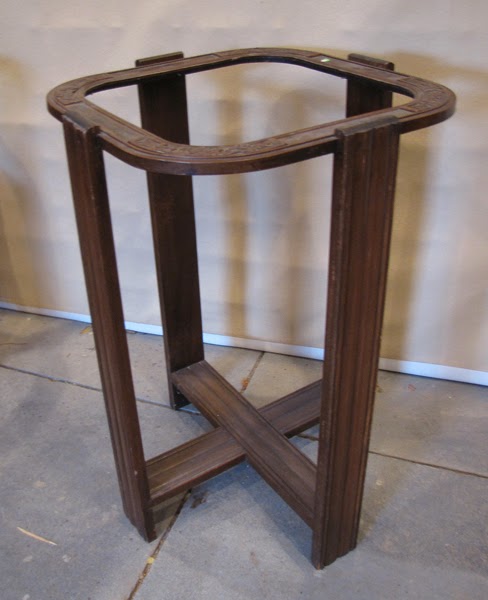
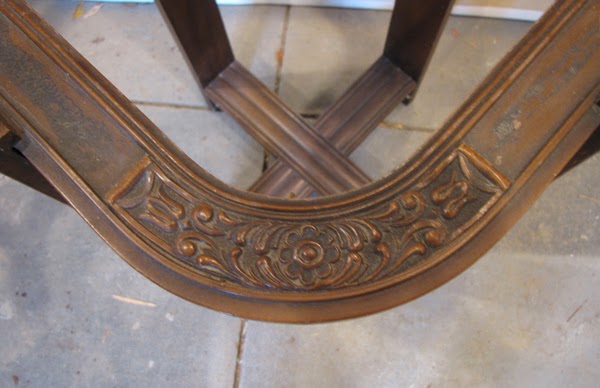
The mirror had some really cool design features. At the top there was an inverted curve of wood that had a carved flower motif in the center. That piece of wood, along with two metal brackets, held the mirror in place. 

To prepare the mirror for painting, I removed the mirror by removing the decorative piece of wood along with the mirror brackets, set them aside to be painted a different color. I sanded and primed the mirror and painted it to match the vanity. The bottom of the mirror had a decorative piece of wood that mimicked the front legs with an inverted curve. Both top and bottom wood accents were painted silver glitter. I opted to hand paint the flower in the center of the top mirror wood insert and it was the perfect little touch of glam. I painted the center drawer a bright tangerine and lemon yellow for the rest of the side drawers. I lined the bottom of the drawers with a super sparkly silver drawer liner. It was that perfect special touch that adds a bit of bling.

Once everything was done and the paint had dried sufficiently, Jim installed the new nickel drawer pulls which were the perfect finishing touch to this spectacular old piece of furniture.

Drawer liner center drawer
         
        Drawer liners
   
New nickel hardware

Wednesday, September 13, 2017

Art Deco Nightstand

Art Deco Nightstand Before

This art deco nightstand matches the dresser and vanity as part of an
Art Deco Nightstand After
art deco bedroom set restoration. This vanity had broken veneer on the top left and bottom left panels as well as noticeable amount of water damage.

To do this right, we removed the handles, drawer and door (as in the dresser) and replaced the broken veneer sections with new matching veneer, then continued the process of stripping, sanding and staining, using cherry stain and three coats of semi-gloss polyurethane to match the other two pieces in the set.

The lower portion of this nightstand opened like a door and had a single shelf on the inside which was just a piece of cardboard laid on top of two flimsy strips of wood that weren't original to the cabinet. We made a new shelf stained it to match and nailed it to the wood strips; much stronger than cardboard and allowing more options for storage on the bottom of this nightstand.

Tuesday, February 11, 2014

Peace Sign Mosaic Table


Table After Paint & Mosaic


Table Before Painting & Mosaic
I wasn't sure exactly what I had wanted to do with this table, but as I studied it, a plan took shape in my mind. The wood was nothing special, so I decided on painting it gloss black. Next, it needed a top. At one time there may have been a piece of glass in there, but it was long gone. After I replaced the top with a section of wood to fit the square-round shape, my idea became concrete. I would apply mosaic to the center and turn this old, worn out relic into a work of art.

As with all projects, it was necessary to first sand all the surfaces. I lightly sanded the entire table then primed it and painted it gloss black. It was the right choice as black lends itself to the most creative of choices for other applications. It also made my mosaic detail easy since I had decided on using mirror and cobalt blue glass.

Corner Before Painting
Corner After Painting
As the design took shape, I knew it needed a detail in the center so I selected a peace sign, an inspiration from my seven year old granddaughter. It was perfect. To complete the project, I painted the corner detail flowers with blue and white paint to accentuate the design, which was hidden until the paint revealed the hand-crafted detail that someone took a great deal of time to do a long time ago. The once worn and ugly table had been successfully turned into a usable work of art. I think you'd agree that this table took on an entirely different transformation and it only took two weeks!

Table Top Before
Table Top After