Showing posts with label wood. Show all posts

Wednesday, November 12, 2014

Antique Oak China Cabinet

China Cabinet Before
China Cabinet After
We acquired this gorgeous oak China cabinet and immediately saw its potential. It was in almost perfect condition, with three mirrors, two glass shelves and two wood shelves. It had the original hardware and needed just a little work to expose its original glory.

Of course, as with all projects, I get "before" photos before beginning any project. Luckily, this large cabinet had wheels, which made it much easier to maneuver.

Other than minor scratches, the cabinet needed little other than touch-up and a good cleaning. I carefully removed the shelves, then unscrewed the angled shelving brackets, each made of brass, as well as the original brass handle and put them aside to be polished. The bowed glass door's molding had a few missing nails, so I used my pin nailer to reinforce the tiny 1/4" molding, holding the glass firmly in place. (I love my small nailer!) This process can be a bit dicy, because the molding holds the glass in place, therefore you don't have a lot of space in which to shoot nails, as the last thing you want to do it break that glass! Once that was done, I cleaned the interior glass first, then the exterior, which showed a lot of dust and smudges, likely from being stored.

Thursday, October 30, 2014

Side Table


Side Table Before
Side Table After
I saw this little table at a resale shop for $6.86. I had been looking for a table such as this to keep my quilting supplies organized because it has a bottom shelf, so when I stumbled upon it, I bought it. The table was originally used with a built-in lamp, which I removed as I hadn't planned on using it that way. The lamp was ugly and in the way.

Never underestimate a smaller project! Just because this table was small, didn't mean it wasn't difficult to refinish. The spindles, I knew, would make it difficult because the area between them was hard to get to, so I ended up removing them and sanding that entire strip, much easier. The spindles were also spinning around, since they had not been secured to the table. That was my first priority, to make sure they stayed put, so after I had spent many days and hours stripping, sanding and refinishing the table, I used my pin nailer to secure the spindles so they no longer rotated. The hole left from where the lamp base once was secured had to be filled in, so I ended up cutting a small piece of wood to best match the opening, then glued it in place.

Ugh, this was a tedious, frustrating job, as most of them for myself turn out to be, but nevertheless, I'm happily using the table to keep my quilting supplies neatly tucked away underneath, on the shelf instead of dangling all over my floor!

Wednesday, October 29, 2014

Solid Cedar Chest

Cedar Chest Before
Cedar Chest After
A good friend had contacted me about refinishing an antique cedar chest that had belonged to his wife's grandmother. Up for the challenge, I took on the job with anxious enthusiasm. When he'd brought it over, it had one broken leg, the lower left front had been knocked off. Luckily, someone had kept that original leg, therefore it was easily fixable. I talked him into keeping the wheels, which added character and made the petite chest easy to relocate once it was refinished. After the repairs were made, it was ready to refinish.

Friday, September 5, 2014

Queen Anne Table

Queen Anne Table Before
Queen Anne Table After
I came across this scratched Queen Anne style coffee table and knew it would be a great table once I refinished it. The original finished was a sandy, lighter stain, so I decided to go much darker, giving it a richer appearance. This table was made of pine and wasn't an antique, but it had good bones and needed some TLC and time. After I completed removed the old finish, I gave it a good sanding with a 220 grit before applying red mahogany stain. I was correct in choose the darker stain. The table took on a whole new personality, as the photos speak for themselves.

Thursday, June 19, 2014

Oak Mantel Stained Darker

Mantel Before
This beautiful oak mantel was quite challenging because of the intricate design with fluted sides and so much detail in the top. There was also a hearth, which I took no photos. (Unfortunately, I didn't get a vertical photo of the mantel before I began stripping it.) My customer wanted a darker finish, so the first step was to completely strip the wood surface of its coating, which proved to be time-consuming and labor intensive work.
Mantel After
The process was to first completely remove the old polyurethane with a strong gel stripper, first using a large brass brush, then going into the grooves with a smaller brass brush, then finally gently scrubbing the surface with a #0 steel wool before the final coat of sanding with a 200 grit piece of sandpaper.

It was a couple of days before I was ready to apply the stain, which was "General Stain Java Gel," the customer's choice. I had not worked with a gel stain before and found that not only was the stain spectacular to use, it had a "cherry" fragrance,  not the typical "chemical" odor you expect from a chemical stain. It was thick and easy to work with and left a deep, rich finish after two applications. The end result was an elegant, rich darker mantel which the customer loved!

Tuesday, February 11, 2014

Peace Sign Mosaic Table


Table After Paint & Mosaic


Table Before Painting & Mosaic
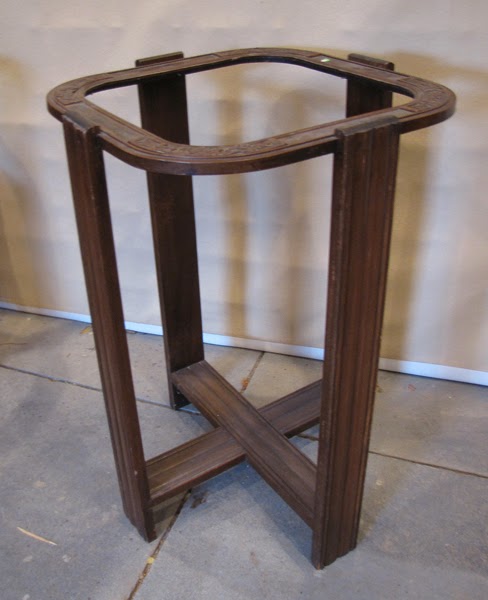
I wasn't sure exactly what I had wanted to do with this table, but as I studied it, a plan took shape in my mind. The wood was nothing special, so I decided on painting it gloss black. Next, it needed a top. At one time there may have been a piece of glass in there, but it was long gone. After I replaced the top with a section of wood to fit the square-round shape, my idea became concrete. I would apply mosaic to the center and turn this old, worn out relic into a work of art.

As with all projects, it was necessary to first sand all the surfaces. I lightly sanded the entire table then primed it and painted it gloss black. It was the right choice as black lends itself to the most creative of choices for other applications. It also made my mosaic detail easy since I had decided on using mirror and cobalt blue glass.

Corner Before Painting
Corner After Painting
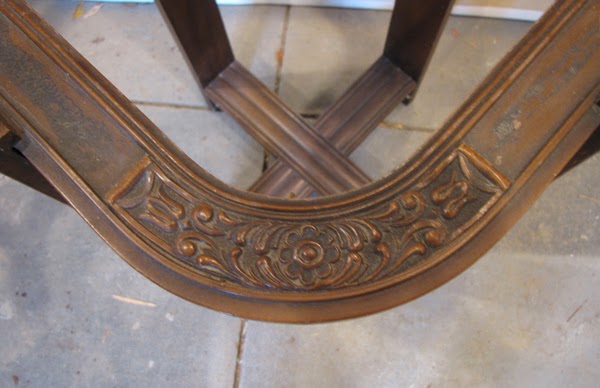
As the design took shape, I knew it needed a detail in the center so I selected a peace sign, an inspiration from my seven year old granddaughter. It was perfect. To complete the project, I painted the corner detail flowers with blue and white paint to accentuate the design, which was hidden until the paint revealed the hand-crafted detail that someone took a great deal of time to do a long time ago. The once worn and ugly table had been successfully turned into a usable work of art. I think you'd agree that this table took on an entirely different transformation and it only took two weeks!

Table Top Before
Table Top After


Thursday, January 30, 2014

Aging Chair Gets Facelift

Chair Before
Chair After
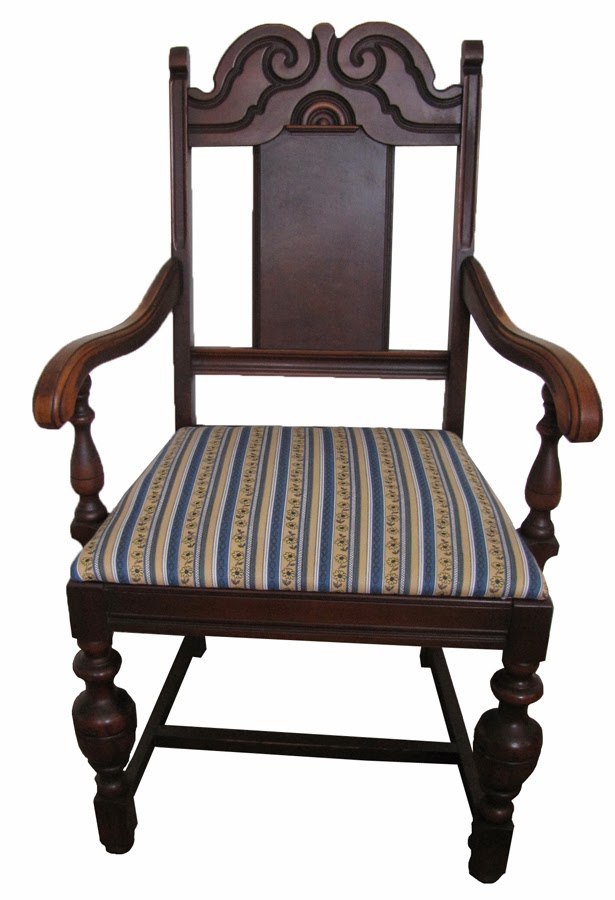
I acquired this chair from a friend who wanted it refinished. This was one of three dining room chairs that needed a new look. The original cushion was worn and dirty, so I reupholstered the seat with a traditional striped fabric, suitable to the style of the chair. I used boiled linseed oil to give the chair's natural luster a boost. The wood responded well and the results speak for themselves.

With great bones, the newly refinished, reupholstered chair is ready to shine.


Friday, August 9, 2013

Antique Dresser Painted Black

Dresser Before Paint
I picked up this sad-looking dresser at a garage sale on the street I used to live on twenty years ago, right here in St. Clair Shores. It was smothered with kid's toys and dishes in the corner of their garage. I knew it was a buried treasure, so I asked the owners if they could pull it out for me. It was a little scary looking but I'm not that easily intimidated by old furniture. The scarier it looks, the better it turns out!) Bring it on! I had a vision and it was to be another black dresser with white knobs. So I bought it and had two young men load it into the back of the mini-van.

First thing was to take photos. The next step was to replace the sides as they had water damage and were deteriorating, but otherwise, this old piece was in amazingly good condition. After the repairs, Jim sanded the entire thing down to bare wood and primed, then painted it. Black was a great choice! Isn't it amazing what a little elbow grease and paint can do?

Here's another terrific dresser that needed paint and love: http://finalefurniture.blogspot.com/2013/08/petite-old-dresser-goes-modern.html
Dresser After Paint

Antique Recliner

Recliner Before
My black buffet customer had a second piece of furniture she wanted
Recliner After
refinished, this antique recliner. This was an unusual piece since it had a brass bar that held the back of the chair in place. The way to turn this from a sitting position into a reclining position was to lower the bar manually. (This was built long before the days of La-Z-Boy!) It was made of solid tiger oak, very solid and sturdy.

We replaced the hinges with new brass ones. Someone had butchered the original hinges, cutting one of them to make it fit. We cleaned up the brass bar and polished it as well as the rest of the brass on the back of the chair. This piece had some great details, which were greatly accentuated upon completion.

Friday, August 31, 2012

Umbrella Stand Shines Again

Umbrella Stand Before
This is an unusual piece of furniture to be sure. We did work for a man who had bought two items of furniture from us and had already had us refinish a table for him. He had picked this up and wanted to see if we could do something to improve its looks. What is it? Well,
Umbrella Stand After
it's a very unusual Umbrella Stand, made out of about three different types of wood; maple, pine and mahogany. The front is a curved brass sheet which was badly marred and tarnished. The photo on the left shows the one spot Jim rubbed out the brass, revealing what promised to be a shiny metal buried underneath years of oxidation.

Friday, June 22, 2012

My Waterfall Cedar Chest

Cedar Chest Before Restoration
Cedar Chest After Restoration
A few summers ago I went to an estate sale right around the block from my house. I wasn't looking for anything in particular, so you can imagine my surprise when I found this gem in the basement, covered with Christmas items! I quicklyran upstairs and asked the woman how much she wanted for the cedar chest. My heart was racing as numbers ran through my head. Surely, she'd ask at least $75.00 for it as it was well worth it. Other than surface scratches, it was in mint condition. The shelf on the interior was broken and its bottom was missing, but I examined it closely and found no broken veneer or other broken wood on the exterior. The interior looked as new as the day it was made and smelled strongly of cedar. I was so engulfed in my thoughts, I thought I misinterpreted what the woman had said about where it came from. I was already envisioning this beautiful 1940's chest restored to mint condition.

I asked her again how much she wanted for it and she tilted her head and said, "I don't know, how about $5.00?" I said, "Sold!" So I paid her for the chest and told her I'd be back in an hour with my husband and son to pick it up. Then I headed home in anticipation after I had message my two guys to make sure they don't stop anywhere on their way home from work because I needed them to pick up an item I'd purchased. Andy came over around 5:00, shortly after Jim got home from work and we all headed over to the estate sale on "Love" street, appropriately named for my lovely cedar chest. They loaded it up in the van and poor Andy had to squeeze between the chest and the seats since we had to put my "stow and go" seats down, but for the short trip home, it wasn't a biggie.

The cedar chest went right into the spare bedroom, but I got to work on the broken shelf right away. I repaired the broken side and replaced the bottom, then put it aside until I could get to the chest. With all the other project I was working on, I didn't get to the chest last year. I did some research on Lane cedar chests and discovered that each one has a serial number on the bottom. If you reverse that serial number, you have the date the chest was made. Mine was made on September 6, 1944.

Finally, this May, I stripped it down and refinished it completely. I lined the shelf with green felt and put it back inside and loaded it up with linens. I am now proudly displaying my $5.00 cedar chest in my spare bedroom. It was a once in a lifetime find and I'll treasure it for a long time!
Interior prior to fixing shelf
Interior with shelf installed