Showing posts with label mahogany. Show all posts

Wednesday, August 2, 2023

Antique China Cabinet Refinished

China Cabinet Before

China Cabinet After

Grandmother's antique China cabinet needed an overhaul. While in pretty decent condition (we’ve seen much worse!) Made of mahogany, this cabinet had plenty of space with shelving on the top and doors and drawers on the bottom. 

The middle top had a decorative piece of wood that had broken and become disconnected, so Jim glued it back together and put it back on top where it belonged.

In the process of restoring this cabinet, it was necessary to remove the decorative wood that covered the upper door to properly stain that area. The glass was removed to preserve and protect it during the restoration process. Each step is carefully taken to get the best results.

Our customer had wanted to replace the original wooden knobs with new ones and she chose black knobs, which looked great with the refinished cabinet. Jim used a red mahogany stain with satin polyurethane which was the perfect finish for this piece. Upon completion, this old cabinet certainly looked much better than when we got it.

Sunday, September 18, 2022

Desk and Chair Gets Fresh Paint

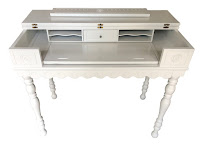
Antique Desk After Painting
 
Antique Desk Before Painting

This small lovely antique desk was in great shape, but my customer wanted it, along with a matching chair, painted white to surprise his daughter for her birthday. 

This desk had quite a bit of detail, nice features and scalloped edges on the front and rosettes on each side and the center as well as spindled legs. The wood was mahogany, but had seen some wear, so painting was a nice alternative to refinishing. Many people love the natural look of wood, but there are times when painting is a great option. My customer chose a soft white for the set which looked amazing once it was painted. I prefer white for painting furniture because it’s always a fresh, light look that will match any décor.

Antique Desk Open After
Antique Desk Open Before

The desk had an unusual feature; you could use it as is, or flip the top to
expose a hidden area which has a pull-out area and a slots which could be used for stationary storage and supplies. It’s a really unique and valuable feature of this dainty desk.

The chair was a simple school style with narrow spindles and a form fitted seat bottom. This chair was a perfect complement to the desk as it could be used for many activities. The set was adequate to provide a nice work space but small enough to fit into a tight spot or tucked into a corner of a small room. 

Chair Before
Painting
Chair After
Painting

Thursday, March 10, 2022

1940’s Night Stand Restoration/Revival

Night Stand After
 
Night Stand Before

Some furniture has a lot more wear than others, therefore those most used could be in dire need of restoration and refinishing. Such is the case with this 1940’s night stand. It was made of solid mahogany, no veneer, which is a sign of a well-made piece of furniture. 

Most of the furniture we refinish has veneer. Sometimes it’s in great condition, other times it can be chipped a little bit or in major need of replacement. Not having veneer made this night stand much better to work on. It had definitely seen lots of use, especially the top, which was worn and scratched. 

It looked like someone tried to remove the finish on the left side of the top at some point in time, but never followed through with the rest of it. Not uncommon for someone to begin the stripping process and stop before getting too far into it once they realize that it’s a lot more difficult than they had originally planned. Using the right stripper is only part of the refinishing process. We always say, “if it doesn’t burn your skin, it’s not strong enough.” That sounds crazy, but it’s true. A good stripper is an essential part of furniture refinishing and restoration as it’s the first step before anything else can be done. 

Night Stand Drawer After
Night Stand Drawer Before

This night stand took me four days to strip from start to finish. Although the legs were Queen Anne style instead of spindles, they were still challenging to strip because they are curved. 

The tools we use to strip are straight, such as a putty knife and carving tools, so stripping a curved part of furniture takes a longer time than a straight section. And of course all the old finish must be removed or it’s impossible to sand and stain it. It’s all part of the process. The better the prep, the better the results. 

For this little gem, I custom-mixed red mahogany stain with a bit of English chestnut to give it a rich, natural color that was true to the original color. One of the fun things of refinishing/staining, is mixing two or three stains to create a completely new, unique color. Using your creative license is encouraged when working with stain colors. I chose a semi-gloss polyurethane to protect the stain. The drawer pull was pretty dull, so it got polished and painted with gold spray paint. The original pull was not brass, just metal, so painting it gold was a better look for the drawer. For a bit of whimsy, I painted the drawer’s interior and put a piece of glitter drawer liner on the bottom for a bit of “bling.” I was happy with the results as the refinished night stand was once again restored to its former glory.

Wednesday, January 26, 2022

Mahogany Buffet Refinished

Buffet Before

Buffet After
One of my personal favorite refinishing woods is mahogany. Being a darker wood with a natural reddish tone, when refinished the woodgrain is more apparent, making it look fabulous. When furniture comes out of a manufacturing plant, much of it hides the natural grain of the wood. Unlike refinishing, furniture right from the factory woodgrain isn’t as prominent as it is upon stripping.

This buffet was a good, sturdy piece that had seen some wear, but overall was in great shape. There were minor scratches on the top, a few on the front legs and sides, but nothing that stripping and sanding can’t remove. Surface scratches are almost always removed when sanding, however, if the scratch is a gouge, sanding can only do so much. Especially with veneer furniture. If you sand too deeply, you will remove the veneer and go too far into the wood beneath (big problem!) That’s why we love working with antiques; the wood, even if it has veneer, is thicker and much more durable, thus better to work with on the refinishing end. 

That being said, the finishing product looks fabulous. Once it was stained and protected with satin polyurethane, Jim polished the original hardware, a Federal Style, and once again the piece looked like new (if not better!) I love the way hardware makes a piece truly stand out. Over time the brass will oxidize, faded and dull. But polished, it shines and adds beauty and freshness to any piece of furniture.


The beauty of working with a piece such as this mahogany buffet is that you have so many color choices with stain. Our customer chose “Carrington,” by Varithane. It’s a rich, warm color with no overly red tones. Mahogany can accept most stains, but seldom can you go a lot lighter with it because the wood is naturally reddish and darker, like walnut. A good tip to keep in mind when choosing stain is the wood itself. 

Darker woods usually cannot go much lighter than their natural color, but lighter wood, such as maple, birch or pine can accept both light and dark colors of stain. An example is if you were to put the same color stain on five different types of wood, each one would look different. Some wood has more grain than other wood, such as oak compared to birch. There are also different types of the same wood; tiger oak, tiger maple, birds eye maple, and so many more. The choices are endless as are the stain colors, so it’s not difficult to narrow down which stain is the right one for you.

Luckily we have plenty of experience in choosing the right stain for your project (unless you are 100% sure what you want). But no matter, the finished furniture item will always be the one you love the most.

Wednesday, December 1, 2021

Art Deco Vanity Better Than New


Vanity after w/o mirror

Vanity Before without mirror
Jim picked up this old vanity from the 1930’s, "art deco style," at an antique shop in Port Huron. It’s got the classic curvy waterfall style as we commonly see in cedar chests. It had five drawers but only four drawer pulls. I had envisioned something completely different, a
refreshing update, so I opted for paint. I chose Sherwin-Williams “Cotton White,” which is one of my favorite off-white colors. This painting preserved the antique look, but with an updated, twenty-first century functionality.

Vanity painted with mirror

Of course, as with every wood project, it’s essential to use a good primer so that the paint will adhere as it should. I actually used two coats of primer for the vanity and mirror. When Jim brought the vanity and mirror home, they were detached, so I had to take the photos separately since we didn’t put it together just for photos. Mirrors are super hard to photograph because they reflect whatever is opposite them, therefore I used a white sheet to block out the basement background (my workspace) but you get the idea. 

The mirror had some really cool design features. At the top there was an inverted curve of wood that had a carved flower motif in the center. That piece of wood, along with two metal brackets, held the mirror in place. 

To prepare the mirror for painting, I removed the mirror by removing the decorative piece of wood along with the mirror brackets, set them aside to be painted a different color. I sanded and primed the mirror and painted it to match the vanity. The bottom of the mirror had a decorative piece of wood that mimicked the front legs with an inverted curve. Both top and bottom wood accents were painted silver glitter. I opted to hand paint the flower in the center of the top mirror wood insert and it was the perfect little touch of glam. I painted the center drawer a bright tangerine and lemon yellow for the rest of the side drawers. I lined the bottom of the drawers with a super sparkly silver drawer liner. It was that perfect special touch that adds a bit of bling.

Once everything was done and the paint had dried sufficiently, Jim installed the new nickel drawer pulls which were the perfect finishing touch to this spectacular old piece of furniture.

Drawer liner center drawer
         
        Drawer liners
   
New nickel hardware

Thursday, October 14, 2021

Antique Mahogany Secretary


Secretary Before
The art of letter writing is almost a lost art. With the influx of everything
Secretary After

instantaneous with text messaging, e-mail and FaceTime, who wants to take the time to hand write anything? Yet, there’s something appealing to putting pen to paper and feel the words as they appear on your page. This antique mahogany secretary had been in the family for many years and had likely been witness to many such letters. It was probably used for bill paying, keeping track of household expenses and storing those stationary items to keep them accessible when you needed them. Because it was used quite a bit over the years, it was quite worn and needed refinishing. It’s hard to see in the picture, but the “after” photo shows new knobs, which were glass. (Unfortunately they don’t photograph very well.)


Secretary Inside After
Secretary Inside Before

Mahogany is one of my favorite woods to restore. It has such lovely patterns and tones that are rich with color and movement. This is a dream to strip and stain as it takes the new stain quite well. The interior also needed to be stripped, which is quite tedious because it had to come apart, otherwise you can’t reach those little cubby holes where envelopes are kept. It’s time-consuming work, no doubt about it. These things simply take a lot of time. 

There are no shortcuts to quality work. This piece, like many of that period, was a perfect size for a small office and a tidy way to keep track of those pesky papers you don’t want cluttering up your table. After it was stripped, sanded and re-stained then protected with two coats of polyurethane, it was once again a lovely piece of furniture that will be useful for many generations to come.

Friday, January 15, 2021

Checkerboard Antique Card Table


Card Table Before

Card Table After

Every once in a while we get a totally unique piece of furniture that is one in a million. One of the many aspects of furniture restoration is the wide variety of items that come our way. It’s always a surprise! At times the surprise comes when we see it. Other times the surprise comes after we remove the years and years of grime to reveal the beauty beneath it. This antique card table with a checkerboard center was such a piece.

It’s hard to know origins of furniture, such as how old an item is, where it was made, what kind of wood is was made from. We have seen mostly oak, walnut, cherry and even some more exotic woods such as bloodwood and olive wood. At times we’ve seen wood we can’t easily identify. With this unique table we quickly realized it was made of many types of wood combined to create a work of art which ended with a center design in a checkerboard or chess table.

However, it was completely covered with years of grime, dirt and who knows what else. Hidden away in a garage for over thirty years, this table was likely overlooked and became part of the back storage of the space it occupied until my customer yanked it out with the intention of getting it refinished. It looked like a major undertaking since there were many pieces of wood missing that would have to be replaced as well as all that grim removed with stripper and carefully sanded so that none of the wood would be destroyed in the process. And yes, each piece of wood you see has been individually placed into the table! This alone makes it a highly unique work of art. 

Once stripped, the gorgeous wood beneath was exposed. It was comprised of maple, bird’s eye maple, walnut and mahogany. Since many of the original tiny pieces were missing, it was necessary to cut and carefully place each missing piece in its place so that it blended in with the table and look as if they were always there. As you can imagine, this was a very time-consuming process. After all those missing pieces were installed and glued, it was then stained and protected with four coats of strong polyurethane so it will hold up for another one hundred years at least. A timeless beauty can say, “Checkmate.”

Card Table Before
Card Table After

Wednesday, November 18, 2020

Antique Mahogany Swivel Table


Swivel Table Before

Another beautiful swivel table! This antique was made of mahogany with brass accents. The lower portion of this table had a unique “harp” design with three brass prongs, that cleaned up real nice. The top was in rough shape and had seen years of use, including water damage likely from placing a planter directly not the wood. It’s always a good idea to have a planter with a tray or aluminum pie tin to eliminate water damage. 

Swivel Table After
This table was in need of stripping, sanding and new stain. We chose special walnut stain and three coats of semi-gloss polyurethane to ensure protection from everyday use. All the brass accents, feet, harp metal and two small knobs (not seen in photo) were cleaned and polished. Polishing the brass, truly accentuates the refinishing process. It also adds a special “bling” to any piece of furniture, much like the right jewelry does for an outfit.

This style of table is used for playing board games or cards, as it has a “secret” swivel compartment beneath the top that is accessible by rotating the table 90 degrees, then opening one side to reveal the compact area beneath, just large enough to hold note pads, decks of cards and paper goods. When not being used as a game table, it folds in half and can be pushed right up against a wall and used for decorative accents such as plants, lamps or collectibles. Now that it has been refinished, this table will likely be used for many card games and other fun activities.

Saturday, June 13, 2020

Bedroom Set Stripped and Whitewashed

Vanity Before
Vanity After

This is one of three bedroom pieces that came to us with an old yellowish paint that was at one time supposed to be much lighter. It had oxidized over the years and obtained some wear, so a refresh was in order.

My customer had wanted a whitewashed finish, so a full strip, sanding and application of white stain, which creates a whitewashed finish that she had wanted. The hardest part is always removing the old finish before anything else and with the amount of detail in this set including ball and claw feet, the stripping and sanding process took a great deal of time. This had to be done to all three pieces, removing the original hardware which luckily, was all in tact and accessible.

Dresser Before
Sometimes hardware pieces get missing so must be replaced. But
Dresser After
mostly, people prefer to use the original hardware in their restoration process.

When changing the entire appearance of an item such as going from stain stripping to painting for a more modern appearance, they will sometimes elect to replace the old hardware with newer, more modern hardware. It’s all personal preference, but it always looks great when it’s done.


Night Stand Before
Night Stand After


Sunday, July 21, 2019

Old Steamer Trunk Renewed

Steamer Trunk Before
Steamer Trunk After

They say “every picture tells a story.” Well, if  This antique steamer trunk could tell a story, it sure would have plenty to say. We estimated this trunk dated back to around 1846, based on its condition and the materials used to create it (blunt end nails and very old leather straps). The exterior had seen better days (that’s the understatement), and the interior wasn’t much better. Needless to say we had our work cut out for us. Where do you begin on this type of enormous project? How do you start? It’s not like it comes with its own “restoration" manual.

Wednesday, October 10, 2018

Antique Spindle Table

Antique Spindle Table Before
Antique Spindle Table After

In restoration, spindles are simply not our favorite things to refinish for obvious reasons; they are a LOT of work. This table, however, required only a sand "touch up," for the legs. Only the top was stripped and sanded down to bare wood, then stained with golden pecan stain and finished off with three coats of semi-gloss polyurethane.

The legs were lightly sanded and touched up with walnut stain, since they were originally made from walnut, so keeping the stain original was the right choice. Likely this table dates back to the early twentieth century, or late nineteenth century judging by its design and the many spindles used to create it. You can usually spot an older piece of furniture by the screws, how it it assembled and the way the wood is connected.

There are other telltale signs, such as the natural patina of the wood, which as it ages, can become dull, the finish almost completely gone as was the case with this table. This is a plus because it makes the tedious job of sanding less time consuming than removing all that old finish which can take days. All in all this little table looked completely different once the top was refinished and the legs were refreshed with a bit of stain and new polyurethane.

This table had a lovely burled maple with a center point pattern. This designed is achieved by cutting the tree section in quarters, then matching the four sections so they meet in the center to create a unique and harmonious, gorgeous table top. Never doubt the value that refinishing an antique can bring to your old furniture. If you own it, you already have the value in the furniture. It's always worth saving a piece such as this.

Tuesday, June 19, 2018

Antique Cedar Chest Revival

Cedar Chest After Refinishing

One of my favorite projects to refinish and restore is a beautiful cedar chest such as this lovely antique. The best part of this restoration was that it had retained all the original details such as the four vertical rows of rope braiding that embellished the front as well as the decorative trim surrounding the lid and another row of trim along the bottom. The chest was in pretty good shape overall, with surface scratches marring its top. Otherwise, it was in excellent condition.

Unlike other cedar chests I've done, this one had separate ball type feet which lifted it off the ground, allowing for easy relocating while working on it. Unfortunately, all that detail requires a great deal of time to remove the old finishes which requires a lot of time, patience and the right tools.
Cedar Chest Before Refinishing 

Never underestimate the power of an old toothbrush! Yes indeed a toothbrush is a key element to removing all that yucky, sticky residue that clings to the wood after you brush on the nasty stripper.

A good stripper will burn your skin on contact, so wearing gloves is essential while stripping. (I also keep a clean bucket of water on hand just in case I need to stick my hand into it. Ah, the burn!) A toothbrush, wood carving tools and a good brass brush are a great combination of tools to remove gooey varnish from all those nooks and crannies that would otherwise be impossible to reach. The ultimate goal is to reveal bare wood, that once sanded, is ready for staining. For this lovely cedar chest I used red mahogany stain and semi-gloss polyurethane, which brought out the natural beauty of the wood, showing its grain.
Cedar Chest After

Cedar Chest Before
It never ceases to amaze me just how awesome the wood looks once all the old finishes are removed and the lovely wood beneath is revealed. This was definitely one of my favorite cedar chests to work on because it had all those lovely details, which shows off its unique qualities and of course, the lovely craftsmanship that went into making it.

For other cedar chests I've refinished, you can click on these links:
http://finalefurniture.blogspot.com/2016/08/1948-lane-cedar-chest_22.html
http://finalefurniture.blogspot.com/2017/04/decorative-walnut-antique-cedar-chest.html
http://finalefurniture.blogspot.com/2017/05/solid-cedar-chest-with-copper-accents.html
http://finalefurniture.blogspot.com/2015/04/elegant-cedar-chest-revival.html
http://finalefurniture.blogspot.com/2013/12/1945-lane-waterfall-cedar-chest.html
http://finalefurniture.blogspot.com/2012/06/my-waterfall-cedar-chest.html
http://finalefurniture.blogspot.com/2014/10/solid-cedar-chest.html


Monday, September 25, 2017

Antique Corner Chair

Corner Chair Before

This adorable corner chair caught me completely off guard as I wasn't searching for a chair when I came across it at a barn sale here in Marine City. The chair is likely over 100 years old, built at the turn of the last century and I simply had to have it. I could see the
Corner Chair After
potential since the chair had a sturdy frame and other than the missing center detail scrollwork, nothing was broken.

The chair had the original seat and the cushion was in amazingly great condition, so I negotiated a price of $18.00 for this little beauty and took it home with a thunder storm and my two grandchildren running ahead of me toward the car. After carefully placing it in the back seat, I headed home with my new treasure.

My original idea of painting the chair gave way to a total strip and restoration as I couldn't imagine covering up that beautiful mahogany and hand carved details on the chair's legs. Stripping took three days, because details such as this chair had took time to get it right. I pulled out all my stripping tools including my wood carving tools to remove the old stain which tends to get trapped in the nooks and crannies of the hand carved areas. It took a lot of scraping and stripper to completely remove the old finish, but once it was down to the bare wood, it was worth all the time it took. I was so happy I made the decision to strip instead of paint!

I marveled at the elegant condition of this fine little gem of a chair. The wood had a luscious sheen and smooth velvety feel. I knew it would take the mahogany stain well, which of course, it did. I chose a soft cloth and carefully applied the stain, then removed the extra stain with an old t-shirt. Old shirts make for great staining because they leave no lint. I try to avoid cloth with the possibility of leftover material on the wood surface.

Corner Chair in Sunroom
Once the chair was completely refinished, I applied two coats of polyurethane. While waiting for the polyurethane to dry, I removed the old seat cushion and replaced it with a piece of fabric I had my eye on. My plan to use this chair in the sunroom dictated that I use fabric to match the "Tame Teal" paint in the sunroom. The fabric was absolutely perfect and matched like a charm. I now have an adorable little chair to rest my feet on when I'm enjoying a good book in my lovely sunroom.

Monday, May 22, 2017

Caned Parlor Chair

Caned Chair Before
Caned Chair After
This little parlor chair had broken cane on the seat, but was otherwise in good condition, albeit a bit scratched up. I had never done caning, but I knew that with a little research, the right tools and a bit of determination I could figure it out, so I began reading about caning and found plenty of videos on YouTube and other "how tos" in various sites on the world wide web.

The concept was simple enough. First step is to remove the spline, then pull out the damaged caning. Once that is removed, you chisel away any remaining glue and debris and clean out the spine groove so that the new spline can be installed. Since the spline comes in various sizes, you need to know what size it is before you purchase new spline, otherwise it may not fit. I didn't realize there were so many sizes!

Wednesday, November 2, 2016

Edwardian Console

Console Before Refinishing
Console After
This console was an extraordinarily large piece of furniture. It's hard to judge the scale of this piece standing alone, but it comes up to the center of my five foot frame and is approximately six feet wide and twenty-one inches deep in the middle.

It had many surface scratches and had seen some wear, mostly on the top where the veneer had worn off and on the sides where the veneer had peeled off on one side and was half gone on the other. Before anything else could be done, I needed to repair that veneer on the one side and add a section to the missing left side. Luckily I was able to match the existing veneer pretty close. With veneer it's a gamble, because most of these pieces were done many years ago and the veneer they used was quite different from today's selection, but I was satisfied the veneer was appropriate for this piece and blended quite nicely.